Updated on 2024-11-19
5518 views
5min read
You’re used to checking your partner’s or child’s location for peace of mind, but suddenly, something feels off. Their location isn’t updating, and you start wondering: Did they stop sharing their location with me? Asking directly might feel too awkward or confrontational, leaving you unsure of what to do next.
The good news is that there are subtle signs to help you figure it out. For example, seeing messages like “no location found” or “sharing location unavailable” could indicate they’ve paused or turned off location sharing on Find My iPhone.
In this article, we’ll not only help you understand how to know if someone stopped sharing their location but also guide you through ways to discreetly manage your own location-sharing settings.
Part 1: How to Know If Someone Stopped Sharing Their Location
If you suspect someone has stopped sharing their location with you, here’s a clear and concise guide to help you identify the signs and confirm your suspicions across various apps.
Key Signs in Location-Sharing Apps
Most apps like Apple’s Find My, Google Maps, or Life360 provide visible cues when someone stops sharing their location. Pay attention to these common signs:
1. “No Location Found” or “Location Not Available” Messages
The person may have paused or disabled location sharing, turned off their device, or lost internet connectivity.
How to Check:
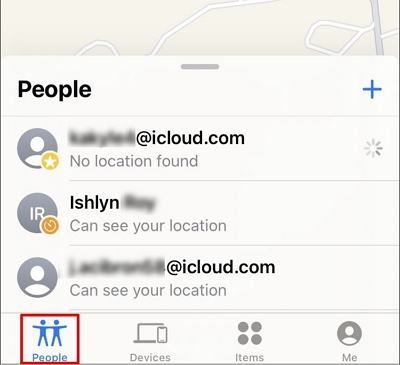
- Open the Find My app, go to the People tab, and look for their name. If their name is missing or their profile displays “No Location Found”, they are no longer sharing their location.
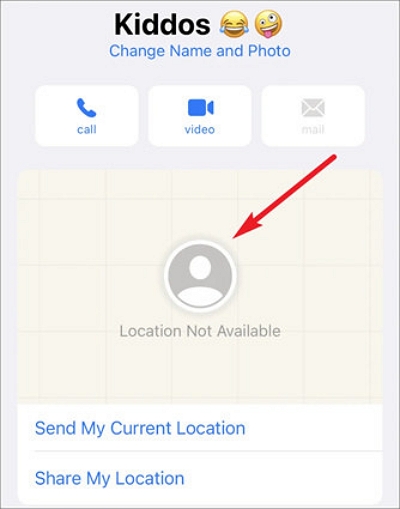
- In the Messages app, tap their name at the top of the conversation. If the map is gone or replaced with “Location Not Available”, it indicates location sharing is off.
2. Static Location
If their location hasn’t updated for an unusually long time, they might have turned off location sharing. However, this could also occur if their phone is offline or powered down.
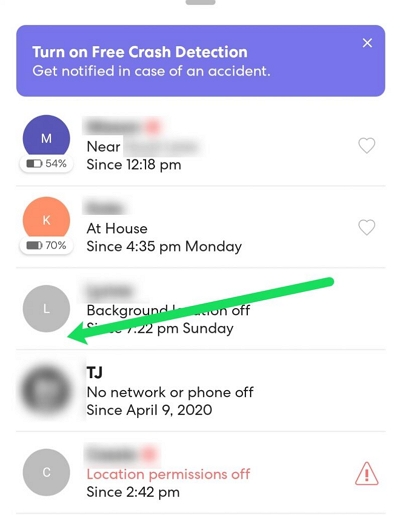
3. Missing Profile Picture or Grayed-Out Icons
Apps like Life360 or Find My may show a grayed-out icon or a question mark for users who have stopped sharing their location.
App-Specific Indicators
Different apps provide specific messages when location sharing is disabled:
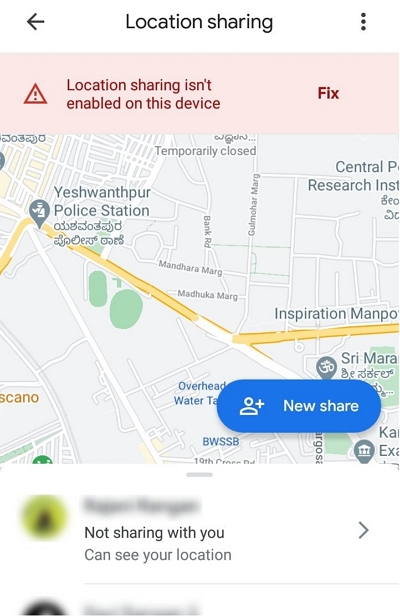
4. Google Maps: If someone was sharing their location, you might see “Not sharing with you” or notice their location disappearing from the map.
5. Life360: Life360 displays messages like “Location Paused” or “Location permissions Off” when someone disables sharing.
What to Do Next
Double-Check the Situation: Sometimes, technical glitches, poor network connections, or a powered-off phone can mimic these signs. Avoid jumping to conclusions too quickly.
Communicate Directly: If you’re concerned, the most straightforward way to confirm is to ask the person directly.
Part 2: 3 Ways to Stop Sharing Location on iPhone Without Notification (with Successful Cases)
If you need to stop sharing your location on an iPhone discreetly, there are a few proven methods to do so without triggering a notification. These methods have been verified by experienced users in Reddit forums and can help you maintain privacy without raising suspicion. Let’s dive into the specific steps:
Method 1: Block the Person via Their Contact Card
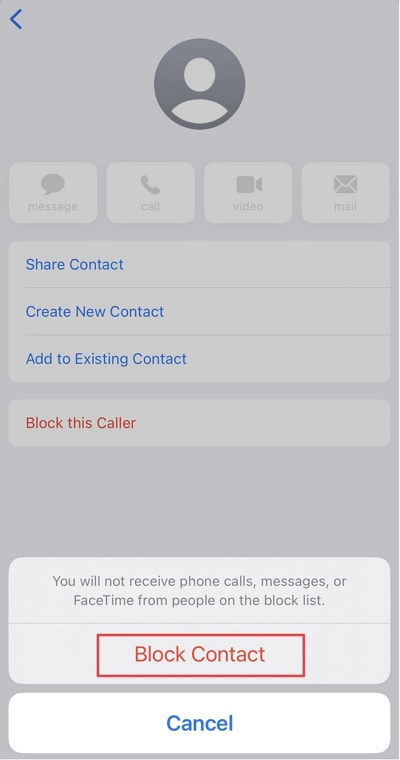
Blocking someone temporarily removes your location from their devices without notifying them. Here’s how to do it:
Step 1: Open your Contacts app, and find the person you want to block.
Step 2: Tap on their contact card, scroll down, and select “Block Caller.” Confirm your choice.
Unblock Immediately (Optional):
To maintain communication without them realizing, unblock them after a few moments by following the same steps and tapping “Unblock Caller.”
Why It Works:
When you block someone, all forms of location sharing are halted without sending any notifications in Find My or the Messages app. However, you might want to test this method with a trusted contact beforehand to ensure it works for your needs.
Method 2: Use a Location Spoofing Tool
Faking your location with a tool like iWhere Location Changer is another effective method. It allows you to modify your location in Find My and other apps without turning off location services or notifying others.
Steps to Fake Your Location with iWhere:
Step 1: Install the iWhere Location Changer for iphone and Android tool on your computer. Connect your iPhone using a USB cable.
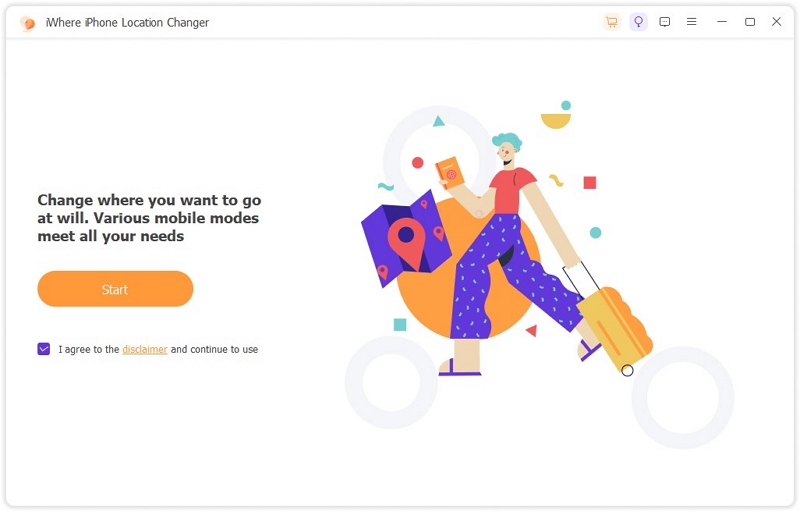
Step 2: Open iWhere and choose a new location on the map. Confirm the change to make it your current location.
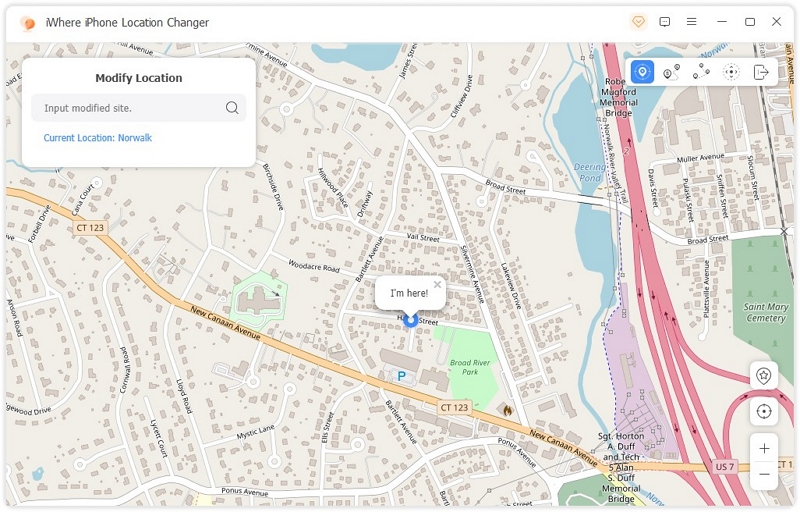
Step 3: Your iPhone will now display the fake location in all location-sharing apps, including Find My, without sending any notifications.
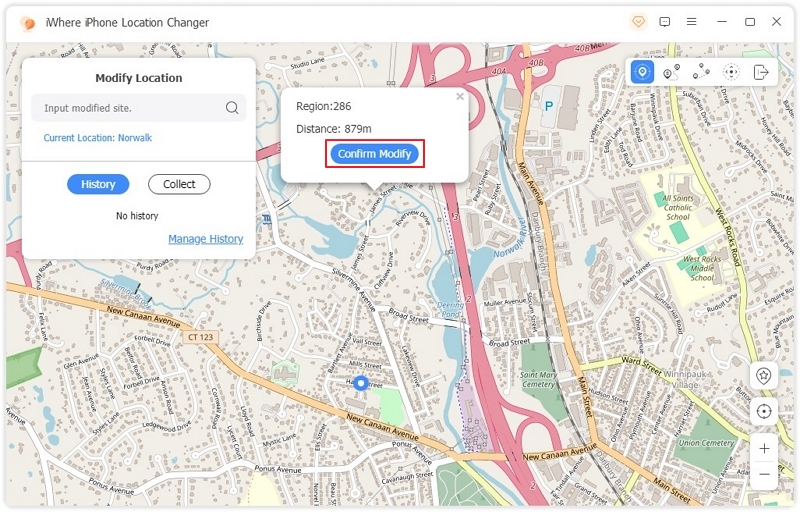
Why It Works:
Since your device continues sharing a location (albeit fake), no alerts or messages will be triggered. This is an ideal option for maintaining privacy without raising suspicion.
Method 3: Utilize an Idle iPhone
If you have a spare iPhone or iPad, you can use it to manage location sharing while your primary device remains private. This requires both devices to be logged into the same Apple ID.
Steps to Set Up Location Sharing with a Spare Device:
Step 1: Prepare Your Spare Device.
On your spare iPhone or iPad, ensure it’s signed in with your Apple ID. Go to Settings > [Your Name] > Find My, and make sure Find My is enabled. In the same menu, tap Share My Location and turn it on
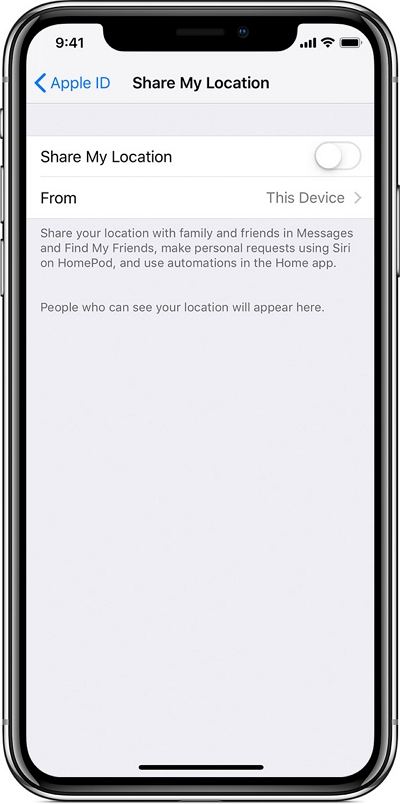
Step 2: Set the Spare Device as Your Location Source
On your spare device, launch the Find My app. Tap Me at the bottom of the screen. Scroll down and tap Use This [Device] as My Location. This will switch your location sharing to the spare device.
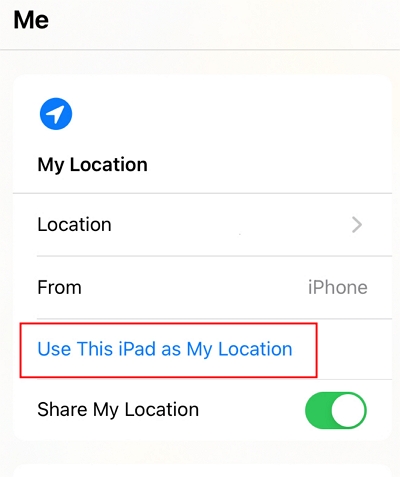
Step 3: Leave your spare device in a secure location, such as your home or office.
Once this is done, the location shared with others will show as the spare device’s location, not your active iPhone.
Why It Works:
The location-sharing feature will now point to the spare device, allowing you to move freely without your location being tracked from your primary device.
Key Benefits of Those Methods
- No Notifications Sent: Others will not receive any notification about the location change.
- Use Your iPhone Freely: Your primary device will appear stationary on the map, while you can continue using it as usual.
- Fully Reversible: You can switch back to your primary device at any time by repeating the steps on your main iPhone.
Part 3: 4 Ways to Pause Location on Find My iPhone (Noticeable to Others)
If you’re looking to stop or pause location sharing on your iPhone, the following methods are effective but can easily alert others to your actions. These options work well if discretion is not your primary concern, but they may lead to questions or notifications. Proceed with caution if avoiding detection is important.
Way 1: Turn Off Find My iPhone
Disabling the “Find My iPhone” feature stops your location from being shared but also turns off important security features. Follow these steps to disable it:
Steps to Disable:
- Open the Settings app and tap your Apple ID Name.
- Navigate to Find My > Find My iPhone.
- Toggle off Find My iPhone.
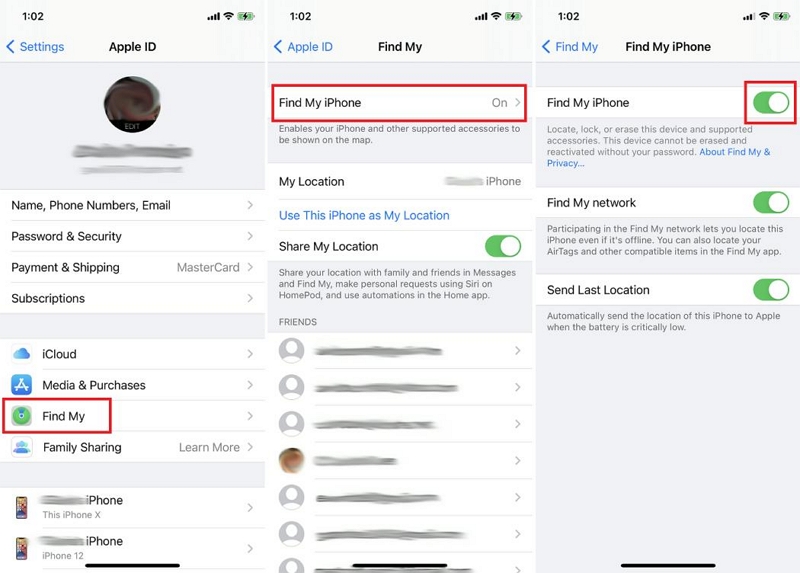
Disadvantage: Turning this off means you won’t be able to locate your iPhone if it’s lost or stolen.
Way 2: Disable Location Sharing
Turning off location sharing stops others from seeing your location entirely, but they may receive a notification when you reactivate it.
Steps to Disable:
- Open the Settings app.
- Go to Privacy & Security > Location Services.
- Scroll to Share My Location and toggle it off.
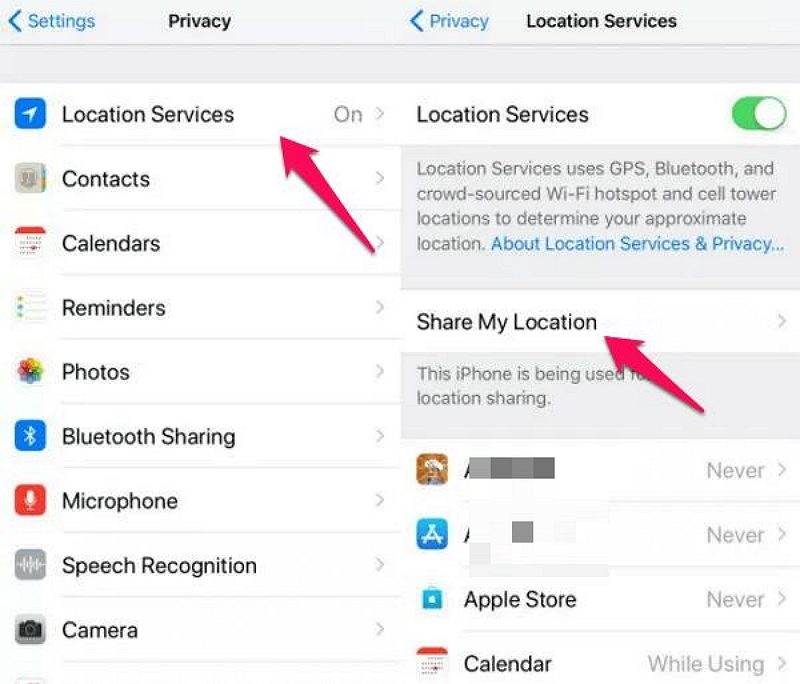
Disadvantage:Reactivating location sharing will send a notification, making it clear that you had stopped sharing earlier.
Way 3: Enable Airplane Mode
Enabling Airplane Mode is a quick and simple way to stop sharing your location. It completely disconnects your device from networks, halting location updates.
Steps to Enable:
- Open the Control Center on your iPhone.
- Tap the Airplane Mode icon to enable it.
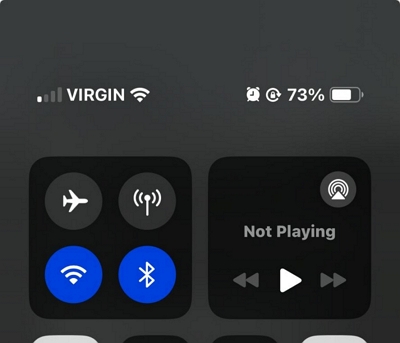
Disadvantage:While Airplane Mode is on, you won’t be able to make calls, send messages, or use mobile data, which limits your phone’s functionality.
Way 4: Change Your iPhone’s Location
Changing the location associated with your Apple ID can mask your real location, but it may not be practical for regular use.
Steps to Change Location:
- Open the Settings app and tap on your Apple ID Banner.
- Select Media & Purchases > View Account.
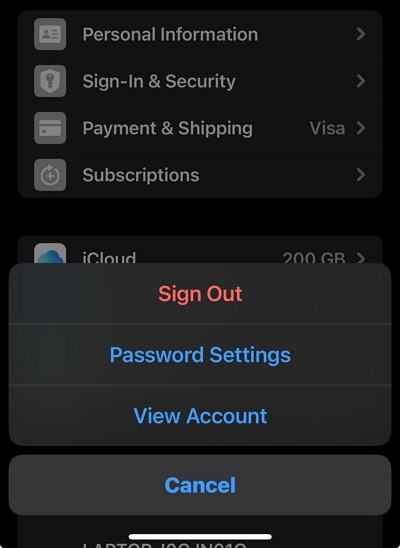
- Tap Country/Region > Change Country or Region.
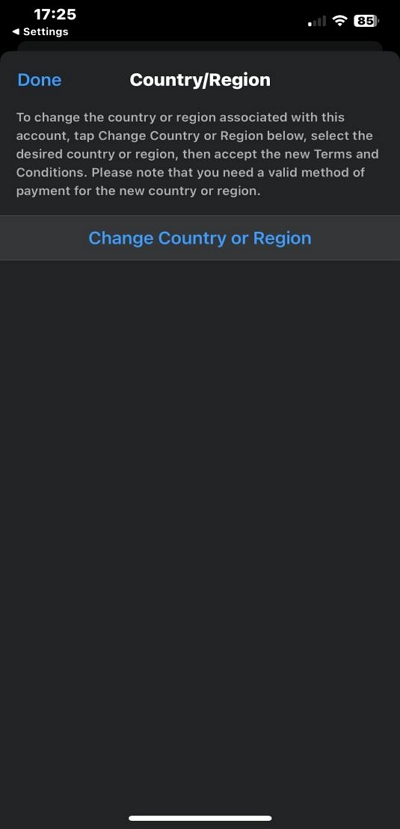
- Choose a new country/region and tap Agree.
- Enter your payment credentials to confirm the change.
Disadvantage: This method doesn’t allow for real-time movement, so your location will appear static, raising suspicion if others are monitoring you.
Hottest FAQs
Q. Does No Location Mean Someone Stopped Sharing Their Location on iPhone?
No location does not necessarily mean someone stopped sharing their location on iPhone. Sometimes, it could be as a result of location services or problems with their iOS device.
Q. Can Someone Secretly Stop Sharing Location iPhone?
Yes, you can secretly stop sharing iPhone location. All you need is to enable the Airplane mode on your iPhone, and the person tracking you will not be notified that you stopped sharing location.
Q. Can I see someone’s location history on iPhone?
Unfortunately, no. However, you can rely on location apps like Google map to view location history on iPhone (this will only work if the person grants Google Map the permission to access their location).
Conclusion
Managing your location-sharing settings can be essential for maintaining privacy, managing relationships, or simply controlling who has access to your whereabouts. This guide has covered a range of methods—from discreet techniques that avoid detection to more straightforward options that might alert others.
