As we continue to rely on social media platforms like Facebook for our daily communication and interactions, it’s easy to forget about the amount of personal data we share with these applications. One such piece of data is our location history.
Facebook, being one of the largest social media platforms, tracks our location and usage history, even when the app is closed. While this data can be helpful for the platform to suggest relevant content and ads, it can also raise concerns about privacy and data security.
In this comprehensive guide, we will introduce you to the simple ways to view Facebook location history, providing step-by-step instructions for Android, iPhone, and the Facebook website.
Part 1: Reasons You Might Need To View Facebook Location History
Viewing your Facebook location history can be helpful in some situations. In this part, we’ve summarized some of the reasons:
- Facebook location history can help you recall past events, trips, or experiences. It can serve as a digital diary, reminding you of the places you’ve visited and the memories associated with them.
- If your device gets missing, you can use your Facebook location history to pinpoint the last location where your device was used.
- You want to track a loved one or your kids. Facebook location history can give you insight into where the user’s last location was if he/she has their Facebook account logged in on their device.
- You can also view Facebook location history to track your hacked Facebook account to see what location the hacker is signing in from.
Part 2: How To View Facebook Location History On Android/iPhone/Website Using Simple Steps
Unfortunately, Facebook has stopped recording users’ location data since the 31st of May 2022. So, if you’re using the new version of Facebook on your device, chances are you can’t view location history. Though the location service feature is still available for you to share your location with friends in your posts.
The only way you can view Facebook location history on your Android, iPhone, or through the Facebook website is to use the old version of Facebook.
If you’re still using the old Facebook version, we’ve explained the steps you need to follow on different platforms below.
Method 1: How To View Facebook Location History On iPhone
Step 1: Open the Facebook app on your Android or iOS device.
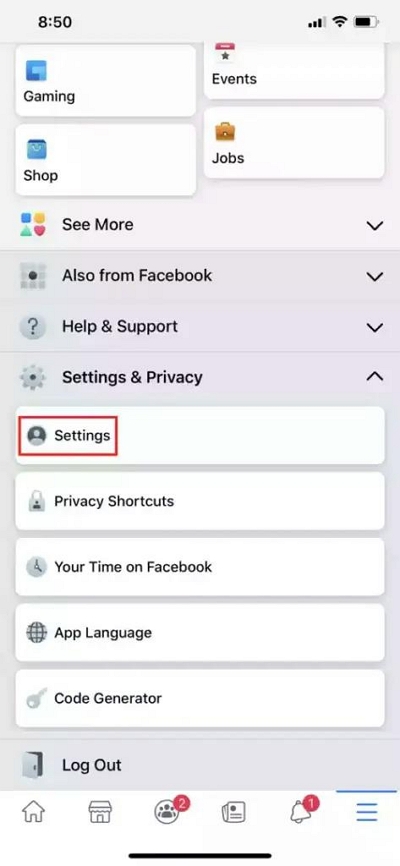
Step 2: Tap on the “Menu” at the top-right side and select “Settings” under “Settings & Privacy”.
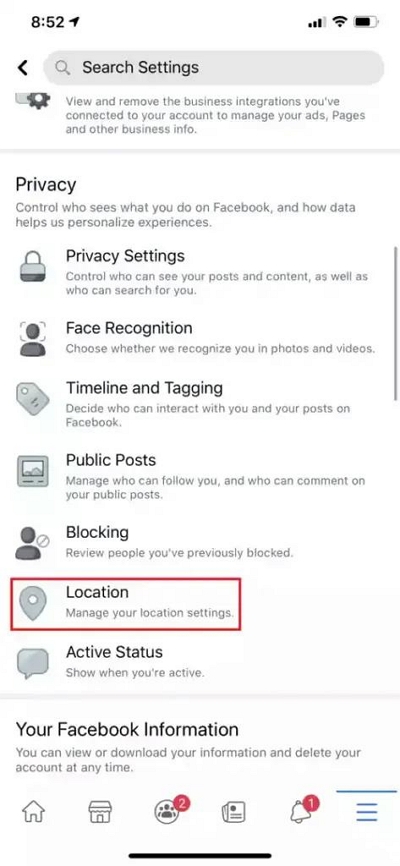
Step 3: Navigate to “Privacy” section and tap on “Location” to load the location settings page.

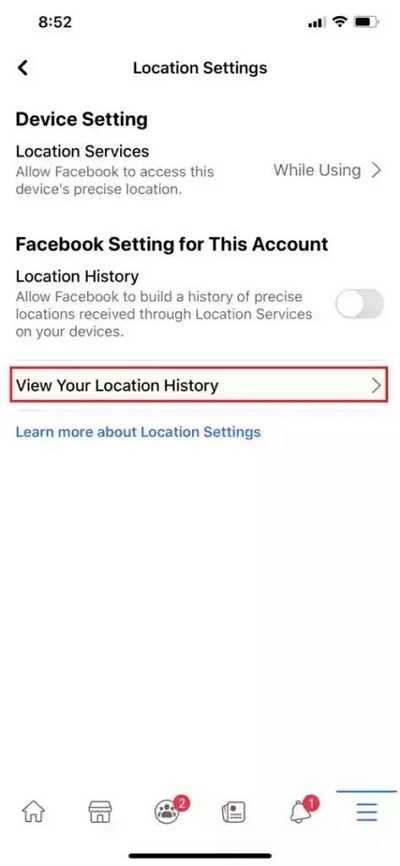
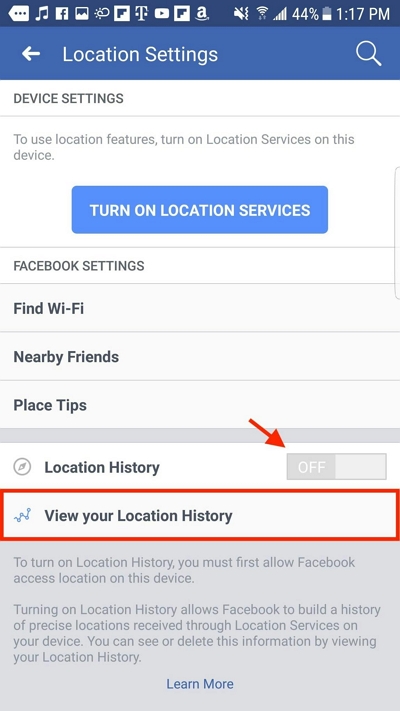
Step 4: Tap on “View Location History”.

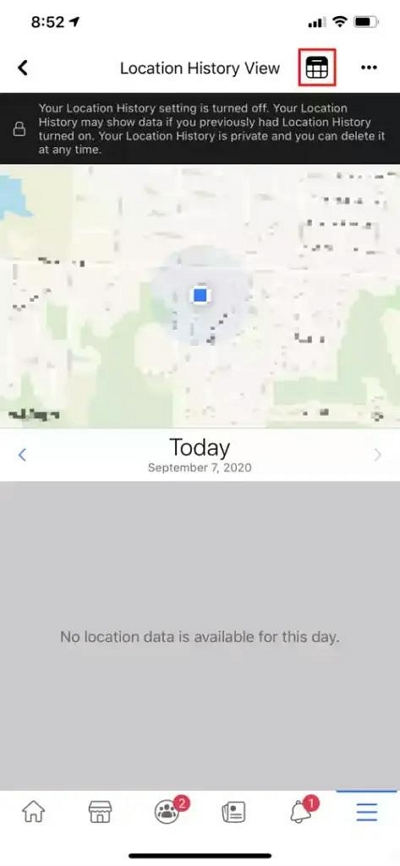
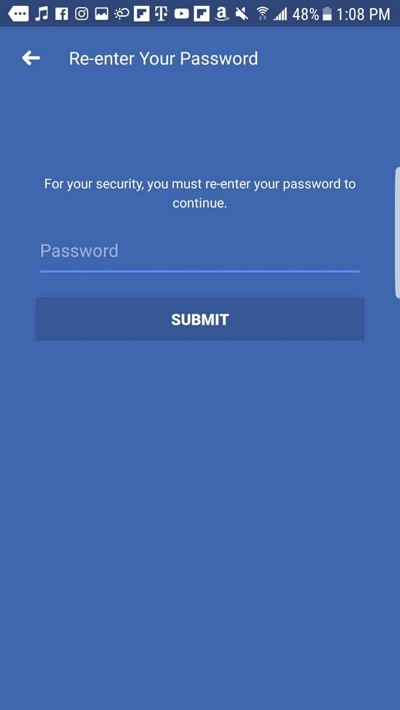
Step 5: Type your “Password” when prompted to view your Facebook account location history on the “Map” as shown in the image below. You can select the “Date range” you want to view by tapping the calendar icon at the top right side.
Method 2: How To View Facebook Location History On Android
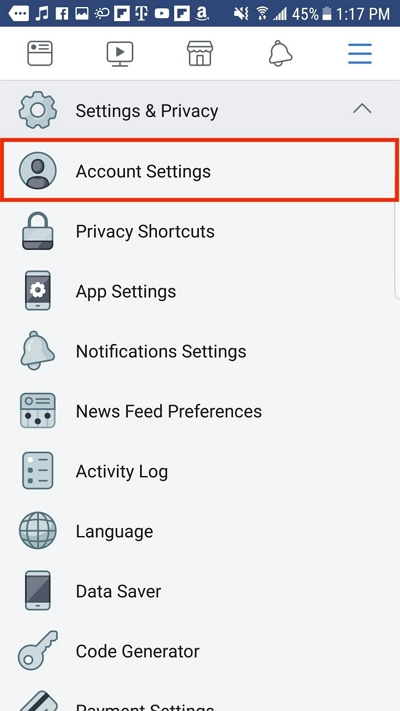
Step 1: Tap the “Menu” icon at the upper-right corner and select “Settings And Privacy > Account Settings.

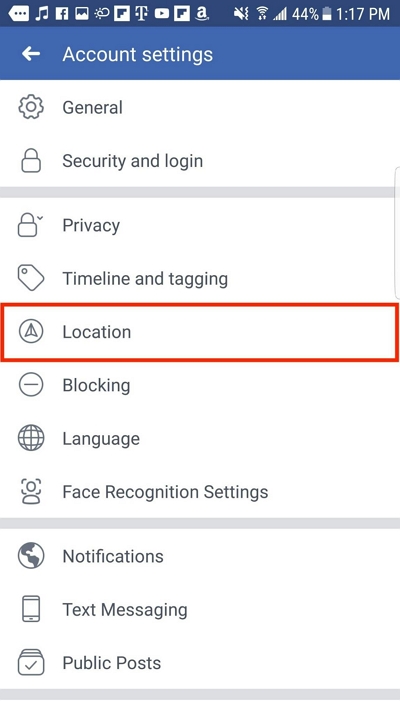
Step 2: Tap on “Location”.

Step 3: Select “View Your Location History”.

- Enter your “Facebook Password”.
Step 4: You should be able to view your location history from the “Map” that appears. You can also select a date to view by tapping on the “Calender”.
Method 3: How To View Facebook Location History Via Website
Step 1: Open “Facebook Official Website” via your device’s browser and sign in to your account.
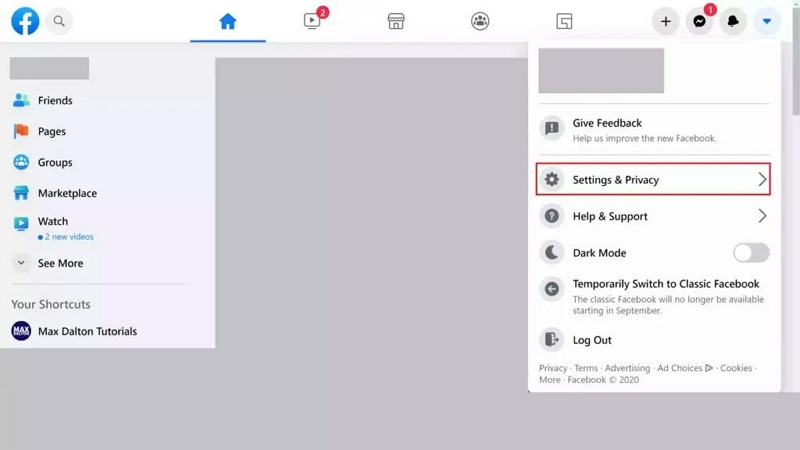
Step 2: Click on the “Drop-down icon” at the top right corner and click on “Settings & Privacy”.
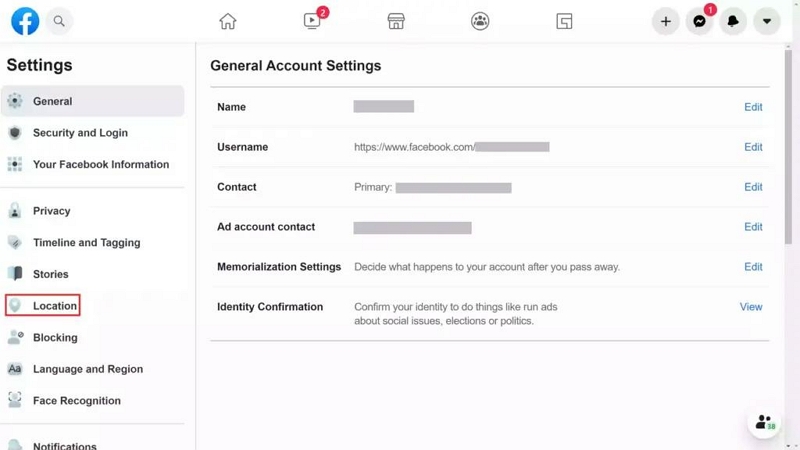
Step 3: Select “Location” from the left menu.

Step 3: Click on “View Location History”.

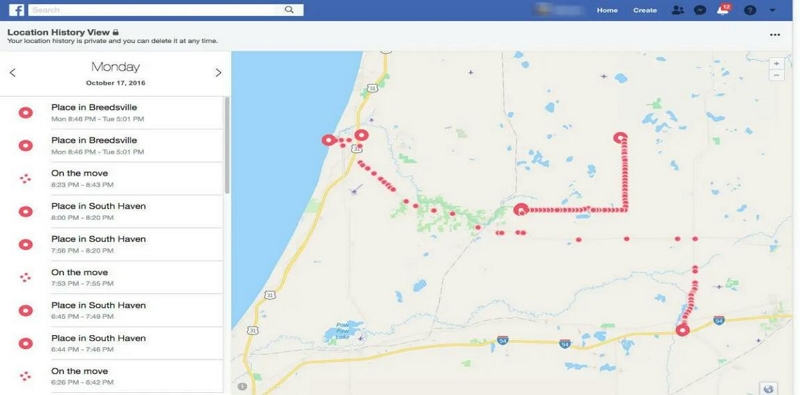
- Enter your “Facebook Password” when prompted and wait for your account’s location history map to be displayed on your screen.
Part 3: How To Delete Facebook Location History On Android/iPhone/Website
If you’ve checked your Facebook location history and you’re wondering how to delete it to protect your privacy, we got you covered. In this part, we’ll explore the steps to delete your Facebook Location History on Android, iPhone, and the website.
Method 1: How To Delete Facebook Location History On iPhone
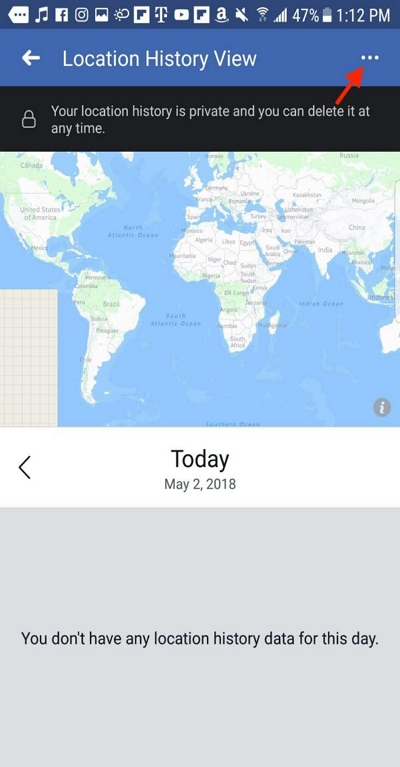
Step 1: Open your Facebook account “Location History” by following the steps outlined above.
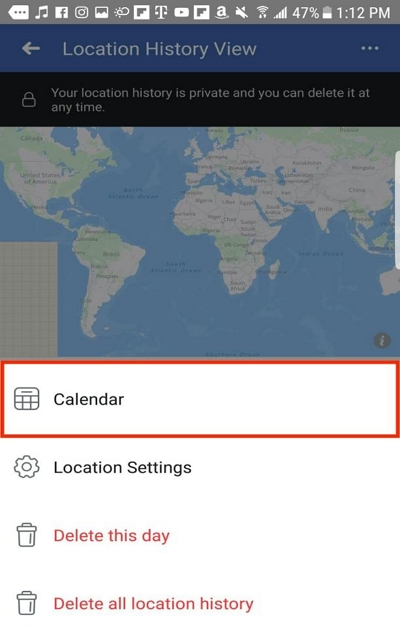
Step 2: On the location history page, tap the “Calender” icon at the top-right side and select a day.
Step 3: Tap on the “Three-dot horizontal icon” at the upper-right corner of your screen.
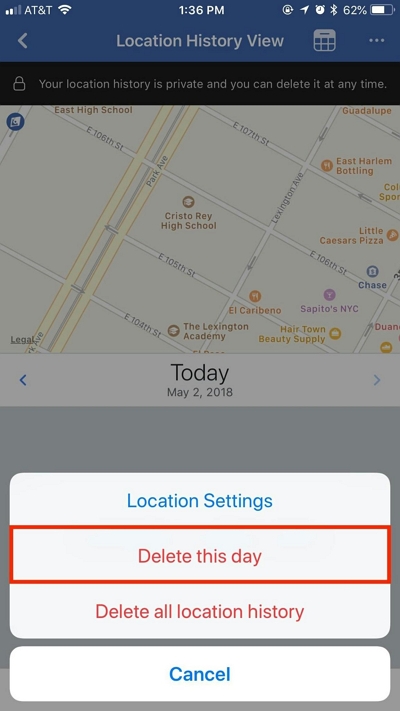
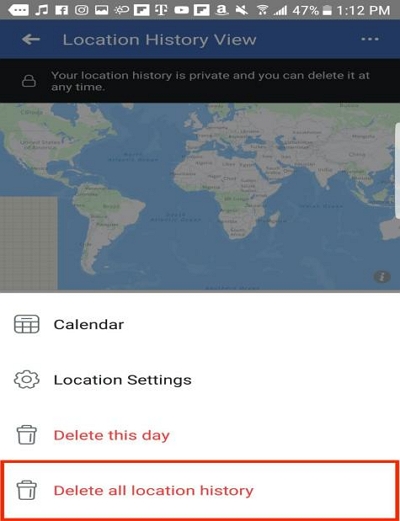
Step 4: Tap on “DeleteThis Day” to delete that specific day or “Delete All Location History” to erase all your location history.

Method 2: How to Delete Facebook Location History On Android
Step 1: After you open your “Location History”, select the “Date” to view and tap on the “Ellipsis (…)” at the top-right corner.
Step 2: Tap on “Delete All Location History” in the menu that pops up.
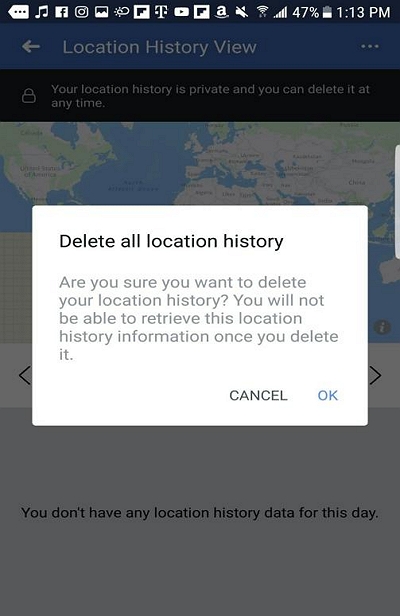
Step 3: Tap on “OK” to confirm the operation.
Method 3: How To Delete Facebook Location History Via Website
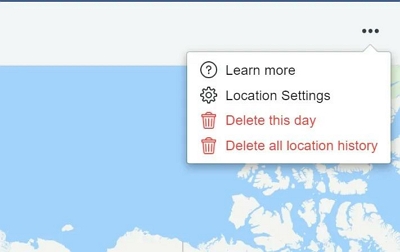
Step 1: On the “Location History” page, click on the “ellipsis (…)” at the top-right corner.
Step 2: Select “Delete All Location History” or “Delete This Day” depending on your preference.
Part 4: How To Disable Facebook Location History On Android/iPhone/Website
If you want to prevent Facebook from tracking your location history, you should disable the Facebook Location history. Here, we’ll walk you through the steps to disable Facebook location history on your Android, iPhone, and the Facebook website.
Method 1: Disable Facebook Location History on iPhone
Step 1: Go to the “Menu” section in your Facebook account
Step 2: Tap on “Settings & Privacy” > “Settings”.

Step 3: Scroll to “Privacy” section and select “Location”.
Step 4: Turn off the “Toggle” next to “Location History”.
Method 2: Disable Facebook Location History On Android
Step 1: Go to “Menu” and select “Settings And Privacy > Account Settings.
Step 2: Choose “Location”.
Step 3: If the toggle next to “Location History” is enabled, turn it off.
Method 3: Disable Facebook Location History Via Website
Step 1: Visit “Facebook Official Website” .
Step 2: Click on the “Drop-down icon” at the top right side and select “Settings & Privacy”.

Step 3: Click on “Location” from the left menu.
Step 4: Click “Edit” next to “Location History” and select “Off” to disable it.

With the above steps, you can easily disable Facebook Location History on Android, iPhone, or the website. But that’s not all. We still have some helpful tips that you can use to further protect your location information while using Facebook. Read on to find out more.
Part 5: Helpful Tip To Protect Location Information From Being Leaked On Facebook Location History
While viewing, deleting, and disabling Facebook Location are essential steps in protecting your privacy, there is an additional tip you can utilize to safeguard your location information more efficiently.
The best way to protect your location from being leaked even while posting on Facebook is to fake your location using a location spoofing app like the iWhere iPhone Location Changer. It’s an innovative app that enables you to change your iPhone/iPad location on any social media platform from a computer without requiring rooting or jailbreaking.
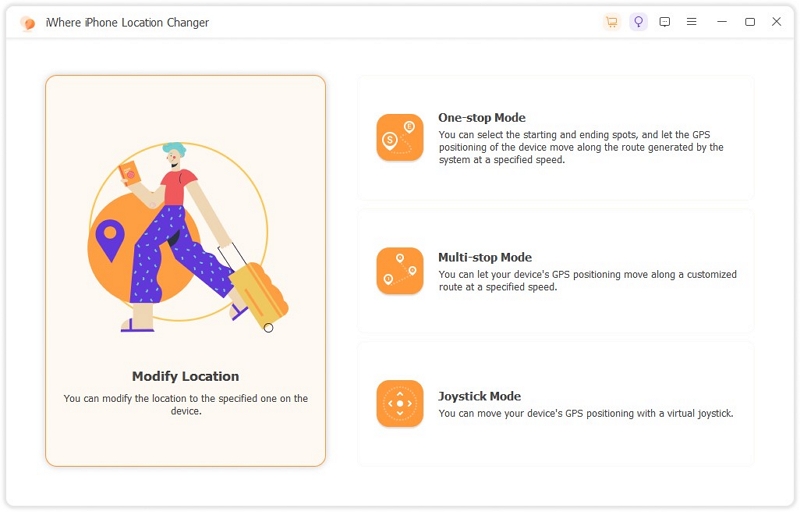
The iWhere iPhone Location Changer app makes it easy for you to change your Facebook location region to anywhere around the world using advanced location spoofing modes, like one-stop mode, joystick mode, and multi-stop mode. It supports importing/exporting GPX files, automatic speed customization (ranging from 1 m/s to 50 m/s), and lots more.
Also, this app can be used to spoof locations in popular AR games like Monster Hunter, Ingress Prime, Pokemon GO, etc., without compromising in-game actions. You even have the option to bookmark your favorite locations so you can always visit the same spot whenever you wish to resume your game.
Key Features
- Export GPX files and collect your routes with distance details.
- Simulate different locations on social media apps (Facebook, Snapchat, Instagram) directly from your computer.
- Plan personalized routes on your iPhone or iPad using multi-stop or joystick mode, ideal for AR gaming experiences like Pokemon Go.
- A high degree of security to ensure that the game and social platform accounts always maintain normal status.
To use iWhere iPhone Location Changer, install the software on your computer and follow these steps:
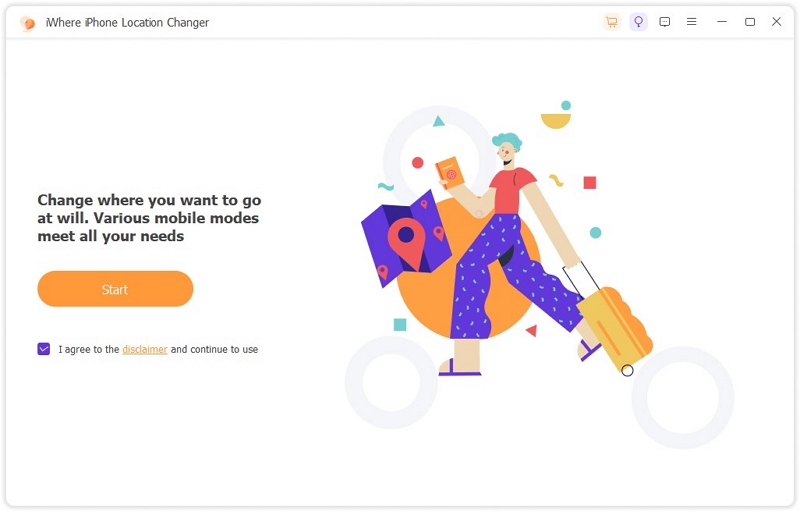
Step 1: Opera iWhere iPhone Location Changer > Click “Start” button.
Step 2: Connect your iPhone to the computer using a good cable and tap “Trust” on your iPhone to establish a connection. Then, click on “Modify Location”.
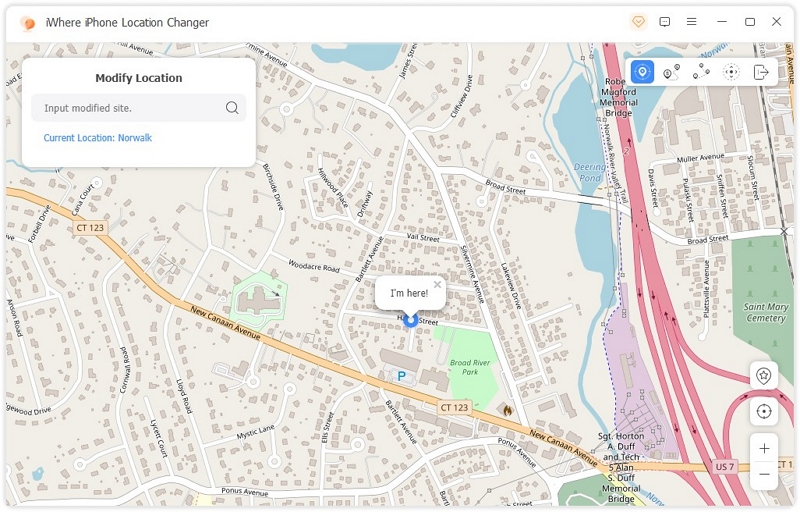
Step 3: Your current location should be displayed in the map that appears on your screen. You can zoom in and zoom out to view different regions on the map.
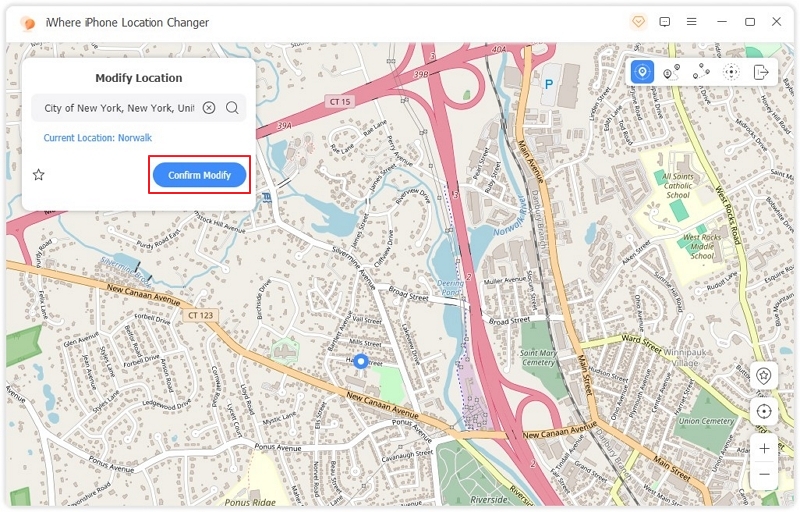
Step 5: Type the “Destination” you want your Facebook account to appear in the empty “Search field” at the top-left side and click on “Confirm Modify”. Your Facebook location should.be change immediately.
Conclusion
Viewing Facebook location history is a pretty straightforward process. The article on this has covered the best ways to view location history on different platforms, including Android, iPhone, and Facebook official websites. It also explains the best methods to disable and delete Facebook location history without compromising your activities on the platform.