Updated on 2024-11-22
5303 views
5min read
After you and your family member have updated iOS or even upgraded their devices, you can’t share location with your family member in the Find My app but your family member can do it normally? Or you can’t share your location in iMessages? No matter which share my location not working situation you encounter, you can find solutions in this article. We provide ways on how to solve find my location sharing not working on iPhone after iOS update. At the same time, we will also show you how to solve this kind of problem in iMessages. For more details, let’s read on.
Why Can’t I Share My Location on iPhone with One Person After Update
If location is not shared on iPhone, it might be a result of one of the following:
- Your iPhone’s Location Services are off, so Find My can’t share its location.
- Weak GPS signals can cause problems with location tracking. Make sure there’s a clear view of the sky for better reception.
- Check app settings to grant Find My location permissions if needed.
- Share My Location isn’t enabled.
Quick Checks Before Fixing Share Location Not Working on Find My iPhone
It is possible that the share location function on Find My iPhone works correctly, but some settings or external factors affect the use of this function. Therefore, before fixing this problem, it is recommended to do some quick checks first.
Check Location Services
Most times, people forget to turn on Location Services for Find My on their iPhones, which causes location sharing not to work. Below are the steps you can use to enable Location Services for Find My:
Step 1: Open the “Settings” app and go to “Privacy & Security”.
Step 2: Tap on “Location Services” and turn on the toggle next to it if it’s disabled.
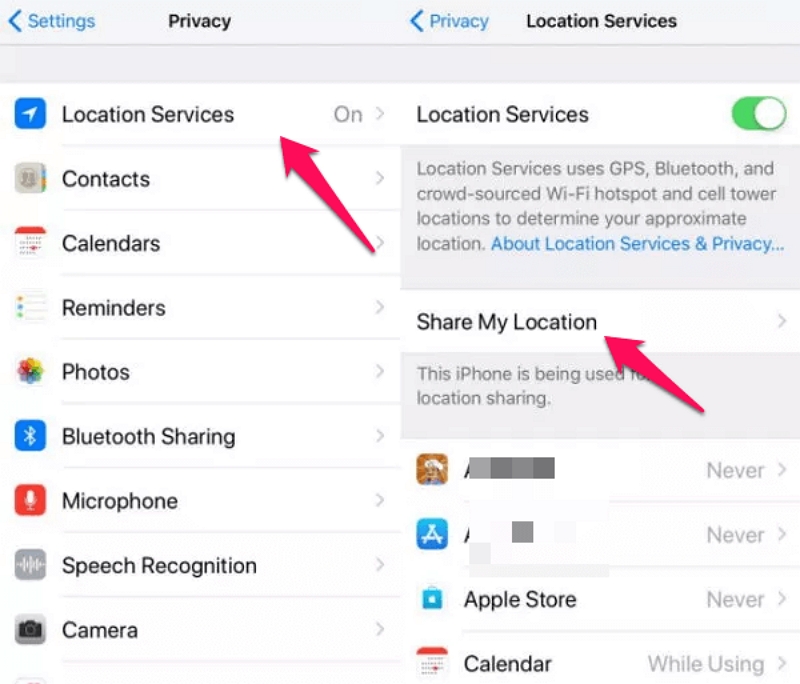
Step 3: On the same page, select “Share My Location” and turn it on if it’s off.
Ensure a Stable and Strong Network Connection
If you are indoors like in a basement or tunnel, the GPS signal will generally be weak. Try going outside to see if location sharing resumes normal operation.

Confirm Find My Feature is On
You might have forgotten to give Find My iPhone permission to track your iPhone location. Go to the Settings app on your iPhone and follow the steps below to check whether Find My iPhone is granted permission to share the device’s location.
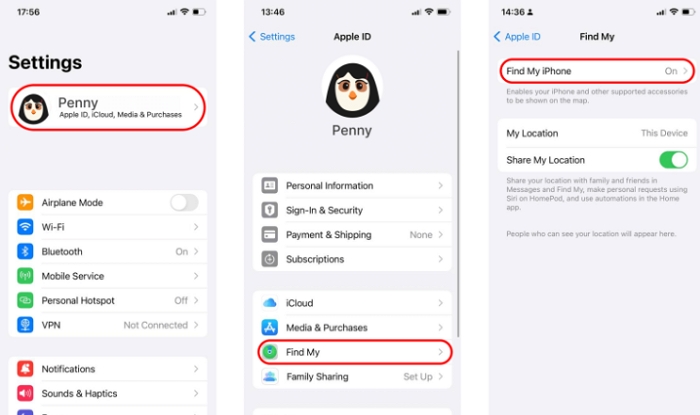
Step 1: Tap on your “Name” at the top side of the screen.
Step 2: Select “Find My”.
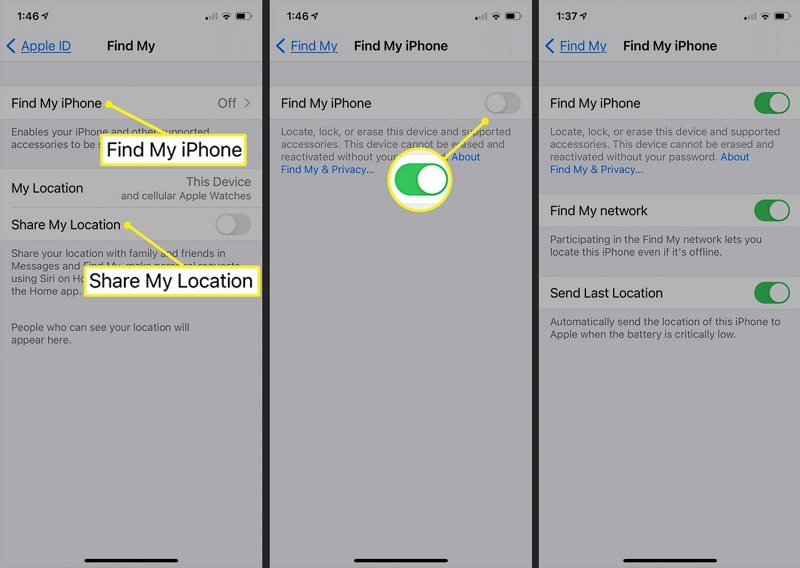
Step 3: Tap on “Find My iPhone” and turn on the toggle next to “Find My iPhone" on your screen.
How to Fix Location Sharing Not Working After Update on Find My iPhone
Here are some proven ways shared by online users, which are well worth a try.
Fix 1: Turn on Send Last Location
It is possible that Send Last Location is turned off on your iPhone, so you or your family members cannot share their location in Find My. You can turn the feature on with the steps below.
Step 1: Open your “Settings” app.
Step 2: Tap on your Apple account name.
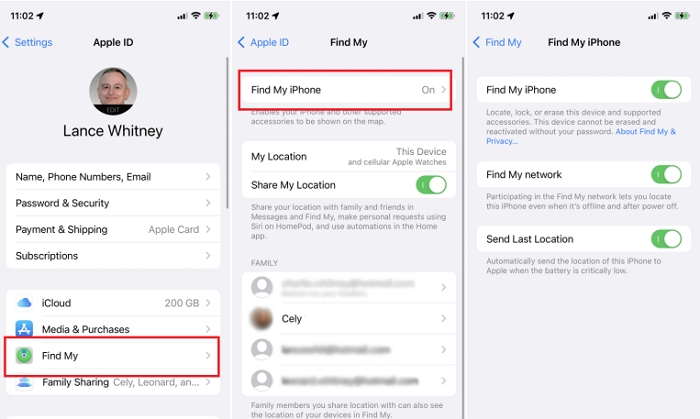
Step 3: Choose "Find My iPhone" and toggle on "Send Last Location".
Fix 2: Enable Use This Device as My Location
This method works if you have a new iPhone and the new phone is logged in to the Apple account of the old device.
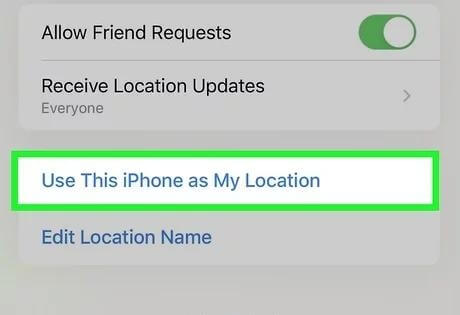
Step 1: Run Find My app on your new iDevice.
Step 2: Tap "Me" at the bottom screen of Find My and hit "Use This iPhone as My Location".
Fix 3: Adjust Font Settings
This is a solution provided by Apple Support. Although the principle is unclear, many users have reported that this method is useful.
Step 1: Access "Settings" and choose "Display and Brightness".
Step 2: Slide the toggle of "Blod Text" from left to right.
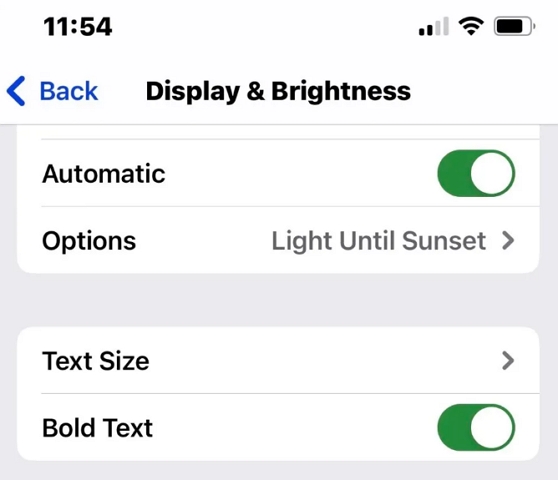
Step 3: Select "Text Size".
Step 4: Decrease the font size by one through moving the slider to left.
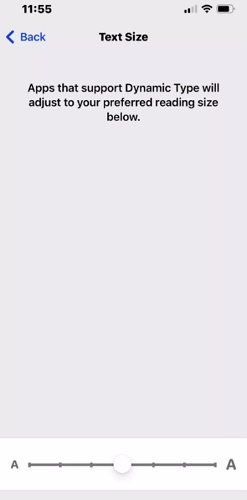
Step 5: Disable "Blod Text". At last, restart your iPhone.
Fix 4: Force Restart iPhone and Re-enable Location Sharing
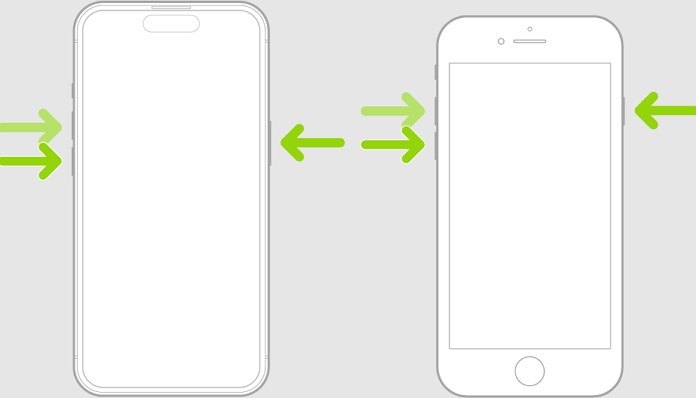
This method can clear up some possible glitches leading to the iPhone location sharing not working issue. Before force restarting your iPhone, make sure you turn on Location Services for Find My iPhone.
Step 1: Press and quickly release the volume up button and do the same for the volume down button.
Step 2: Hold the side button until you see the Apple logo.
Step 3: Go to the "Settings" app and tap your name in the top screen.
Step 4: Choose "Find My iPhone" and turn on "Share My Location" in the next screen.
How to Share Fake Location on Find My iPhone Without Others Knowing
Sometimes, you may want to temporarily stop sharing your Find My iPhone location, but don’t want someone to know. Here is a way to help you achieve it, which is to use the powerful iWhere iPhone Location Changer to create a virtual location so that the real location can’t be tracked on your iPhone.
iWhere iPhone Location Changer is a professional location changing all that allows you to change your iPhone location without moving from your current location. Whether you intend to switch to another location or maintain the current one, this tool provides you access the advanced features to get the job done smoothly.
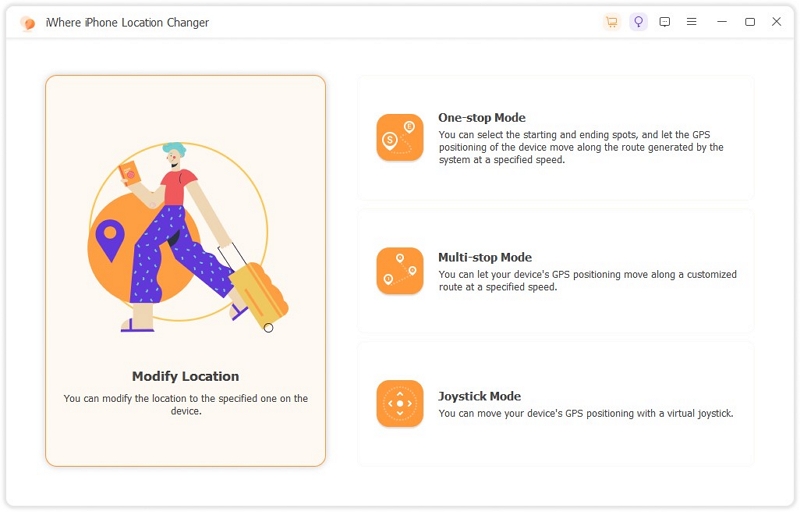
Moreover, iWhere supports different location spoofing modes like the one-stop mode, multi-stop mode, and joystick mode. And you have the option to customize your iPhone speed to move at different speeds, ranging from 1 m/s to 50 m/s.
Key Features
- Easily change location on your iPhone without notifying you using a computer.
- Spoof iPhone location using different modes, such as one-stop mode, joystick mode, etc.
- Allows you to easily change location when playing competitive AR games like Pokemon Go and Monster Hunter Now.
- Supports customizable speed, which allows you to move at different speed ranges.
The following steps explain the procedures for using iWhere iPhone Location Changer:
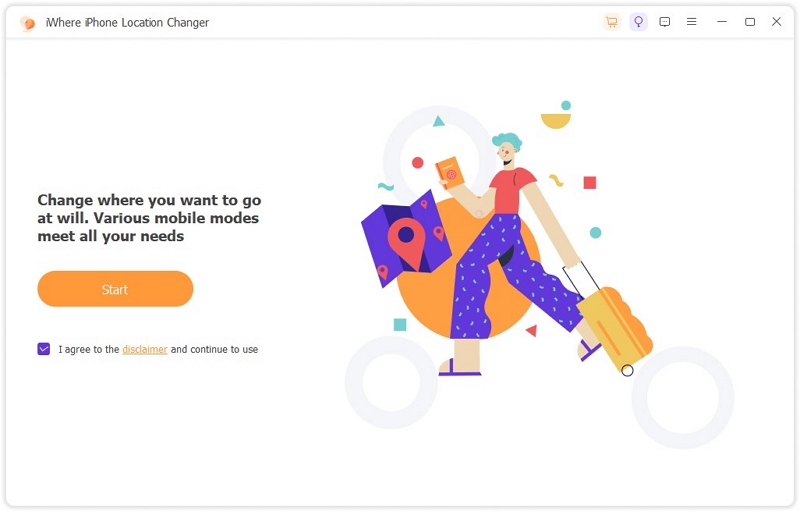
Step 1: Start the iWhere iPhone Location Changer app on your computer and connect your iPhone to the computer. Then, authorize the connection by selecting “Trust” on your iPhone.
- Click on the “Start” button to proceed.
Step 2: Click on “Modify Location”.
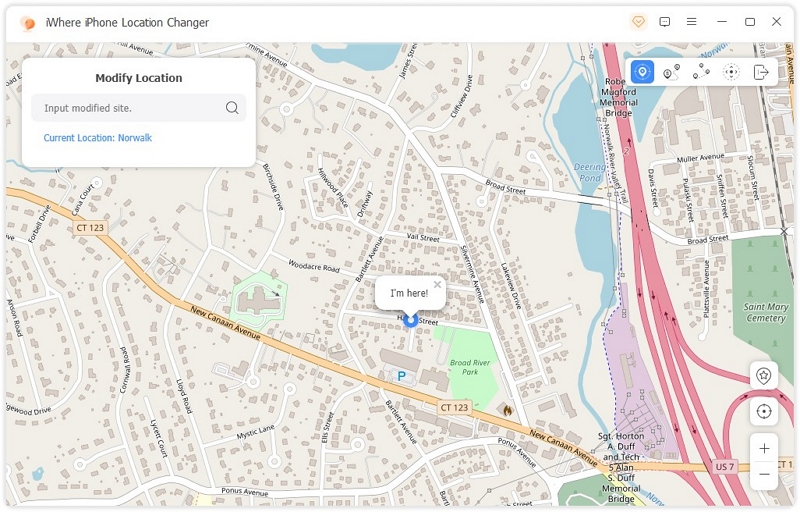
Step 3: A map will be loaded on your screen. You can check your current location either by dragging the map or zooming in/out the map.
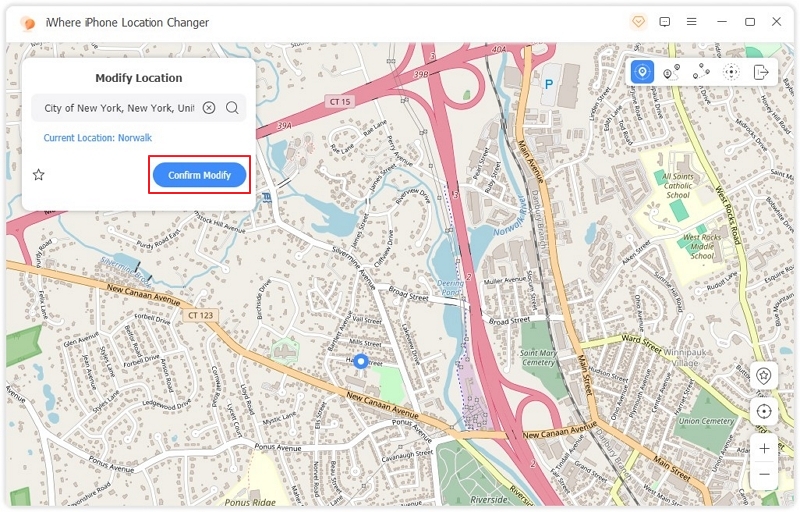
Step 4: Scroll to the top-left side of the Map and type the “Destination” you want to switch to into the “Search Bar”. Click on “Confirm Modify” to enter your choice and wait for the tool to change your iPhone location. This only takes a few seconds.
How to Fix Share My Location Not Working on iMessages After Update
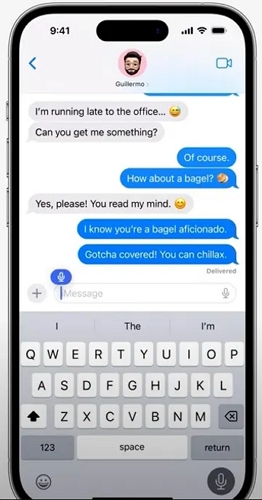
Some users reported that their location sharing function works normally in Find My, but in iMessages, it can’t see someone’s location. If you also encounter a similar problem, then the following solution would be helpful.
Step 1: Open the iMessages app on your iPhone and access the chat screen which doesn’t show the location of the other person.
Step 2: At the top of the screen, tap the name.
Step 3: In the Contact page, tap "Contact photo and poster".
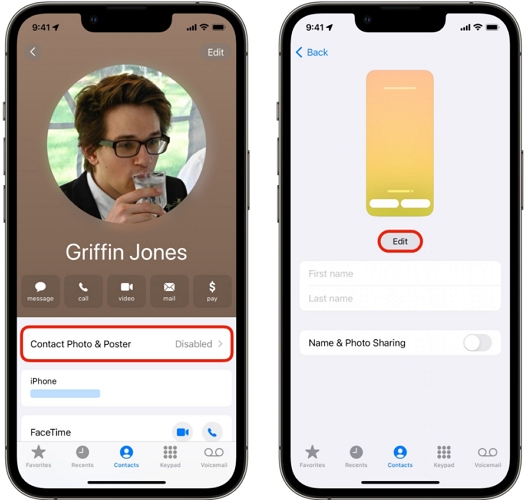
Step 4: Change the poster and save it. Now, you can see the location of the person.
FAQs
Q: How do I stop sharing my location with someone once I’ve shared it?
For iPhone
- Open the “Settings” > Tap on your Apple ID (your name) > Select “Find My”.
- Tap on “Share My Location”.
- Under “People,” tap on the person you want to stop sharing your location with.
- Tap on “Stop Sharing My Location”.
For Android
- Open the “Settings” > “Location.” > “Location sharing".
- Under “Shared with,” tap on the person you want to stop sharing your location with.
- Tap on “Remove”.
Q: Can I share my live location with someone for a specific period of time?
Yes, Finy My app offer the feature to share your live location with someone for a specific period of time, allowing you to set a time limit for how long they can track you.
- Open the Find My app and select the People tab.
- Tap the Add button “+”.
- Choose “Share My Location,” then input the name or phone number of the recipient.
- Click “Send” and decide whether to share your location for one hour, until the end of the day, or indefinitely.
Conclusion
If you ever happen to experience Find My location sharing not working on iPhone, the solutions discussed in the above guide can always come to your rescue. Besides, you don’t need to be tech-savvy to operate. Just follow the provided steps, and shared location not showing error will be fixed in no time. Moreover, if you want to fake your Find My iPhone location, don’t hesitate to give iWhere iPhone Location Changer a shot, which can spoof your iDevice location easily and secretly.
