Although Instagram doesn’t have a built-in location-sharing feature integrated into it like its sister platforms WhatsApp and Facebook, there are some tweaks you could apply to keep your followers updated about your whereabouts. Care to discover these tweaks? Then stick around as we discuss the 5 ways to send location on Instagram.
Important Update: To share your GPS location on Instagram, you must grant the app access to location services on your device. In case you haven’t, proceed to the settings menu now and make the necessary adjustments.
Part 1. How to Send Location to Someone on Instagram
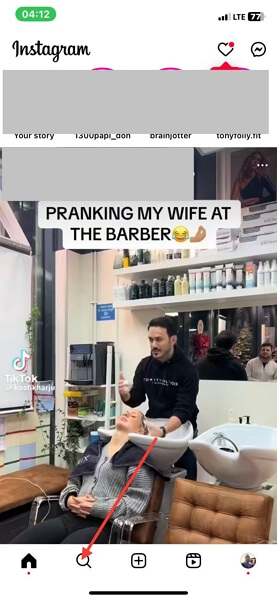
As previously mentioned, there is no location sharing function on the Instagram app but the “Search” tab could play a great role in sending your GPS to your followers. This approach is very simple, cost-free but unpopular. Here’s how to go about it:
- Launch Instagram on your phone and click on the Search icon at the bottom of your screen.
- Enter a location in the search bar, then click the See all results icon to access the screen below:
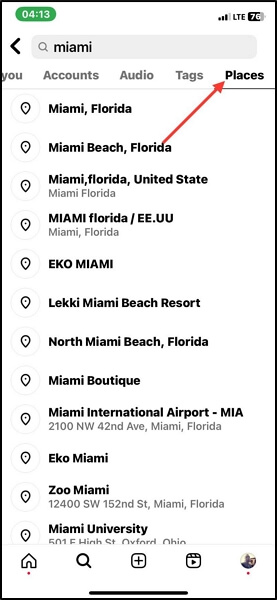
- Next, select Places from the menu bar at the top of the interface displayed and a page showing all related results will come up.
- Click on one of the locations and tap on the Plane icon.
- Now choose the follower you want to send your location to and click Send.

Part 2. How to Send Instagram Location via Google Maps or Apple Maps
Google Maps and Apple Maps are location based services great for searching unfamiliar addresses and navigating your way around them conveniently. You can also leverage these platforms to share your real-time location with your contacts on Instagram and other social media channels.
Both mapping platforms are super easy to operate and the procedure required is straightforward. But before sharing the stepwise guide for each one, here are some important information about Google Maps and Apple Maps:
- Google Maps works perfectly with both Android and iOS devices.
- Apple Maps is peculiar to iOS devices.
Now, check and apply the appropriate guide that suits the mapping platform you have on your device:
Google Maps
- Launch the most recent version of Google Maps on your phone and grant access to the Location Services.
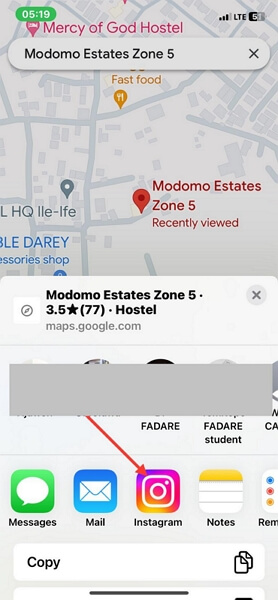
- Input the location you want to share in the search field or click on the pin icon to share your current location.
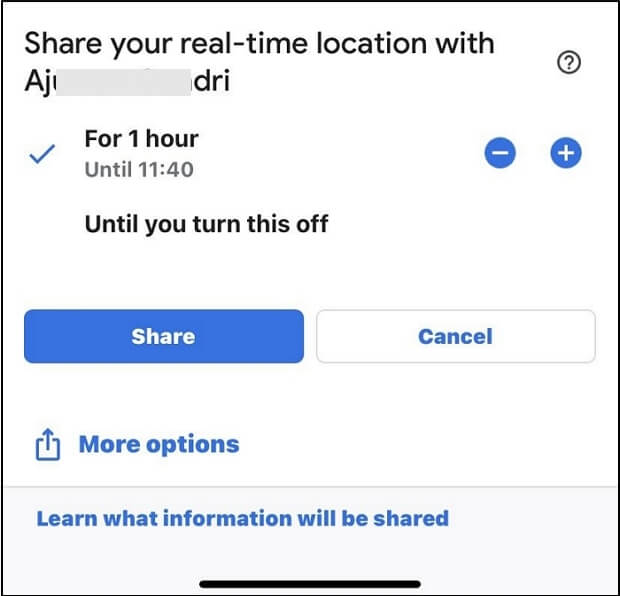
- After that, select Share location and choose Instagram app as your preferred platform to share your GPS data.
- Now, click on the contact to share your location with and Instagram will automatically drop your location in the chat.
Apple Maps
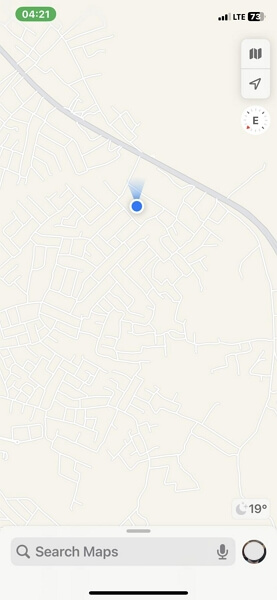
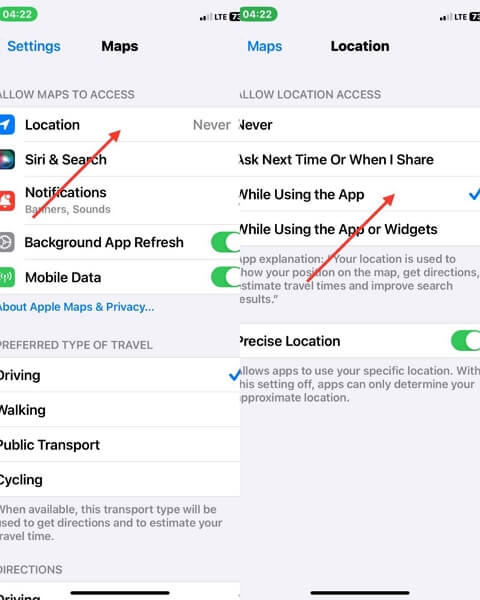
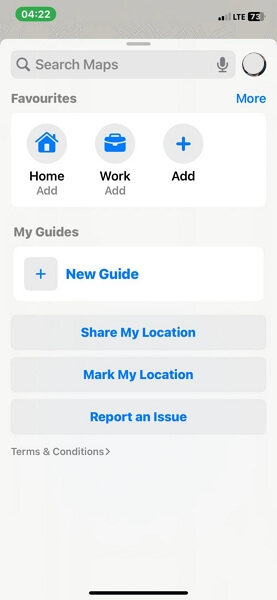
- Run Apple Maps on your iOS device and the screen below will appear:
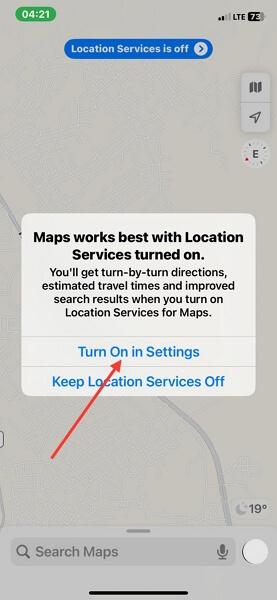
- If you haven’t granted Apple Maps access to your location services, click on the corresponding icon at the top of your screen and select Turn On in Settings.
- After that, click Location and select While Using the App.
- Now, head back to the Apple Maps screen and swipe down to where you have the Share My Location icon. Click on the icon.
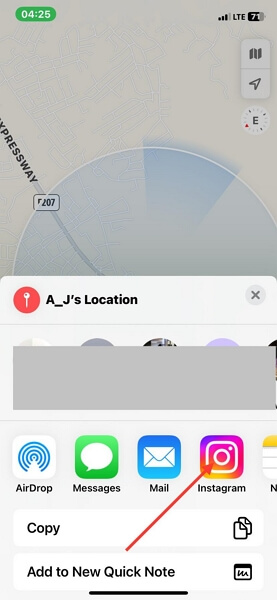
- Next, select Instagram from the apps displayed and click on the recipient contact that you want to share your location with. After that, click Share.
Part 3. How to Send a Location Different from Where You Are on Instagram
Perhaps you want to prank your friends about your whereabouts or keep private about your location, you may consider faking your GPS details before sharing them with contacts on Instagram. To do this, you would require a location spoofing software. And it’s not just any spoofing tool but an elegant one that offers top-notch services.
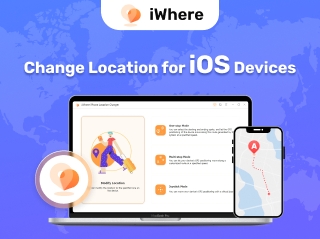
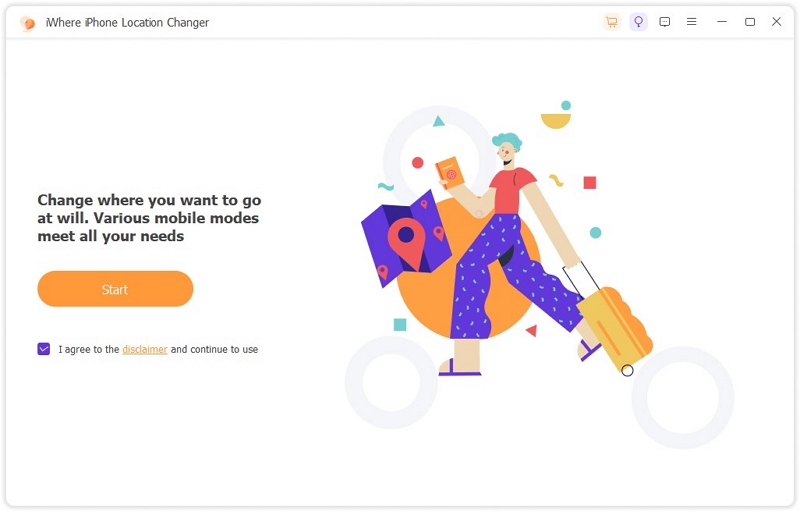
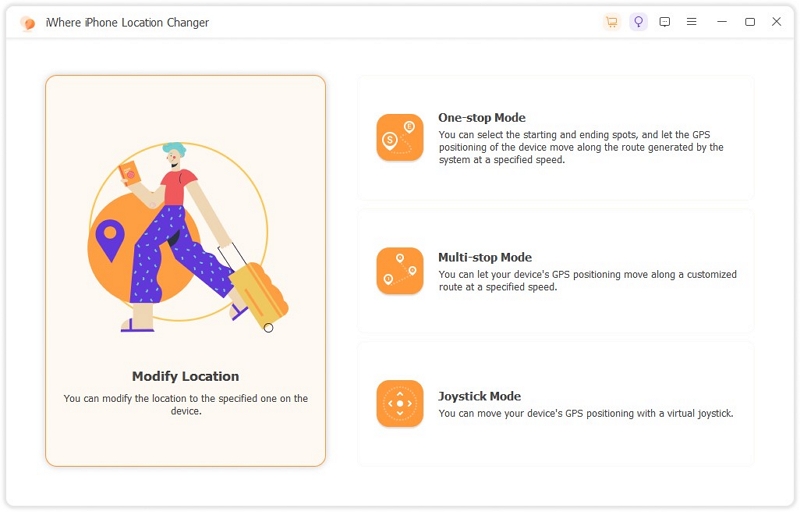
iWhere iPhone Location Changer is a simple yet effective iOS spoofing tool that enables you to simulate the GPS algorithm of any iPhone or iPad. With this software, you can manipulate your device to display any location of your choice without hassles. You can also use it to alter the location on your favorite social media app, such as Instagram, Facebook and more thereby giving you the privilege to send a location different from where you are to your followers. iWhere also comes in handy when you need to fake your location on Pokémon Go, Find My, Google Maps and other location based apps you may have on your device.
Key Features
- 1-click to manipulate your iOS GPS algorithm on any iPhone or iPad model.
- Teleport to any region around the globe.
- Take full control of the direction of movements in your favorite AR games, such as Pokémon GO.
- Works well with Windows OS and macOS.
Stepwise Guide to Send a Location Different from Where You Are on Instagram Using iWhere iPhone Location Changer
Firstly, download and install iWhere iPhone Location Changer on your computer. After that, launch it and follow the steps below to send a fake location to your contacts on Instagram:
Step 1: Connect your iPhone to your computer using a USB cable and hit Start.
Step 2: Then click on Modify Location on the quick start page.
Step 3: Next, you will find a map interface displaying your present location. To change it, navigate to the left sidebar and input an address in the search bar. After that, tap on Confirm Modify.
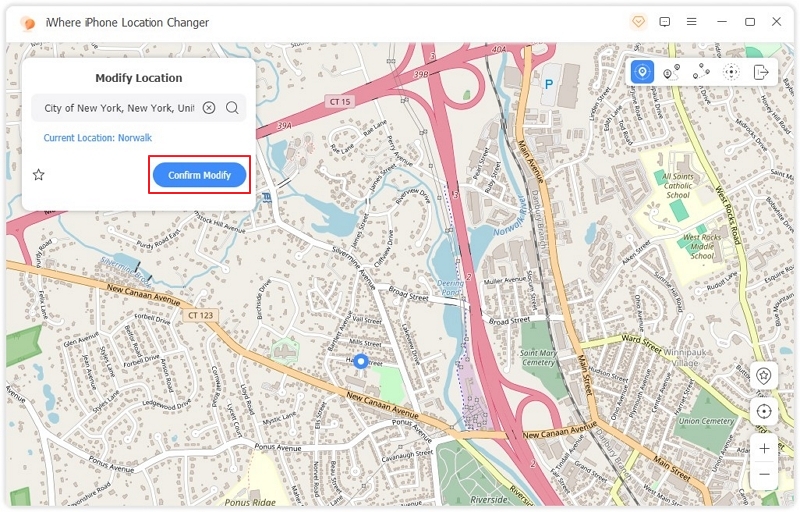
Step 4: Now, iWhere will change your location to the newly selected region. You can now send the location to anyone on your Instagram contact list.
Part 4. How to Share Location on Instagram via Post
Via your Instagram post, you can inform folks on your friend list about your location. Instagram supports the location tag which could be added to your posts to keep your contacts updated about your location or where you’ve been in the past.
To do this, you can apply the step-by-step guide below:
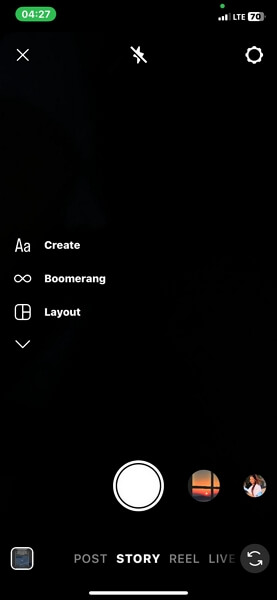
- Open Instagram on your device and sign into your account.
- Swipe from right to left and the screen below will pop up:
- Locate and click on the POST button.
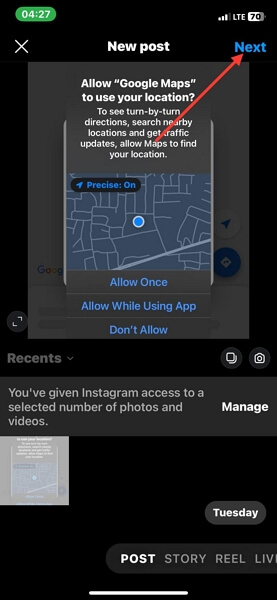
- Upload an image or video from your photo library and click on Next at the top right corner of your screen.
- Click on Next again to proceed.
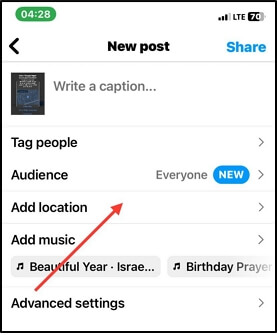
- Select Add Location on the next interface that pops up, then input an address in the search bar. Alternatively, you can select a location from the list to add your current GPS.
- Finally, click on Share to send the POST live.
Part 5. How to Create and Share Custom Location on Instagram
If you own a business on Instagram and wish to add a location to your page, you can leverage the sister platform, Facebook, to help you out. Facebook allows you to create and share custom locations on your Instagram page without difficulty. However, you must fulfill the condition of linking your Facebook account to Instagram to use this method.
If you meet this condition, here is the procedure to follow:
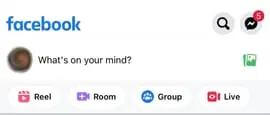
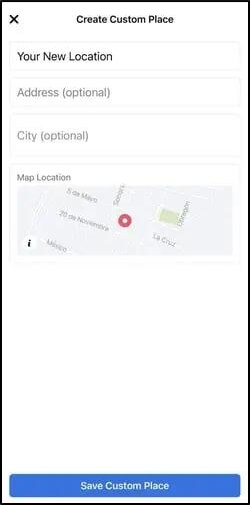
Step 1: Open Facebook on your phone and log in to your account. Once you’ve gained access, tap on the empty space labeled What’s on your mind? to create a post.
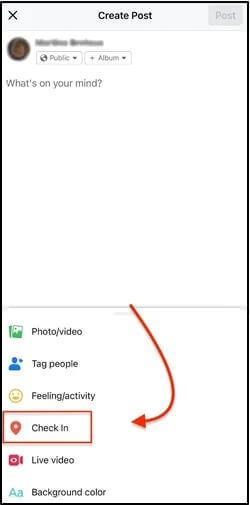
Step 2: Enter what you want in the space provided, and select Check-in from the customization buttons that pops up at the bottom of your screen.
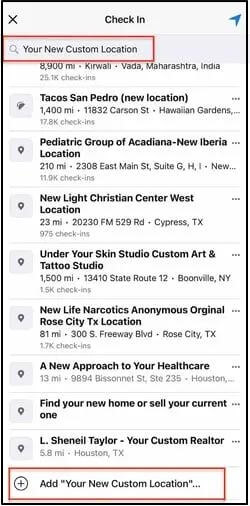
Step 3: Now, grant Facebook access to use your location and input your desired address in the search bar. After that, click on + at the bottom of your screen to add your custom location.
Step 4: On the next screen, hit the Save Custom Place icon. Your Facebook account and Instagram page should start displaying the newly customized location in no time.
Conclusion
Sending your location on Instagram is now easier than ever before with the ultimate guide shared in this post. Of all the 5 solutions recommended, which one do you intend to use? No matter what your answer is, if you wish to fake your location, iWhere iPhone Location Changer is our most preferred option. It lets you hide your location with minimal stress.