We live in a digital era where sharing location with our friends and family has become a safety measure. While Apple users are familiar with sharing their location from their iPhone, many are unaware that they can also share their location from their MacBook.
Although MacBook computers do not have a built-in GPS, there are several factors it can use to determine and share your location, including your IP address, network, etc. This article explains the various ways to share location from MacBook instead of iPhone effortlessly.
Part 1. When Should You Share Your Location from MacBook?
There are several situations that might require you to share your location from MacBook instead of iPhone. We’ve shared some scenarios below:
- If your iPhone battery is low, using your Mac to share your location can save your phone’s battery life.
- If you are working on your Mac and need to quickly share your location without switching devices, it’s more convenient to share directly from your Mac.
- Another common situation people use Mac to share their location is when their iPhone is experiencing a GPS signal issue.
Part 2. How to Share Location from MacBook Instead of iPhone
Fortunately, there are different ways to share your location from a MacBook instead of an iPhone. From using the Find My feature to Apple Maps, and Google Maps. We’ve shared the step-by-step procedure for these methods below.
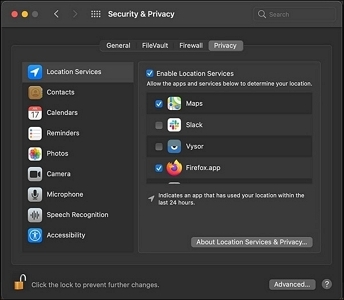
But before you proceed to the steps, make sure you’ve turned on the Location Services feature and other location permission for location-sharing apps on your MacBook. Just head to “Apple Menu” and select System Settings > Security & Privacy > Location Services.
Method 1: Use Find My
Using Find My is one of the most reliable ways to share location from MacBook. However, to be able to use this method, the recipient must also use Apple device like an Apple Watch, iPhone, or iPad.
Here are the steps to share the location on your MacBook using Find My:
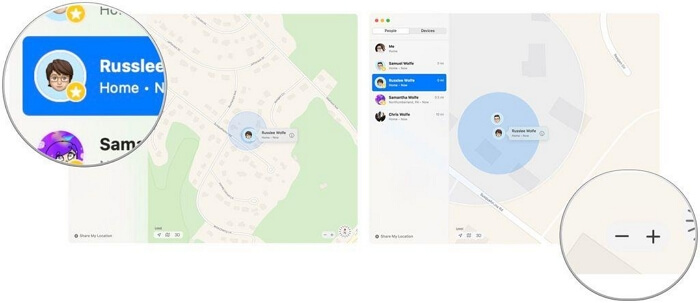
Step 1: Open the “Find My” app on your MacBook and click on “People”.
Step 2: Click on the “Info” icon on the Find My map and select “Me” from the “People” list.
Step 3: Turn on “Share My Location” if it’s disabled. Then, click on its button and type a name, an email address, or a phone number in the “To” field and choose the contact you’d like to share your location with from the list.
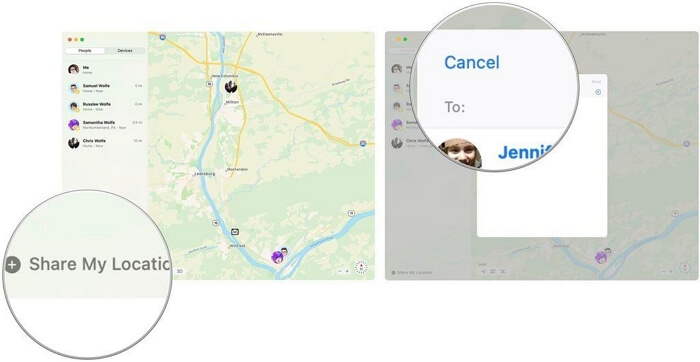
Alternatively, you can click the “Add” button on the right-hand side. To see all your contacts and select whom you want to share your location with.
Step 4: Finally, click “Send” and select how long you want to share your location with the contact.
Method 2: Through Apple Maps
Another way you can share location from MacBook without iPhone is by using the Apple Maps app. Apple Maps is Apple’s native web mapping service that helps users navigate unknown locations by providing them with directions and estimated time of arrival based on their means of movement, including driving, walking, cycling, and public transportation. Its location-sharing feature is also outstanding.
Here’s how you can use Apple Maps to share your location on your MacBook.
Step 1: Go to “System Preferences” on your Mac and select “Apple Maps”.
Step 2: Once you launch the Apple Maps app, select your location from the Map.

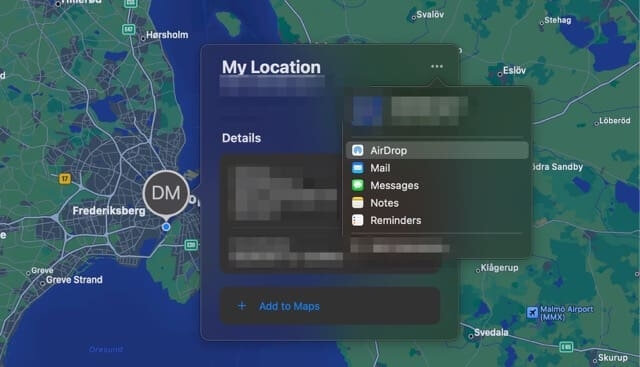
Step 3: Click on the “Three Dots” icon at the top-right side of the pop-up and select “Share”.
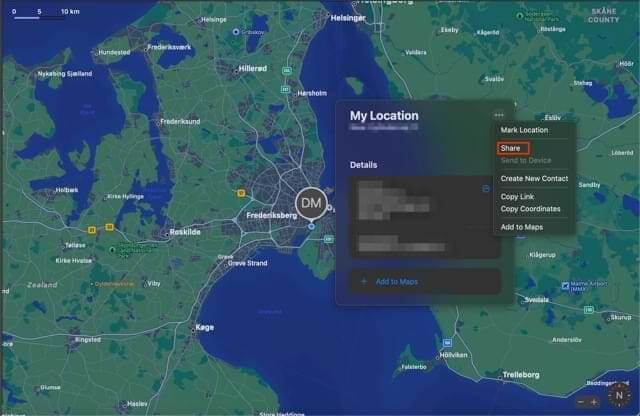
Step 4: Select the “platform” you want to use to share your location and follow the on-screen instructions to finish.
Method 3: Use Google Maps
Google Maps is a versatile tool that works across multiple platforms, making it an excellent choice for sharing your location from a MacBook. With Google Maps, you can share your real-time location, send a location link, or share your estimated time of arrival with others.
Here’s how you can use Google Maps to share your location via MacBook.
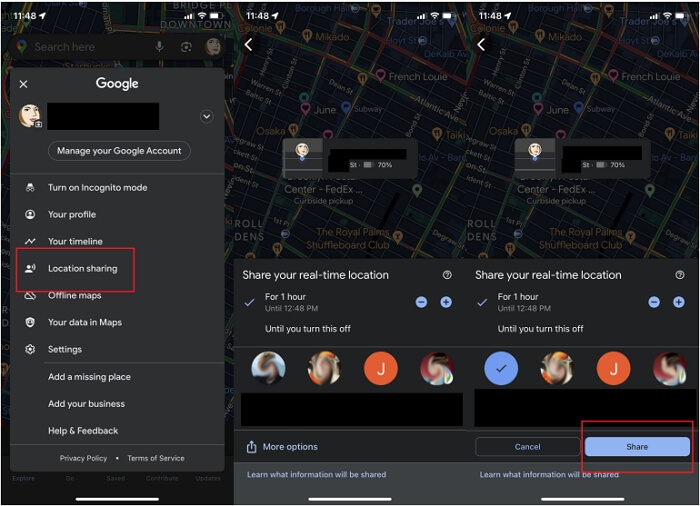
Step 1: Open “Google Maps” in your browser and sign in to your Google Account.
Step 2: Tap your profile picture. Then select Location sharing, followed by New share.
Step 3: Set the duration you want to share your location and choose the people you want to share it with. Finally, tap Share to send your location.
Part 3. Can You Use Your MacBook as Your Location in Find My?
No, you can’t use your MacBook as your location on Find My. Switching what product from which you are sharing location is possible only with other non-Mac Apple devices, so basically iPhone, iPad, and cellular Apple Watches if separated from the paired iPhone. Then list the steps of using other iPhone/iPad/Apple Watches as your location in Find My here.
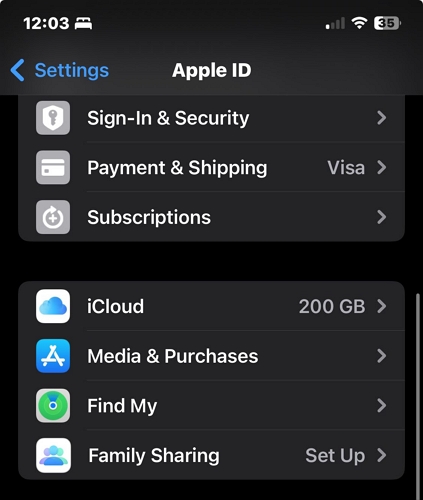
Step 1: On your iPhone, iPad, or Apple Watch, head to “Settings” and tap on your “Apple ID banner”.
Step 2: Select “Find My”.
Step 3: Tap on “Use This [Device Name] as My Location”. Then, turn on the “Share My Location” toggle.
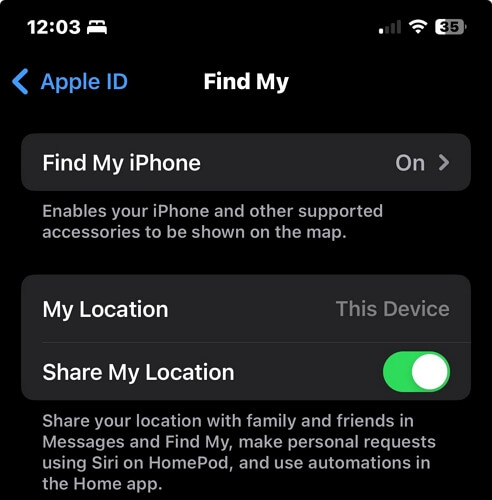
After you complete the steps, your location will be displayed on the device.
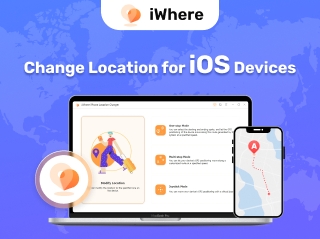
Bonus: Ultimate Hack to Share Fake Location on iPhone without Jailbreak
When it comes to sharing fake location on iPhone without jailbreak, iWhere iPhone Location Changer is the ultimate tool that can help you achieve your objective effortlessly.
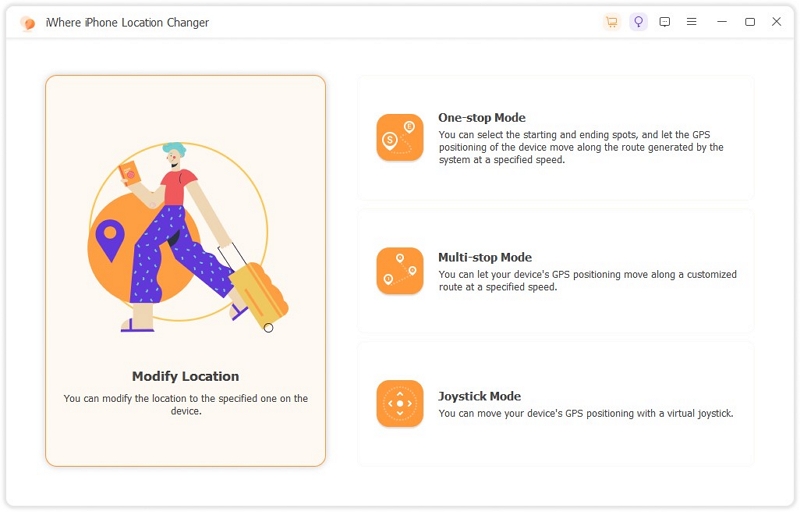
iWhere iPhone Location Changer is an advanced tool that allows you to appear in any region worldwide without moving or notifying anyone. It provides you with different location spoofing modes like One-stop mode, Multi-stop mode, and Joystick mode, allowing you to manipulate your iPhone location with just a single click.
Key Features
- Trick your iPhone location to share a fake location, protect your privacy, bypass geo-based game restrictions, or more.
- Allow location spoofing on a wide range of platforms, including social media apps, dating sites, mapping software etc.
- Enable you to create routes and use a flexible joystick to manipulate your location when playing geo-based AR games like Pokemon Go.
- Offer interactive features to customize speed, collect routes, and GPX file import/export to fake iPhone locations.
How to Share Fake iPhone Location with iWhere
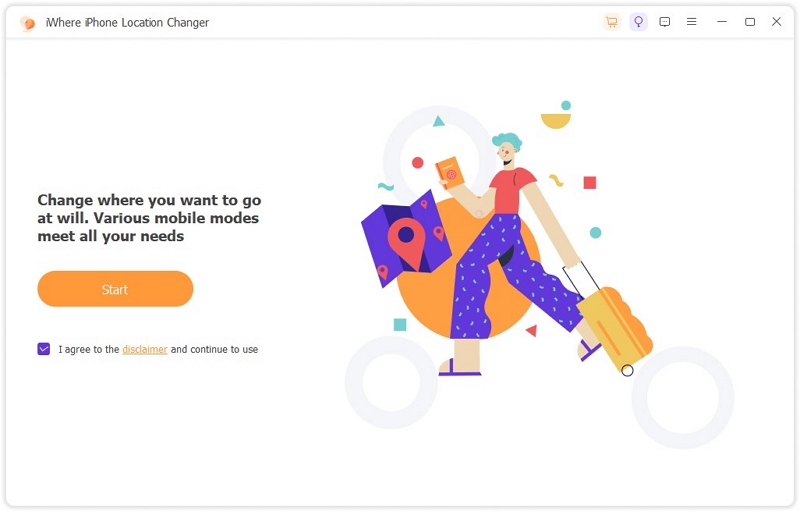
Step 1: Start by installing the iWhere program on your computer. Then, run the software and click “Start” to begin.
Step 2: Connect your iPhone to the computer using a compatible USB cable and choose “Modify Location” location changing mode.
Step 3: In the map that appears on your screen, use the +/- buttons to zoom in and zoom out the map to be able to view different regions you can use to fake your iPhone location.
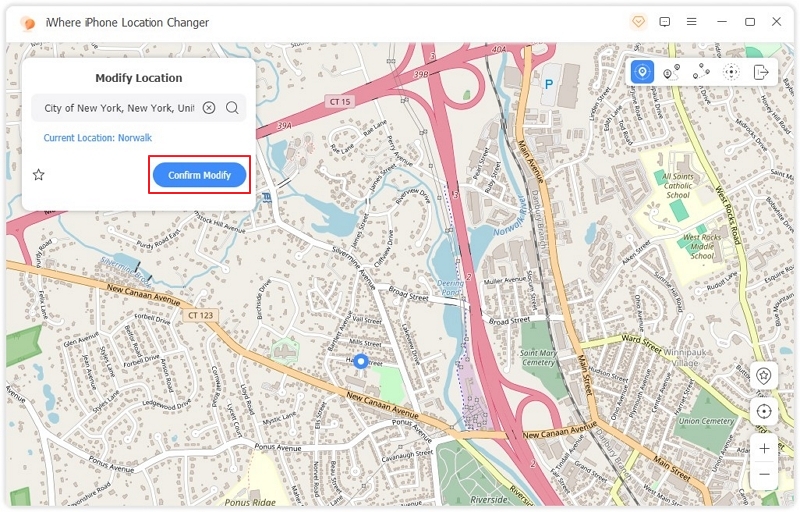
Step 4: Once you find a suitable “Destination”, enter the address into the “Search box” at the top-left and click “Confirm Modify” to make your iPhone location changed to the destination.
Now, you can head to the platform like Find My or WhatsApp to share the fake location.
Conclusion
Not many people understand how to share location from their MacBook computer. However, with the article on this page, we believe any Apple users will be able to share their MacBook location easily.