Let’s face it – location is an important feature when it comes to navigating various social media platforms, and Facebook is not excluded. Facebook uses your location data to share friends’ suggestions, third-party advertisements, potential matches (on Facebook Dating app), etc. However several situations might require you to change your location on Facebook. This could be for privacy reasons or to explore region-specific features, find new friends in other regions, or explore more potential matches in other countries.
To help you out, we’ve created this guide explaining how to change Facebook location on different devices, including Android and iPhone.
Part 1: Why Change Location On Facebook?
Changing your location on Facebook can come in handy in different situations. In this part, we’ve discussed some of the common reasons why you might want to get this done.
- Privacy: Changing your location on Facebook can enhance your privacy and hide your actual location from potential threats or unauthorized people. And adding an extra layer of security to make it harder for others to track your movements.
- Connect With New Friends: If you’re looking to interact with people in different regions, changing your location on Facebook is one of the ways to achieve your objective. You’ll be able to receive friend request suggestions within other regions and join local communities, fostering new friendships and social networks.
- Access Services That Are Not Available In Your Country: Altering your location on Facebook is also helpful when you want to use services like “Facebook Dating” and Facebook Marketplace. It enables you to find potential dates outside your region and explore products from sellers.
- Bypass Facebook Restrictions In Your Country: Circumvent geographical restrictions imposed by your country on Facebook, granting you access to use the app without limitation or getting detected.
Part 2: Ultimate Way To Change Location On Facebook Dating/Marketplace/Profile On iPhone
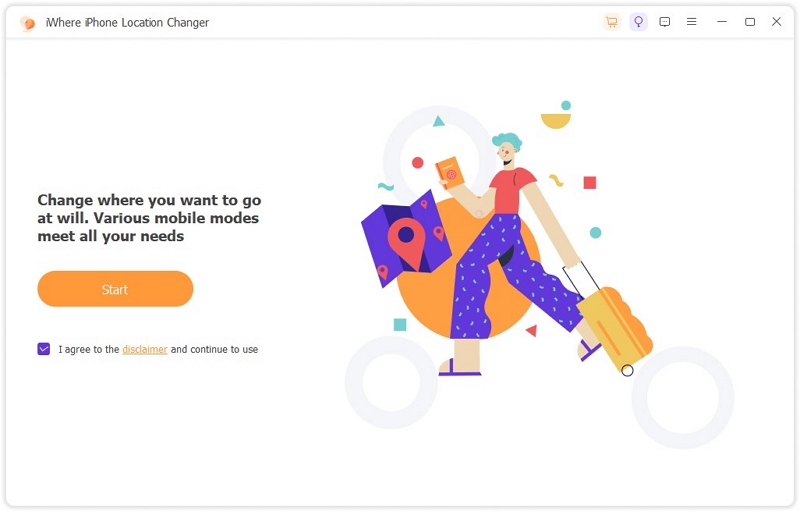
If you want a straightforward way to change your location on all Facebook services you’re using, iWhere iPhone Location Changer is the ultimate solution.
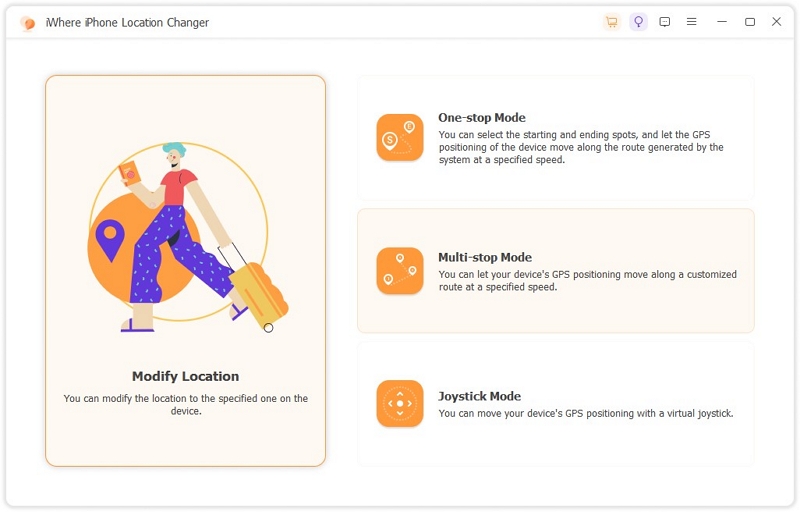
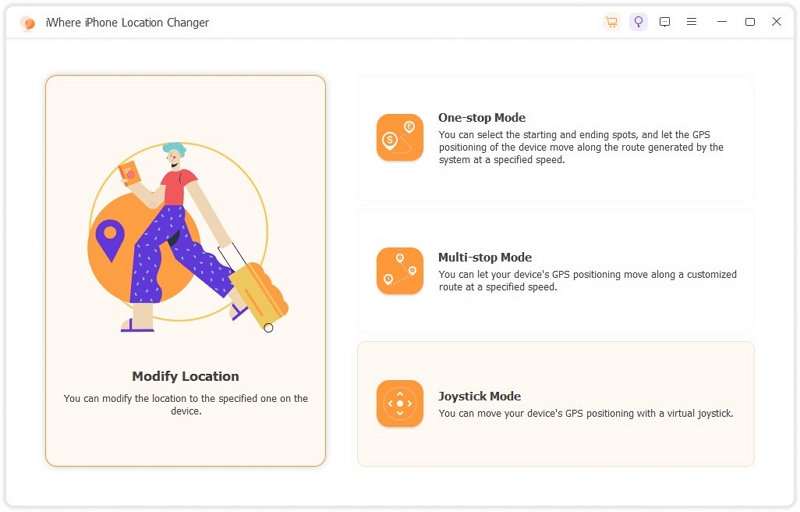
iWhere iPhone Location Changer is an advanced location spoofing app that allows you to change location on any social media platform, including Facebook on iPhone without compromising your account activities. It enables you to change your location using different modes, such as:
One-stop Mode: Easily choose a starting and ending point to change your Facebook location using a specific route.
Multi-stop Mode: This mode allows you to change your location on Facebook using more than one region. All you need to do is to choose various spots, and it’ll create a custom route that your iPhone moves within.
Joystick Mode: This is similar to multi-stop mode. However, you have more freedom to change your location to any region around the world by moving freely using your computer cursor or keyboard.
But that’s not all. iWhere iPhone Location changer also supports import/export GPX feature that allows you to import GPX files with your custom settings to change Facebook location.
More Key Features Of iWhere iPhone Location Changer
- Customizable Speed: iWhere iPhone Location Changer allows you to move your iPhone speed within the range of 1 m/s to 50 m/s while spoofing its location.
- Spoof Location On AR Games: Change location and explore rare gems on AR games like Pokemon Go without walking.
- Guaranteed Privacy & Safety: Boasts advanced security algorithms that ensure 100% protection of user data.
- Location History: Easily explore all regions you’ve visited while spoofing location on iWhere via history.
Steps to Change Location On Facebook With iWhere
Step 1: Open the “iWhere iPhone Location Changer” app and click on the “Start” button.
Step 2: Connect your iPhoneto the computer. Then, you need to choose a preferred mode to change your Facebook location. In this guide, we explained how to use “Multi-stop” and “Joystick” modes to enjoy more freedom.
Option 1: Select Multi-stop mode:
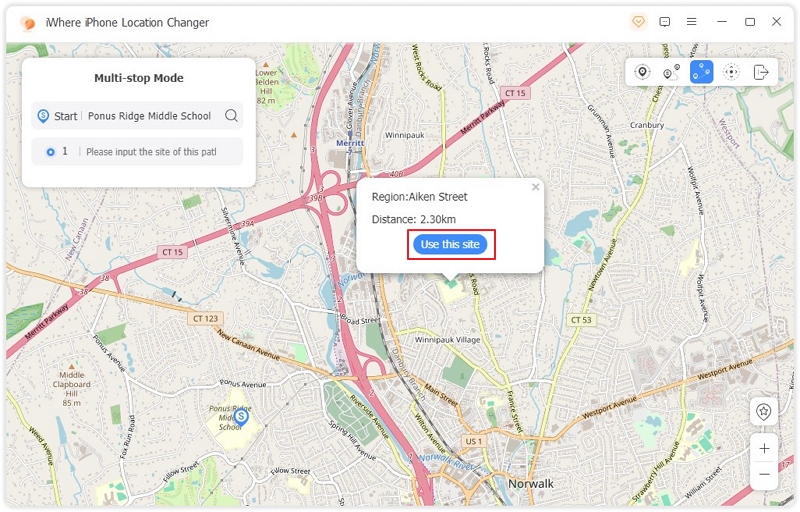
- Then, click on the “Multi-stop” icon, which is located at the top-right side of the screen.
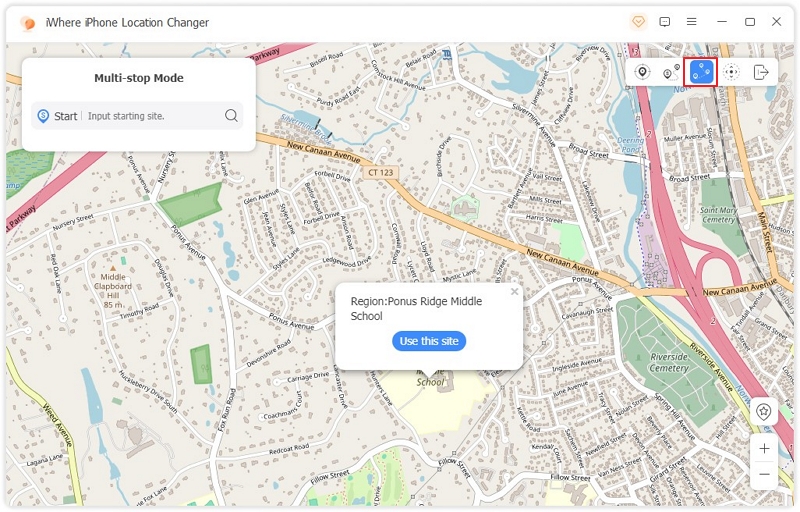
- Choose different locations to use. You can choose regions from the “United States” “Canada”, “United Kingdom”, or any other region in the world. Click on “Use This Site” to proceed.
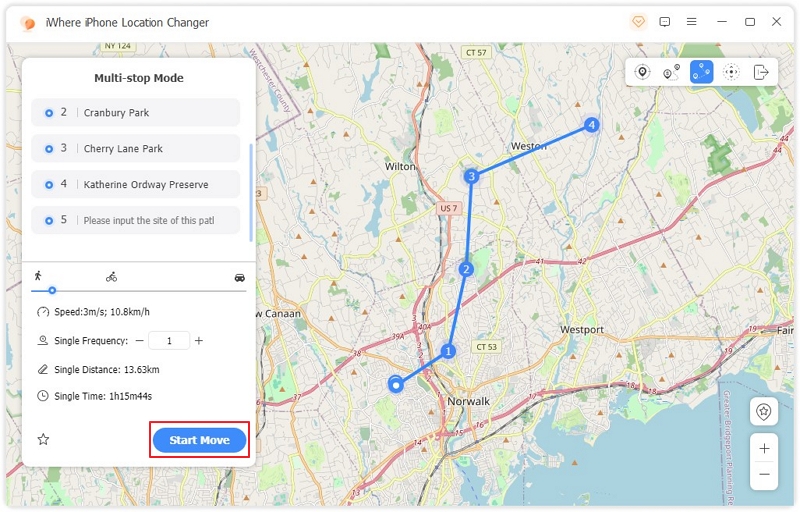
- Finally, click on the “Start Move” button to change your location on Facebook.
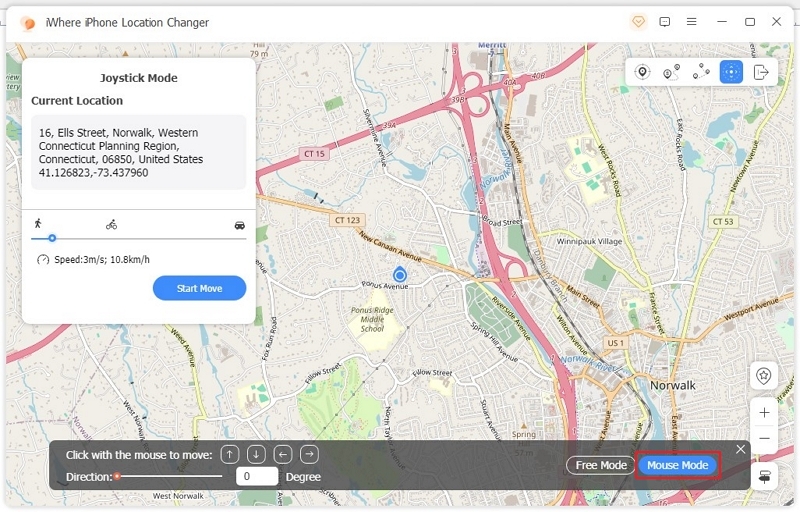
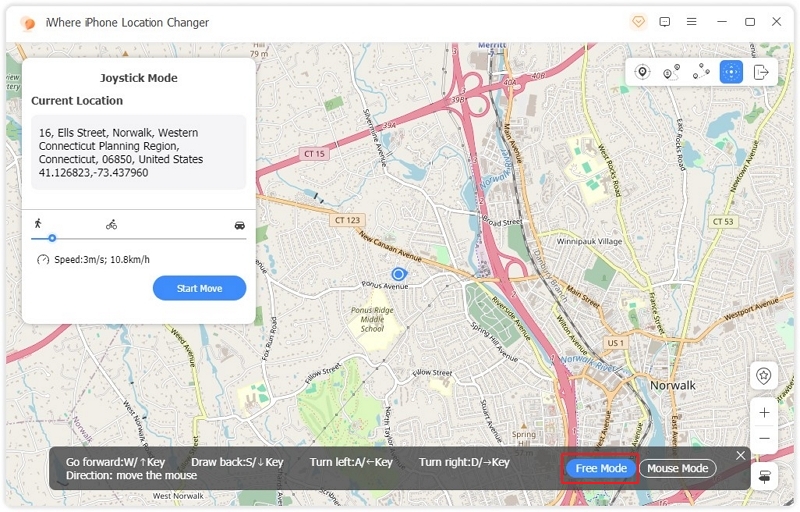
Option 2: Joystick mode:
- Click on the “Joystick” icon at the top-left side.
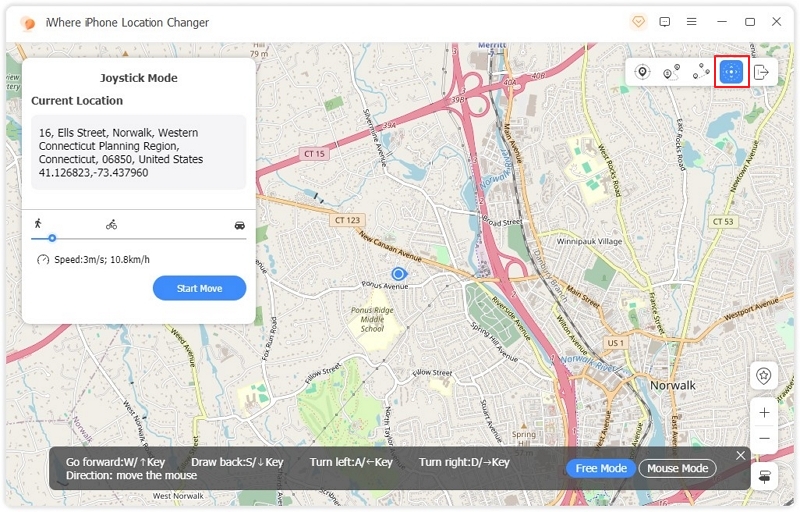
- In this mode, you can move freely using the icon on the map. There are two options available:
- Click the “Mouse Mode” at the bottom left corner if you want to use your computer “Cursor” to move the icon.
- Click on “Free Mode” if you want to use your computer “Keyboard” to move.
Part 3: How to Change Location On Facebook Profile – Official Way
The official way to change location on Facebook is pretty simple and can be done via your Facebook account. However, unlike iWhere iPhone Location Changer, you can use different locations simultaneously. See the steps below:
Step 1: Launch “Facebook” app and log into your account.
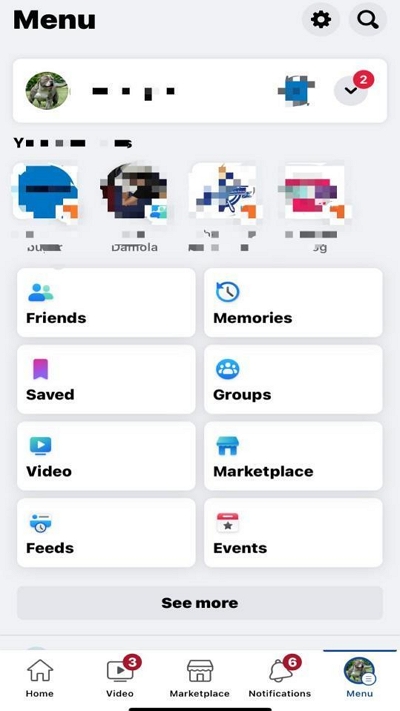
Step 2: Tap on your “Profile” icon at the bottom right side.
Step 3: Tap on the “Gear” icon at the top-right side.
Step 4: Scroll to the “Audience and visibility” section and select “Profile details”.
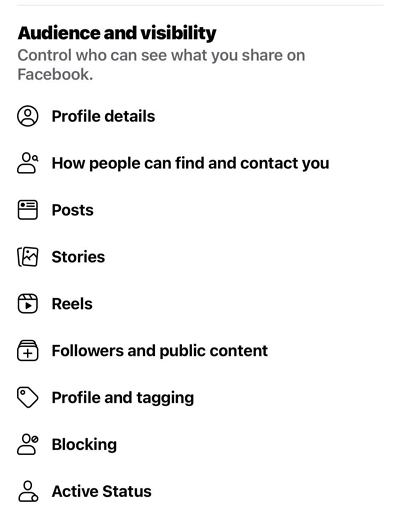
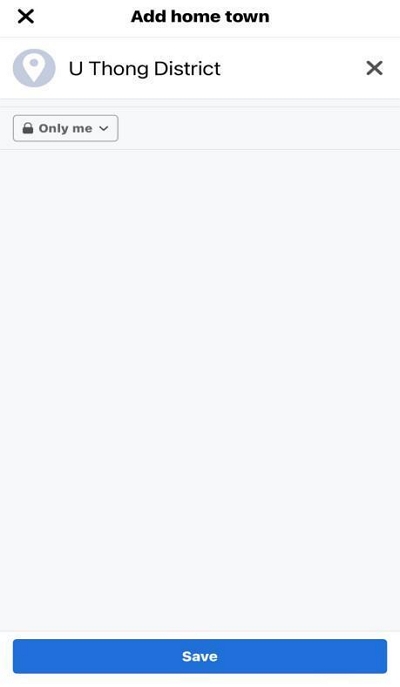
Step 5: Find and select “Add Home Town” .
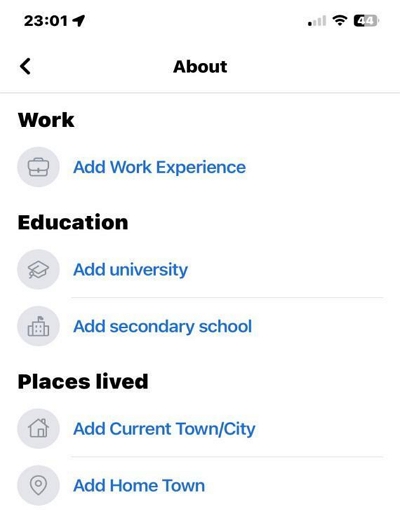
Step 6: Enter the new location you want to use on Facebook and tap “Save”.
Part 4: How to Change Location On Facebook Dating iPhone/Android?
Facebook Dating, just like many other dating platforms allows you to find matches only within a 100-meter radius of your location. So, if you want to find more potential matches beyond a 100-mile radius, you need to always change your location. Here is how to change Facebook Dating location on Android or iPhone:
Step 1: Launch the “Facebook Dating” app on your Android or iPhone.
Step 2: Navigate to your “Profile” and select “Edit”.
Step 3: Tap on “Dating Location”.
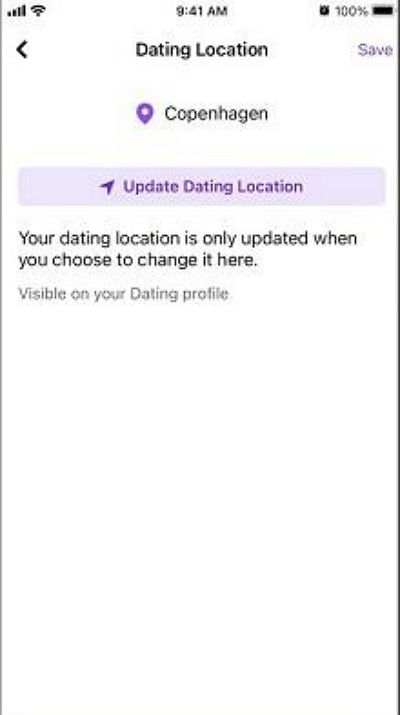
Step 4: Choose “Update Dating Location” and select the new location you want to appear on your “Dating Profile”.
Step 5: Tap “Save” to finish.
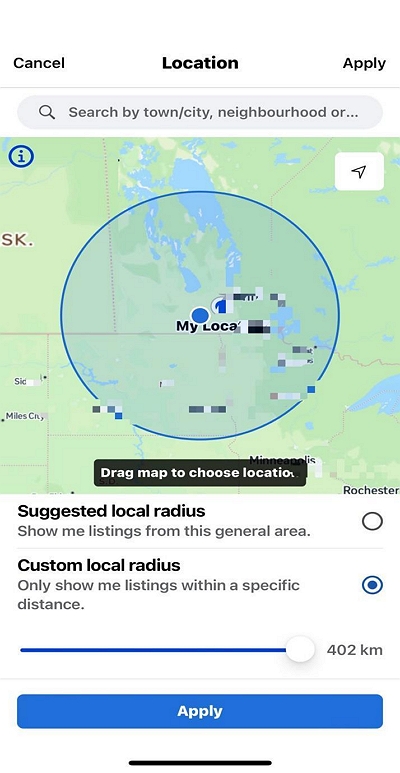
Part 5: How To Change Location On Facebook Marketplace iPhone/Android?
If you use Facebook Marketplace to buy and sell products, you’ll only get listings from sellers within your location. However, if you wish to explore more listings from sellers in other regions, you can edit your location in the marketplace. Here is how:
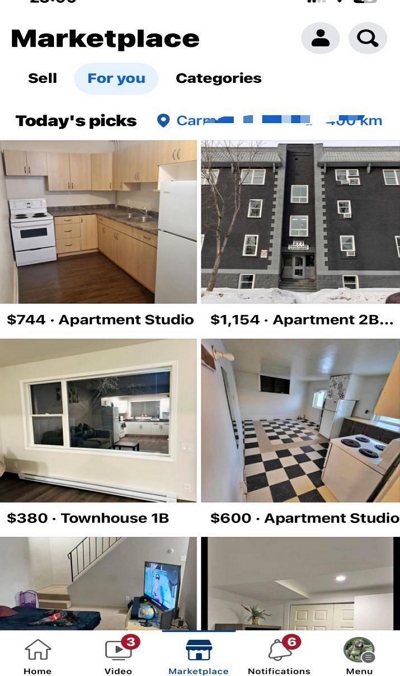
Step 1: Open “Facebook” on your Android or iPhone and tap on the “Marketplace” icon at the bottom of your screen.
Step 2: Tap on your “Current Location”, which is displayed at the top of the screen.
Step 3: Type the new location you wish to find listings in the “Search” box and tap on “Apply”.
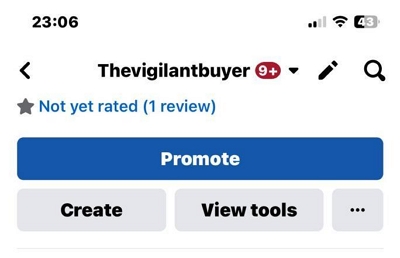
Part 5: How to Add or Edit an Address on Facebook Page Android/iPhone?
In case you moved to a new country and you’re wondering how to edit or add your new location address to your Facebook page, worry less. The process is more straightforward than you think.
In this part, we’ve explained the step-by-step process to add or edit an address on a Facebook page.
Step 1: Launch the “Facebook” app and go to your “Facebook Page”.
Step 2: Tap on the “Three-dot” horizontal icon next to “View Tools”.
Step 3: Select “Edit”.
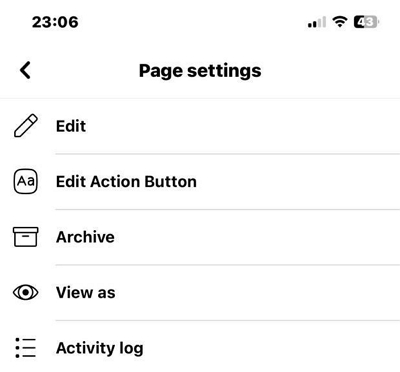
Step 4: Scroll to “Details” and select “Address”.
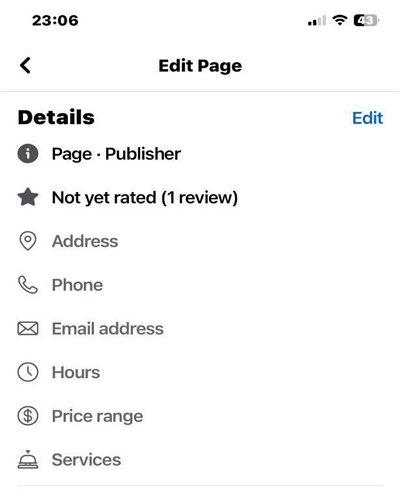
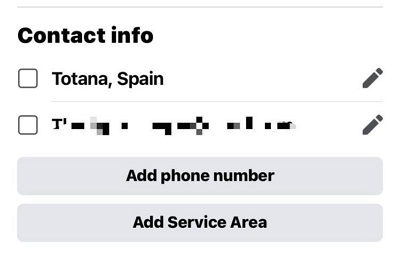
Step 5: Navigate to “Contact” info and tap on “Add Service Area” (if you want to add an address) or tap the “Pencil” icon next to your current address to edit your address.
Step 6: Enter your new address and tap “Save”. Then, provide a “Postcode”. If your page does not have a postcode, select “My Page doesn’t have a postcode and tap “Save.”
Conclusion
The ability to change your location on Facebook, whether on iPhone or Android, offers a range of benefits and functionalities. From enhancing privacy and security to connecting with new friends and accessing region-specific services.
The techniques above provide you with the flexibility to change your Facebook location for various services on Facebook. You just need to choose the method that suits your needs and follow the steps correctly.