Updated on 2024-06-21
3625 views
5min read
Sharing and requesting location on iPhone can be useful in different situations. Perhaps, you want to keep your loved ones updated about your whereabouts, you’re planning a meet-up with someone in an unfamiliar location, you’re looking to plan a group event with family and friends, etc. Whatever your reasons might be, the good news is there are several ways you can go about this. So, in today’s article, we will look at the different ways to request and share location on iPhone quickly and easily. Keep reading.
Part 1: How To Request Someone’s Location on iPhone Using Messages App
There are two ways to request someone’s location on your iPhone using the inbuilt Messages app. In this part, we will introduce you to both methods and show you the steps to utilize them.
Way 1. Through Chat Interface
Step 1: Open the “Messages” app on your iPhone and start a chat with the person you want to request a location from.
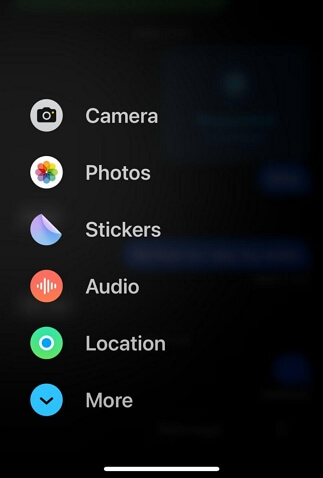
Step 2: Tap on the “Plus” icon at the bottom-left corner and select “Location”.
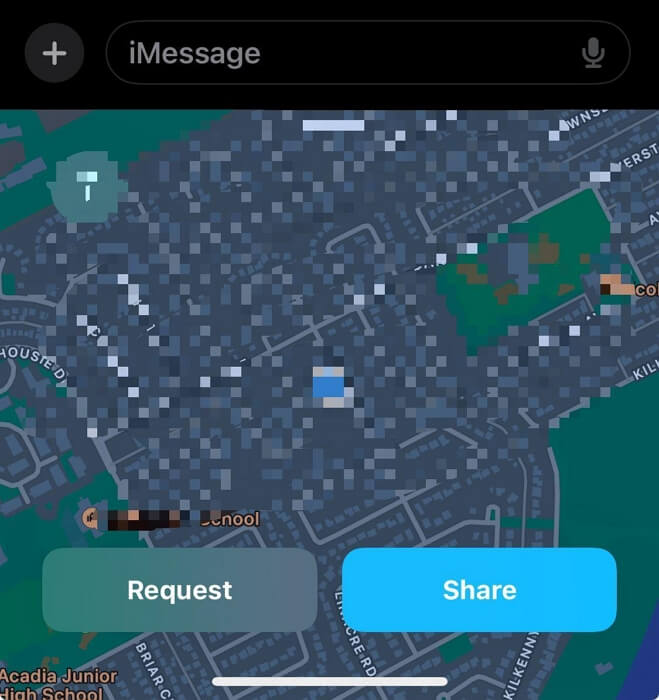
Step 3: Select “Request” from the “Map” that pops up at the bottom of your screen.
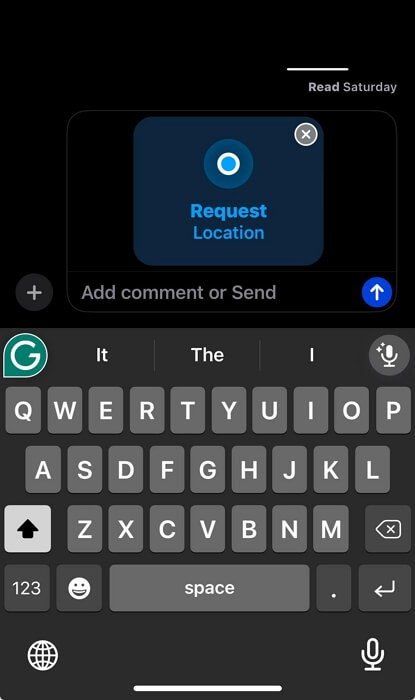
Step 4: Now, enter a relevant message with the “Location Request” and tap the “Send” button.
Way 2. Via Contact Profile
Step 1: Open the “Messages” app and tap on your chat with the person whom you want to request his/her location.
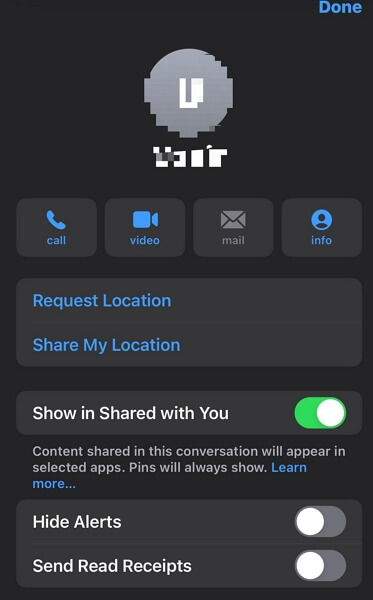
Step 2: Tap on the user “Profile icon”.
Step 3: Select “Request Location” to ask for the person’s location.
Part 2: How to Share Your Location on iPhone
It’s also very easy to share location on your iPhone. Here we will show you two efficient methods using the iMessage and Find My apps.
Method 1. Use iMessage
Besides allowing you to send messages to your iCloud contacts, iMessage can also be a useful tool for sharing your location on iPhone. Here is how:
Step 1: Go to the “iMessage” app and open a chat with the contact you hope to share your location with.
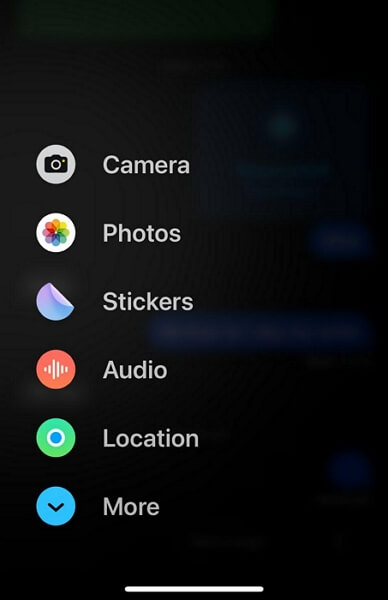
Step 2: Tap on the “+” icon at the left-hand side of the text box and choose “Location”.
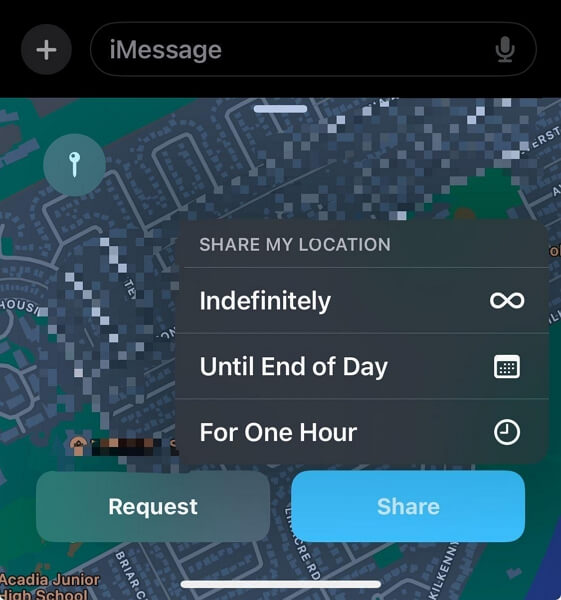
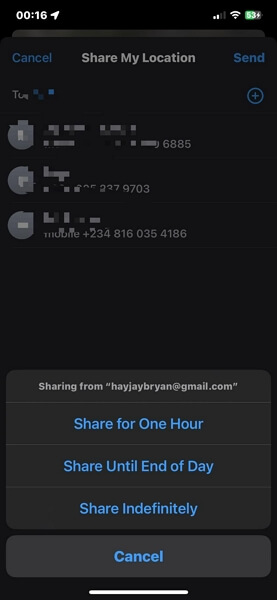
Step 3: Tap on “Share Location” from the map that appears and select a “Duration” to keep sharing your location with the person. You can share your location for 1 hour, until the end of the day, or indefinitely.
Step 4: Enter a relevant message that you’d like to send with your location and tap the “Send” button to start sharing your location.
Method 2. Use Find My
Another way you can share your location on iPhone is with the Find My app. This is a very common method among iOS users, and here is how it works:
Step 1: Open the “Find My” app and tap on the “People” tab.
Step 2: Choose “Share My Location”.
Step 3: Select the “Contact” of the person you intend to share your location with.
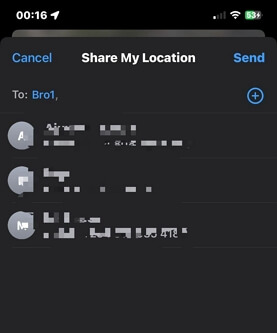
Step 4: Tap on “Send” and select how long you’d like to keep sharing your location.
Part 3: How To Share Fake iPhone Location When Someone Requests Your Location Without Notifying
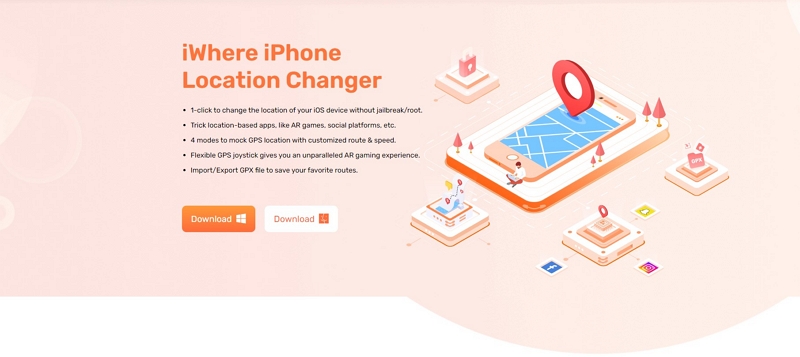
Are you looking to share a fake location with someone when they request your location on iPhone? We got you covered with the best trick for that. All you need is iWhere iPhone Location Changer. This is one of the most effective location-faking apps for iPhone that offers many powerful features that make location-faking a breeze.
iWhere iPhone Location Changer supports simple, yet efficient tools that users with any experience level can utilize to fake iPhone locations in different situations. You can use this tool to prevent someone from knowing your original location, protect online privacy, bypass geographic restrictions on apps and websites, change your social media account location, and do lots more without being detected. Besides, iWhere supports different location-faking modes that allow you to create routes to fake your location in specific regions.
Key Features
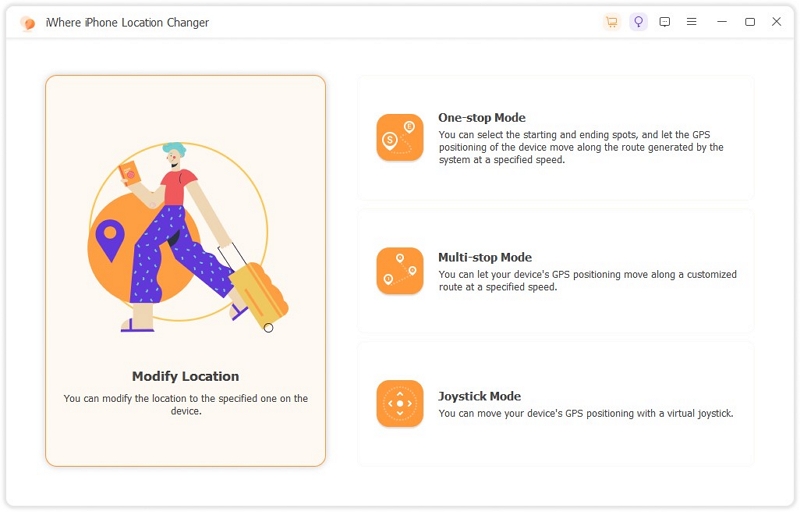
- Facilitate location on iPhone using advanced modes like Modify Location, One-stop mode, Multi-stop mode, and Joystick mode.
- Bypass geographic restrictions on websites, dating apps, games, and lots more in a few clicks without jailbreaking your iPhone.
- Allow you to create a custom route to fake your iPhone location by importing and exporting your favorite locations via GPX files.
- Easily move to different regions on geo-based AR games like Pokemon Go, and enhance your chances of finding rare gems without leaving your current location.
How to Fake Location On iPhone With iWhere iPhone Location Changer
Step 1: Install iWhere iPhone Location Changer and start the app on your Mac or Windows computer.
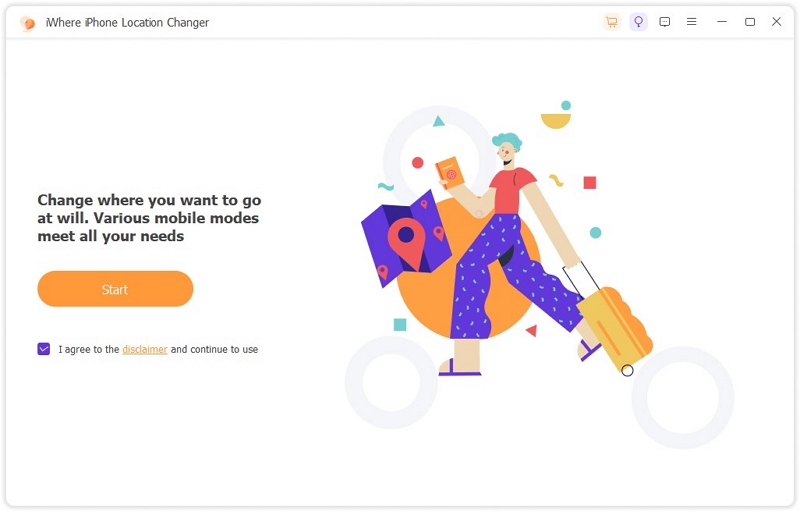
Step 2: Click “Start” from the tool’s interface and connect your iPhone to the computer.
Step 3: Select “Modify Location” as the mode to fake your iPhone location.
Step 4: A map displaying your current location will appear on your screen. You can use your computer cursor to navigate the map or click the “+” and “-” icons at the bottom-left to zoom in and zoom out.
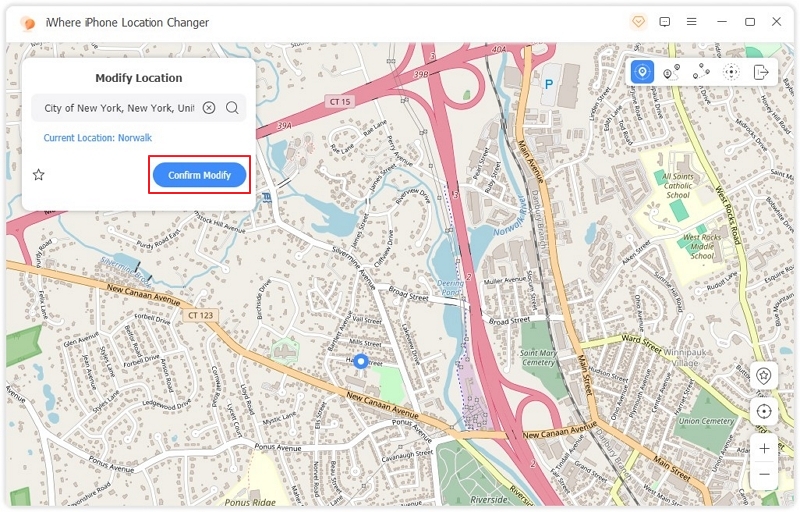
Once you find a suitable “Destination” to use as your fake location, enter the address into the “Search box” at the top-left side and click “Confirm Modify” to start faking your iPhone location.
Now, you can share the fake location to the contact who requests your location.
Part 4: Why Can’t I Share My Location on iPhone
There are different reasons why you might be unable to share your location on your iPhone. In this part, we’ve explained these reasons and shared quick fixes you can use to resolve them efficiently.
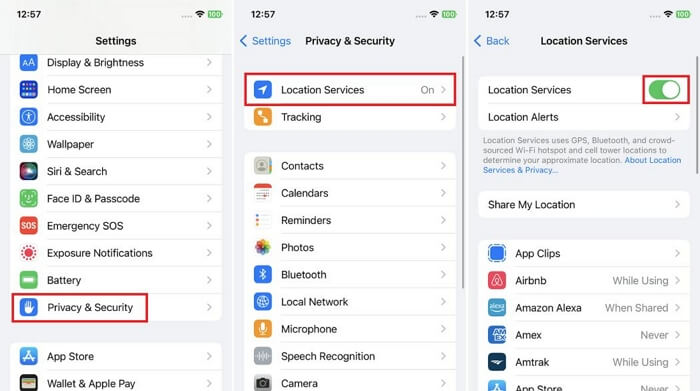
Reason 1: Disabled Location Services
If the Location Services feature on your iPhone is not disabled, you can’t share your location on the iPhone.
Fix: You need to turn on the location service feature via your iPhone settings. Just open the “Settings” app and select “Privacy & Security” > Location Services > turn on Location Services toggle.
Reason 2: The location-sharing app doesn’t have the permission to access your location
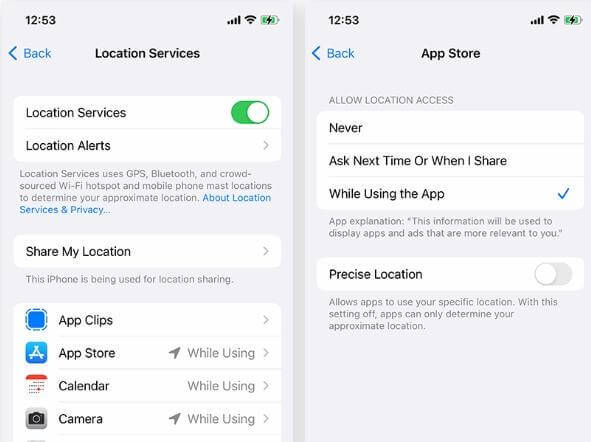
Another requirement you must satisfy to be able to share your location on iPhone is that the location-sharing app’s permission to access your location and share it must be enabled. So, if the relevant permission is not turned on for that app, you might not be able to share your location.
Fix: To turn on permissions for the location-based app, go to your iPhone settings. After that, go back to the main settings page and select “Privacy & Security”. Then, choose “Location Services” and locate the target app. Make sure the permission to access your location is “Always” and “Precise Location” is enabled.
Reason 3: Poor network connection
Bad internet connection can also prevent you from being able to share your location on your iPhone.
Fix: We recommend you switch to a more stable internet network. If you’re using a Cellular data network, switch to WiFi. And if you’re using WiFi, switch to a Cellular data network.
Reason 4: Obsolete apps
If you’re using a third-party app to share your location, you need to make sure the app is updated to its latest version to ensure smooth operation.
Fix: Check if there is any available update for the app via the “App Store” and install it immediately. Then, try using the app to share your location again.
Reason 5: Outdated iOS Software
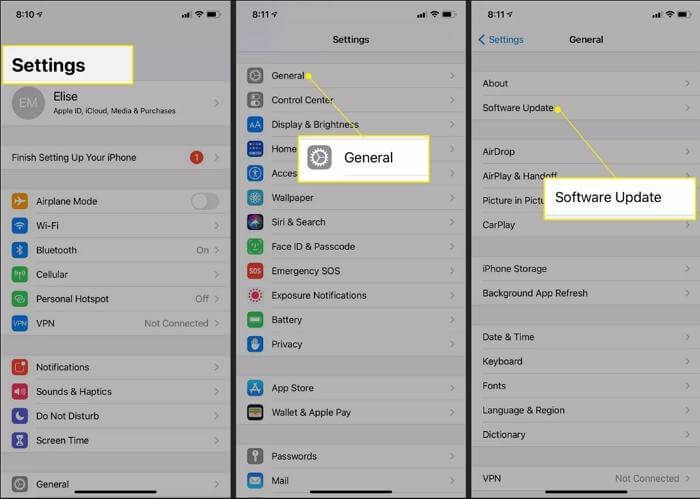
An outdated iOS software can also be the reason you can’t share location on your iPhone. Perhaps the current software version your iPhone is using contains bugs that are compromising the location-sharing operation.
Fix: Update your iPhone iOS to the latest version. You can do this by going to your iPhone settings and selecting: General > Software Update. Then, install any latest update available.
Conclusion
That’s all for now. We believe you already know how to share and request location on your iPhone using the different methods explained in the article. So, the next time you need to share or request a location, you should be able to get the job done without any hassle. Also, don’t forget to take note of the reasons why iPhone might not share your location. This will help you resolve any issue whenever you encounter such a problem.
