One of the most frustrating aspects of the Pokemon Go game is dealing with upload failure or underwhelming rewards from AR mapping tasks. While these are very helpful for the developers to develop the map even further, they can be a troublesome issue for you as a player. Luckily, you can easily disable the AR mapping tasks without any trouble at all.
In this guide, we will share a complete step-by-step process of turning off these troubling tasks. So, if you want to get rid of them, then stick with us till the end, we also leave an exciting method that makes Pokemon Go even more fun while being at home. Let’s get started.
Part 1: What is AR Mapping Tasks?
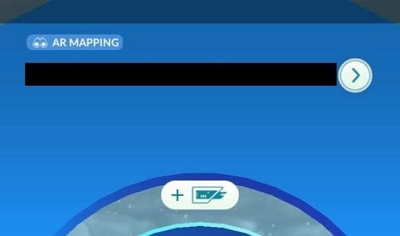
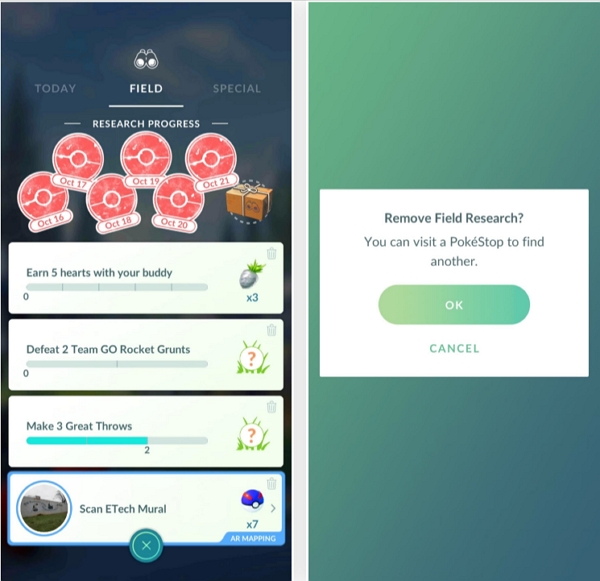
AR Mapping Tasks are special quests in the Pokemon Go game where you will need to scan a PokéStop using your phone’s camera. Doing this helps Niantic, the developers of the game, improve the in-game map data. When you complete an AR mapping task, you also get rewarded with several items in the game. However, Not all PokéStop will have AR mapping tasks in the game. Only a PokéStop that has a special “AR Mapping” designation displayed above its name will offer these tasks.
How to Get AR Mapping Tasks?
If you’re interested in contributing to the map data of the game, and helping the developers improve the state of the game, then here’s how you get AR mapping tasks.
Look for the AR Designation:
When you are exploring the map, keep an eye out for PokéStops with the “AR Mapping” designation on the map.
Spin and Check Tasks:
Next, you just approach the PokéStop and spin it like you would do in general. After spinning it, you should see the “AR Mapping Task” in the Field Research Queue of your game. Keep in mind, you have to be level 20 or above.
Part 2: Why Would People Want to Disable AR Mapping Tasks?
Now, let’s talk about what makes these AR mapping tasks so frustrating. Here are the key reasons to disable AR mapping tasks in the game.
- An AR mapping task usually takes up one slot in the field research queue which prevents potentially getting other special tasks like Spiritomb or Stardust tasks.
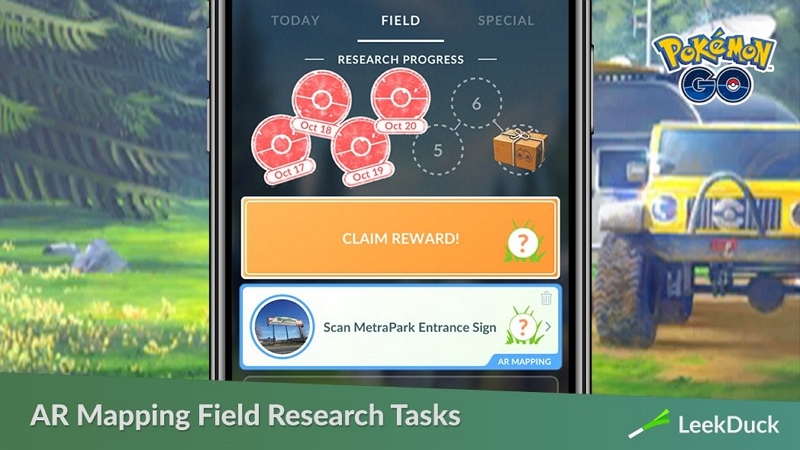
- Typically, AR mapping tasks come with very underwhelming prizes such as Pokeballs and potions. It’s very low motivating compared to other special tasks where you get evolution items and valuable resources.
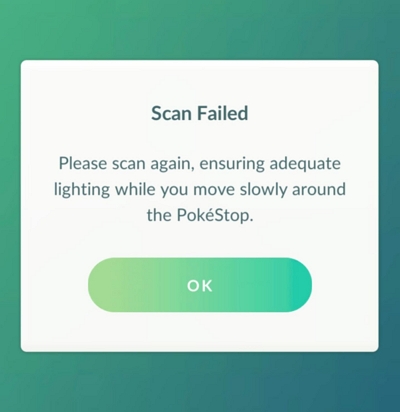
- The most frustrating part of these tasks is that you may have to scan multiple times due to upload failure to complete the task.
Part 3: How to Turn off AR Mapping Tasks in Pokemon Go?
Unfortunately, there is no direct or official way from the Pokemon GO app to turn off AR Mapping Tasks in the game. However, the community has come up with a trick that can help you avoid getting them in the game completely. Here’s how it works:
Step 1: Spin a PokéStop labeled with the AR Mapping Designation
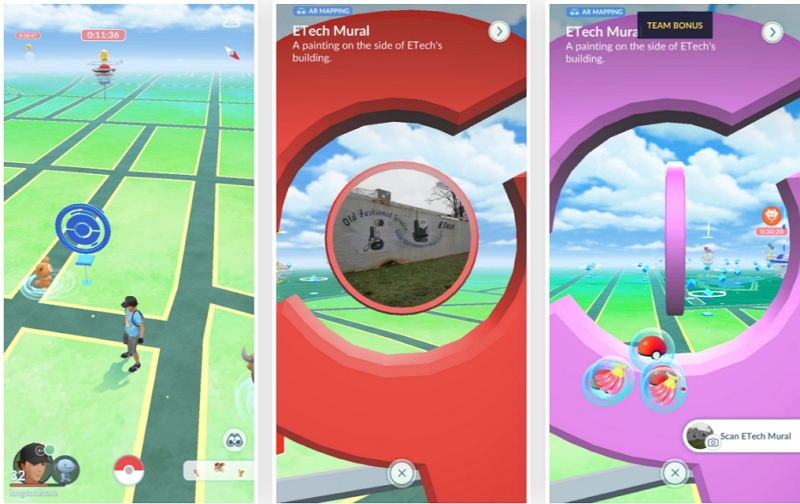
If you encounter a PokéStop with the AR Mapping designation spin it like you normally would. There’s a chance you might receive the AR Mapping Task. When you get the task, make sure that you are not taking any footage or scanning anything. Then, move on to step 2.
Step 2: Retain the task in your Field Research Queue
In the next step, all you have to do is move on while keeping the task incomplete in the Field research queue. As the AR mapping tasks have their own slots, you will still have three free slots available to spin other PokéStops for other special tasks. As long as there is an incomplete task in your queue, the game will not offer any more AR mapping tasks to you.
Part 4: How to Fix Pokemon GO AR Mapping Tasks Not Working?
If your only objection to AR mapping tasks is about the frustrating malfunctions with it, then there is a way to fix them. Usually, there are two common issues that players face when attempting these tasks. Let’s take a look at those issues and then we will move on to solving them one by one.
Issue 1: Scanning/uploading fails a LOT.
This is the most common issue that almost every trainer faces when they are attempting AR Mapping tasks. The scanning process seems to be quite unresponsive, or uploads might fail repeatedly which gets very frustrating for the players. There are several reasons for this to happen, such as –
- Gyroscope Sensor issues: The AR features need your device’s gyroscope sensor to work properly. This sensor helps track movement and orientation in 3D space. If your device doesn’t have a working gyroscope sensor, you won’t be able to accurately capture the surroundings in the game.
- Software Bugs: Sometimes, problems can occur within the Pokemon GO app itself. If there are any bugs or glitches in the app related to the AR features, it can disrupt the scanning and uploading process.
- Insufficient Storage Space: When you scan an area in the game, the data needs to be stored on your device before it’s uploaded to the game’s servers. If your device doesn’t have enough storage space, you might have trouble uploading the data, causing issues with the AR features.
Solution 1: Make sure your device has a gyroscope sensor
The first and obvious solution to try here is to check if your device has a gyroscope sensor or not. If it lacks this sensor, you won’t be able to complete AR Mapping tasks at all.
How to check:Just open YouTube and search for the 360* videos. Play anyone and try to move your device left or right. If the video frame moves as you tilt or rotate your device, then it’s likely equipped with a gyroscope sensor. If not, then your device may not have one.

Solution 2: Update the software
To solve the bugs and glitch issues, you have to ensure that you’re running the latest version of Pokemon Go or not. Usually, if such bugs or glitches exist then the developers will provide updates with bug fixes and performance improvements. Open your app store and check for available updates. Install them before attempting another AR Mapping task.
Solution 3: Free up storage
If you have a gyroscope, and there are no updates on the store, then it might be a storage issue. Check if you are running out of storage or not. If you are then, free up some storage space on your device by deleting unnecessary files, apps, or photos. This ensures the app has enough space to store the scan data for uploading
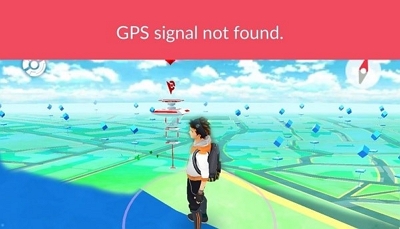
Issue 2: The outdoor network signal is poor.
While AR Mapping tasks can technically be done indoors, ideally, they should be completed outdoors for the best results. However, if you’re in an area with a weak or unstable internet connection, you might face upload failures despite a successful scan. There are two prime causes for this issue to happen. They are –
- Spotty Connection: Uploading the scan data to Niantic’s servers requires a stable internet connection. If your signal keeps dropping or is very weak, the upload process might be interrupted, or fail.
- Server Overload: In rare cases, Niantic’s servers could be experiencing high traffic, causing upload delays or failures for multiple users.
Solution 1: Log out and log in to Pokemon GO
Make sure to log in with locations off, so that your phone doesn’t constantly poll the network and check for Pokemon nearby. Here’s how you do it –
Step 1. Head over to the Pokemon Go main menu.
Step 2. You will see the “sign out” option if you scroll down. Tap on it.
Step 3. Now, enter your login information and sign in again.
Step 4. The AR should be fixed now.
Solution 2: Get a stronger signal or Wi-Fi
Another solution for a weak network signal is to move to a location with a stronger cellular signal. If you have access to Wi-Fi it’s even better. A stable internet connection is crucial for successful uploads.
Bonus: How to Play Pokemon Go without Going Out!
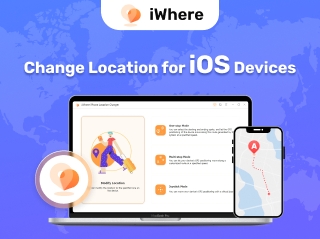
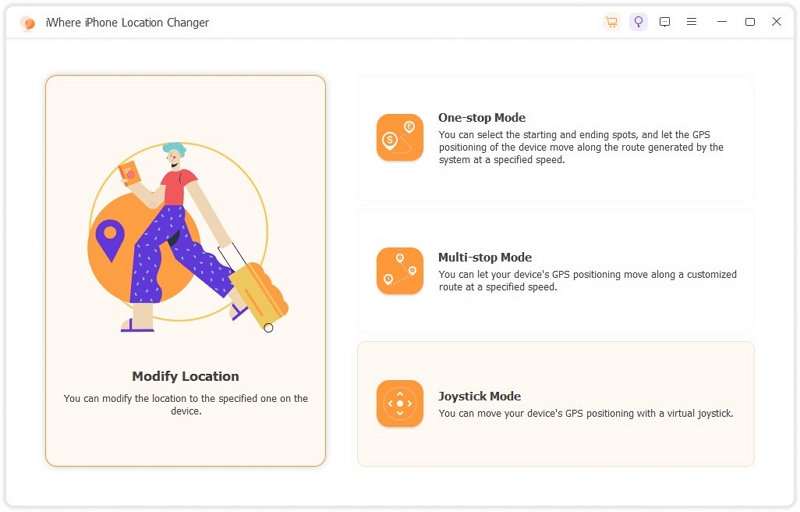
Whether you like AR Mapping tasks or not, one thing you will definitely love is being able to play the game right from the comfort of your home. With the help of iWhere iPhone Location Changer, you won’t have to go outside to play Pokemon Go anymore. Whether it be hatching eggs, catching Pokemon, visiting PokéStops and Gyms, or participating in various events, all can be done while sitting on your couch. The best part is that you will never have to worry about getting banned for using third-party software because of its handy features.
Key features:
- Successfully fake locations with speed adjustment settings ranging from 1m/s to 50m/s.
- Ability to move based on different needs with the 4 available movement modes, including One-stop Mode, Multi-stop Mode, Joystick Mode, Modify Location Mode.
- Option to save favorite routes and location settings with shareable GPX file format.
- Walking freely in any AR setup using the flexible joystick mode.
- Easy to use the software with just a single button needed to change location without requiring any jailbreak.
How to use joystick mode for changing location in Pokemon Go?
Step 1: Connect your iPhone device to it. In the home screen, check the box to agree to the disclaimer and then click on “Start”

Step 2: Select the “joystick mode” on the next screen, as it will give you a lot of flexibility in changing your location in the software. This mode works best if you want to freely roam around the Pokemon Go map for maximum activities.
Step 3: In the joystick mode, there are two movement controller modes available. One is the Free Mode where you use the keyboard, another one is Mouse Mode where you use the mouse for navigation and movement. You can pick any mode and switch between depending on comfort.
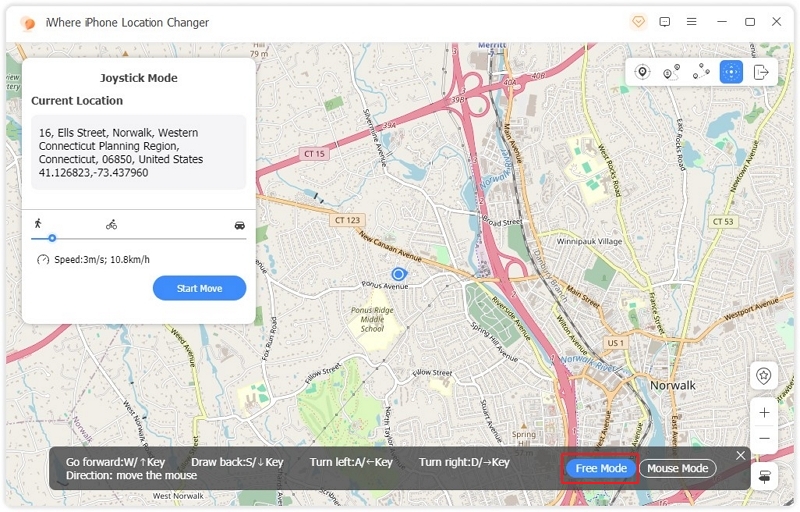
Step 4: Before you start moving on the map to change your location, you have to adjust the speed. Use a speed that is more human-like. After adjusting the speed, you can click on “Start move” to start simulating your new location.
Step 5: Now, open Pokemon Go on your device, and you find yourself in the same location as the software. Whenever you move on the software, your character in the game will also move on the Pokemon Go map.
FAQs
Is there a specific technique for completing AR Mapping tasks successfully?
Yes, there are several things you can do to make sure you are completing the AR Mapping tasks flawlessly. For instance, try scanning the location under good lighting conditions and avoid harsh sunlight or dim environments. When scanning make sure to hold your phone steady and move it slowly in a circular motion. Start the scan close to the PokéStop and gradually move back while maintaining the circular motion. Doing these can ensure you complete the tasks successfully.
Can I delete an AR Mapping task if I accidentally accept it?
Yes, you can delete any unwanted research task, including AR Mapping tasks. But doing so will also open up a slot for another potential AR Mapping task in the future. This way you won’t be disabling the tasks in the game.
What are the benefits of completing AR Mapping tasks?
AR Mapping tasks aren’t that beneficial when it comes to the players and their achievements. Usually, these tasks contribute to a richer gameplay experience for everyone, as you will be helping the developers improve the game condition. They help Niantic create a more precise in-game map, potentially leading to better spawn points, PokéStop locations, and Gym placement in the future. These may not be rewarding for you, but they can be helpful for the community.
Conclusion
To conclude, getting rid of the AR Mapping tasks isn’t that difficult at all. All you have to do here is accept the task and keep it as an incomplete task by not attempting it at all. While you give up a slot this way, you also eliminate the hassle of ever encountering the tasks. As for more tasks, rewards, and events, you can always rely on the iWhere iPhone Location Changer to spoof your location and explore the majority of the map to do more. Maybe potentially Catch ‘em all?