The advent of the location-sharing feature on iPhone has undeniably simplified various aspects of our lives. However, it has also raised concerns about privacy, as it allows others to track our movements effortlessly. While sharing your location can be beneficial for purposes like locating a lost device or staying connected with trusted individuals, there are instances when you might wish to halt location sharing temporarily without alerting anyone.
In today’s post, we’ll delve into the common reasons why you might want to temporarily cease sharing your iPhone’s location and offer detailed, step-by-step instructions applicable to any iPhone model on how to execute this operation discreetly. Stay tuned to learn how to safeguard your privacy effectively!
Part 1: Reasons You Might Want to Stop Sharing Location on Your iPhone Temporarily
There can be various reasons why you may want to stop sharing your iPhone location temporarily without anyone knowing. This includes:
- Anonymity: If you are planning a surprise party for a loved one or wish to keep your whereabouts private for any other reason, disabling location sharing on your iPhone without others knowing is crucial to maintain the element of surprise.
- Privacy: Sometimes, you might need your privacy. Perhaps you suspect someone you share your location with is doing something that can compromise your information. You can easily stop sharing your location temporarily until he/she clears the air on what’s happening.
- Manage Battery Usage: You might also want to stop sharing your iPhone location to manage battery usage, especially when you’re embarking on a journey to a location with a limited power supply.
Part 2: How to Temporarily Stop Sharing Location Without Them Knowing on iPhone
Regardless of your reason to temporarily stop sharing location without notifying anyone on iPhone, the good news is there are different ways to achieve your objective without requiring technical knowledge. In this part, we will show you five efficient methods you can try.
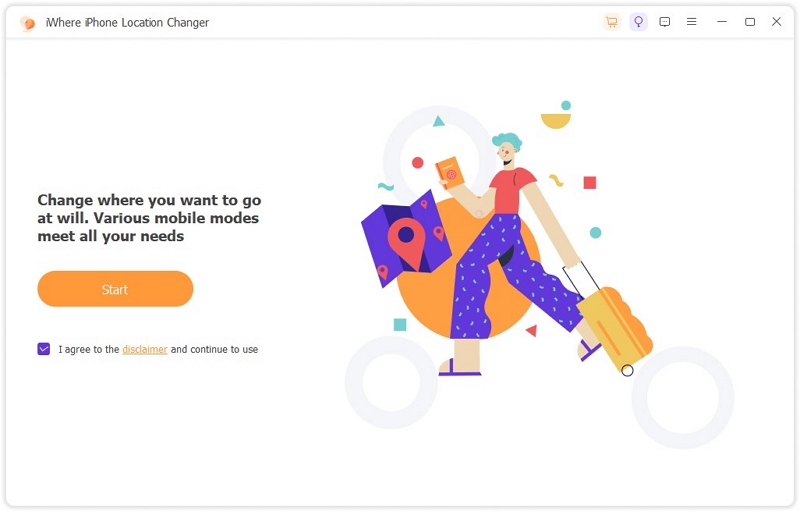
Method 1: Fake Location Using iWhere iPhone Location Changer
The most efficient way to temporarily stop sharing location on iPhone without them knowing is to utilize a location spoofing app. iWhere iPhone Location Changer is a powerful location spoofer that utilizes an advanced algorithm to fake your iPhone GPS location, enabling you to stop sharing your iPhone location discreetly.
With iWhere iPhone Location Changer, you can fake your iPhone location to stop sharing your current location without compromising your regular activities. And the best of all? It can come in handy to fake location on various platforms, including social media apps, Google Maps, YouTube, and lots more.
iWhere iPhone Location Changer also guarantees 100% privacy when faking iPhone location.
Key Features
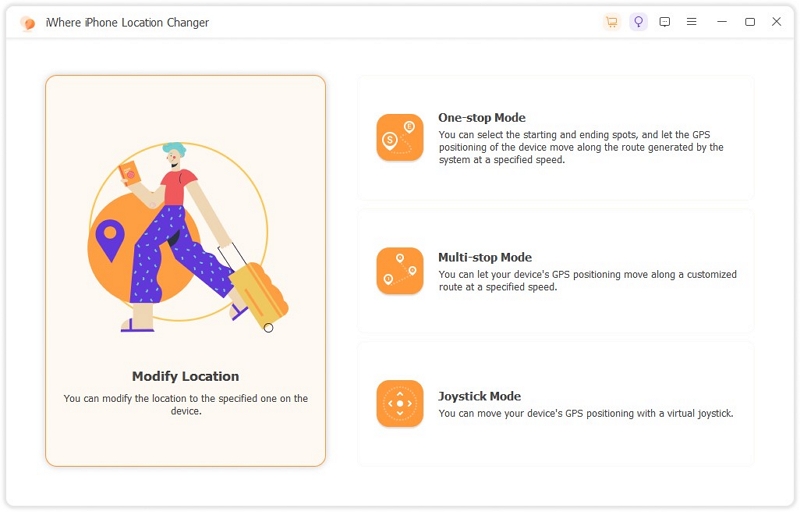
- Offers more than one location faking modes: one-stop mode, multi-stop mode, and joystick mode.
- Supports importing and exporting GPX files to enable you to use custom location settings.
- Offers customizable speed within the range of 1 m/s to 50 m/s.
- Facilitates location spoofing on AR games like Pokemon Go, allowing you to catch rare Pokemon without having to leave your current location.
Step 1: Download and install the Location Spoofing app from iWhere’s official website. Then, set up the tool on your computer using the on-screen instructions.
Step 2: Click the “Start” button from the main interface. Then, connect your iPhone to the computer.
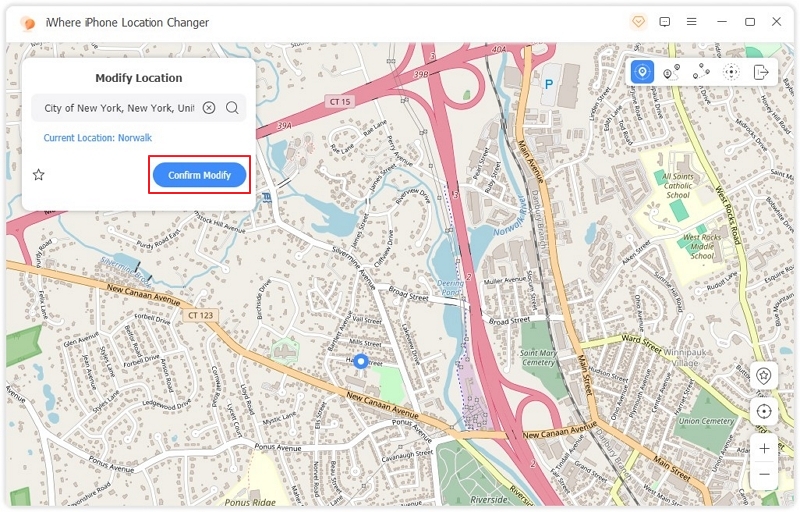
Step 3: Click on “Modify Location”.
Step 4: Enter the “Destination” you wish to fake your iPhone location with into the “Search Box” at the top-left. Then, click “Confirm Modify”.
Method 2: Turn on Airplane Mode
Turning on airplane mode on your iPhone is another reliable way to temporarily stop sharing locations without them knowing. But this method restricts your ability to perform operations that require network connection. Also, if you try connecting to a Wi-Fi network, your location starts sharing again.
See the steps to turn on airplane mode on iPhone below:
Step 1: Open the “Control Center” on your iPhone.
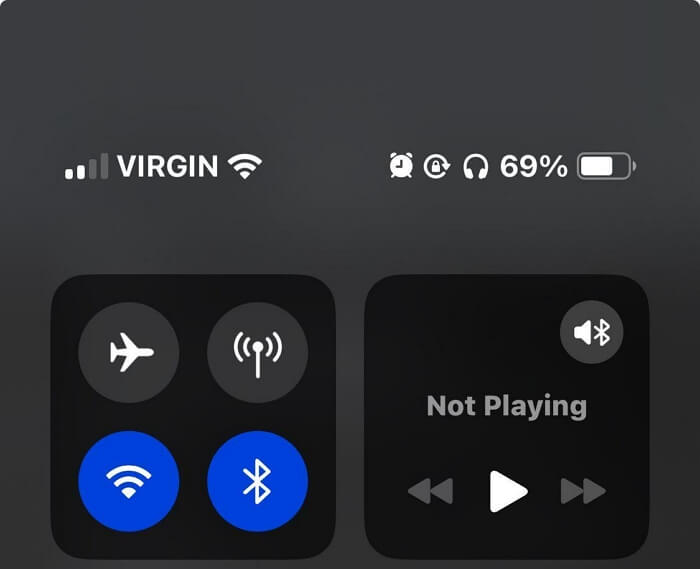
Step 2: Tap on the “Airplane” icon. Airplane mode is enabled if the icon turns “Orange”.
Limitation: You can’t make phone calls or browse the internet when airplane mode is turned on.
Method 3: Disable Location Service
Since enabled location service is necessary for sharing iPhone location, you can easily disable location service to temporarily stop sharing your iPhone location. Here is how:
Step 1: Navigate to the “Settings” app and select “Privacy & Security”.
Step 2: Tap on “Location Services”.
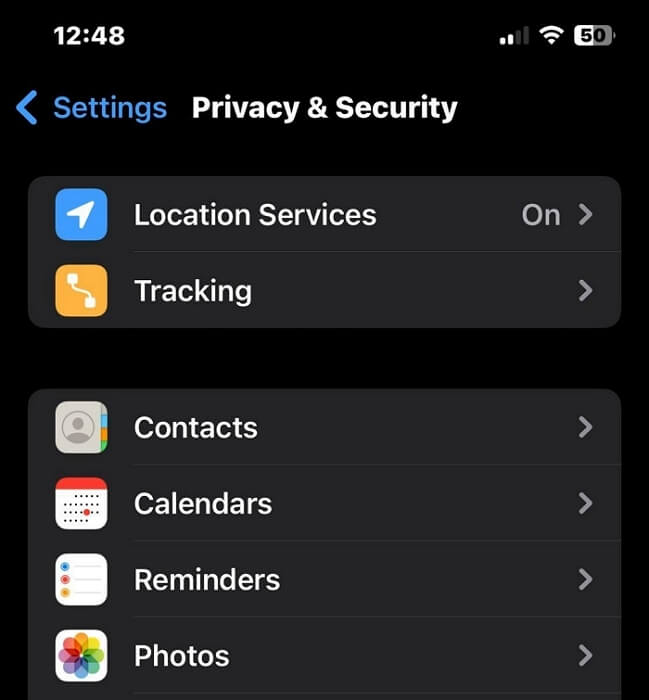
Step 3: Tap on the “Toggle” next to “Location Services: to turn “Gray”.
Limitation: Disabling location service might compromise the function of apps that utilize location service features on your iPhone.
Method 4: Power Off Your iPhone
Another proven method you can use to temporarily stop sharing iPhone location without them knowing is to turn off your iPhone. But this is only helpful when you want to temporarily stop sharing your iPhone location because you’re not using it.
For iPhone X or Later
Step 1: Hold down the “Side” button and “Volume Up” button.
Step 2: Do not release the button until the “Power Off” screen shows up.
Step 3: Swipe the “Power Off Slider” to the relevant direction to turn off your iPhone.
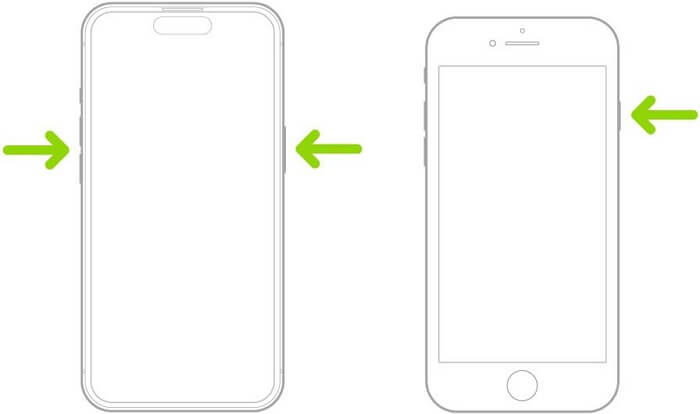
For iPhone With Home Button
Step 1: Press the “Side/Top” button until you see the “Power Off” slider.
Step 2: Swipe the “Power off” slider to the right to power off your iPhone.
Limitation: Your iPhone becomes useless.
Method 5: Turn Off Find My Permission to Share Your Location
If you don’t want to switch off your iPhone and want to stop sharing your location on Find My, you can resort to disabling Find My permission to share your location information.
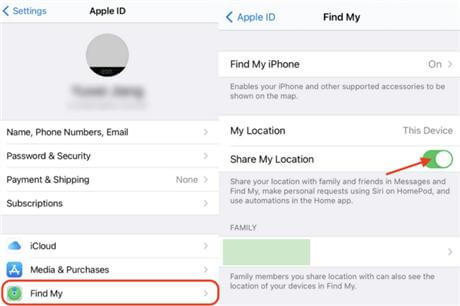
Step 1: Launch “Settings” and tap on the banner displaying your “Apple ID Name”.
Step 2: Select “Find My”.
Step 3: Turn off the toggle next to “Share My Location”.
Limitation: Turn off Find My will make it unable to find lost iPhone.
Method 6: Share Your Location From Another iPhone
If you have an idle iPhone, that’s good news because you can easily use it to temporarily stop sharing your current location without notifying anyone on Find My. All you need is to use the idle iPhone as your location on Find My. The steps for this method are explained below:
Step 1: Launch the “Find My” app on another iPhone. Then, log in to your account using the same Apple ID credentials on your original iPhone.
Step 2: Tap on the “Me” tab at the bottom right side.
Step 3: Tap on “Use This iPhone as My Location”. Once you do this, your location will start sharing from the selected iPhone.
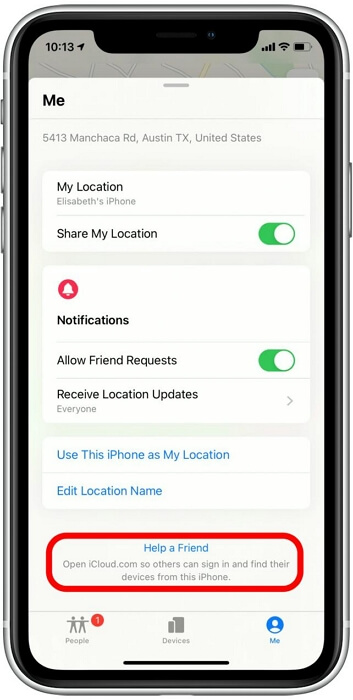
Limitation: You need another iPhone to be able to perform the operation and neither a new nor used iPhone is cheap.
FAQs
Q1: Does Find My Notify When I Stop Sharing My Location?
No, Find My does not send notifications when you stop sharing your location.
Q2: Will Someone Know If I Stop Sharing My Location With Them?
While the person tracking you might not get notified when you temporarily stop sharing location with them, they can suspect you’ve stopped sharing location when they open Find My, as your iPhone location won’t be displayed on their list.
Conclusion
Ultimately, the solutions above will enable you to temporarily stop sharing your location on iPhone without them knowing. So, whether you choose to use an advanced tool like iWhere iPhone Location Changer or other alternative methods we recommend, you can enjoy full control over who can access your current location. However, be sure to consider the limitations of each method before making a final choice.