Adding location data to your photos can be a great way to keep track of where each photo was taken and create a visual diary of your travels and experiences. So, whether you’re a professional photographer or just someone who enjoys capturing precious moments, and you’re wondering how you can add locations to photos on your iPhone, you’ve come to the right page.
Today’s guide explains how to add location to photos on iPhone using manual or automatic methods. Keep reading to find out more!
Part 1: How to Automatically Add Location to Photos on iPhone
The quickest way to add location to every photo you take on your iPhone is to do it automatically. This can be done via your device’s settings app. All you need is to enable location permission for the camera app. The steps below explain how you can do this:
Step 1: Launch your iPhone “Settings” app.
Step 2: Select “Privacy & Security” and tap on “Location Services”.
Step 3: Locate the “Camera” apps using location. Then, turn on “Precise Location” and select “While Using App”.
Once you complete this process, location will be added to any photos you take using your iPhone camera.
Part 2: How to Manually Add Location to Photos on iPhone [Inbuilt Photos App]
In case you don’t want your location to show in all photos you take using your iPhone camera, you can use the manual technique to get the job done. This is also a very simple process and can be done via the Photos app.
We’ve explained different procedures to add location to photos on iPhone manually below:
Method 1: Add Location To A Single Photo
Step 1: Open your “Photos App”.
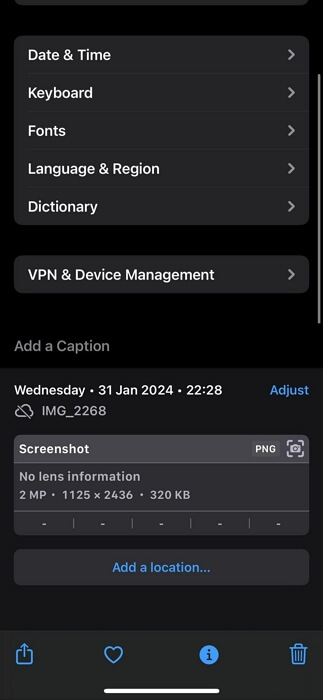
Step 2: Select the “Photo” you want to add location to. Then, tap on the “Info” (i) icon at the bottom of your screen.
Step 3: Tap on “Add A Location”.
Step 4: Type the “Location” into the “Search Field” and select it from the “Search Result”.

Method 2: Add Location To Multiple Photos
Step 1: Tap on “Select” from the “top-right” corner of your screen in the “Photos” app.
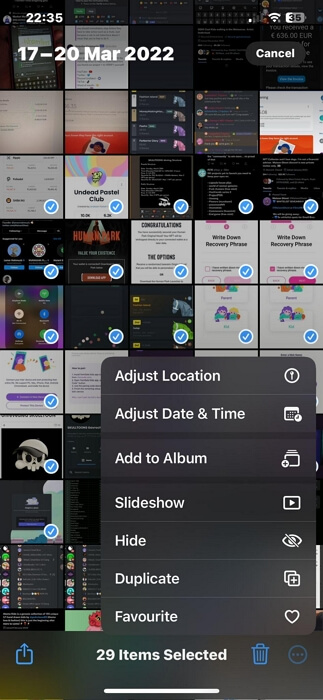
Step 2: Select the “Photos” you want to add location information.
Step 3: Tap on the “Three-dot” horizontal icon at the bottom-right side. Then, select “Adjust Location”.
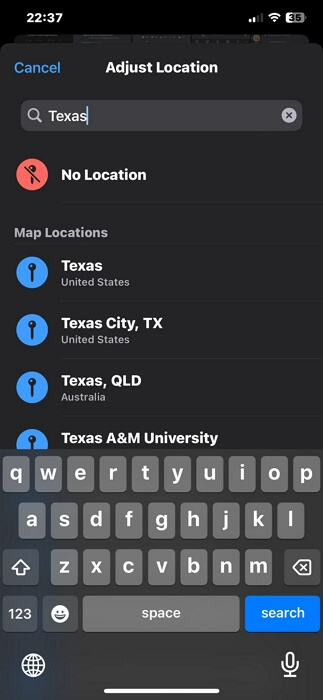
Step 4: Type a “location” into the “Search” area and select the correct location from the search result to finish.
Part 3: How to Add Location to Photos on iPhone[Google Photos]
You can also add location to your iPhone photos using the “Google Photos” app. However, you must have backed up the “Photos” to your Google Account to be able to get the job done.
In this part, we’ve discussed the steps to add location to single or multiple photos in Google Photos iPhone.
Method 1: Add Location To A Single Photo
Step 1: Launch the “Google Photos” app and select the “Photos” that you wish to add your “location”.
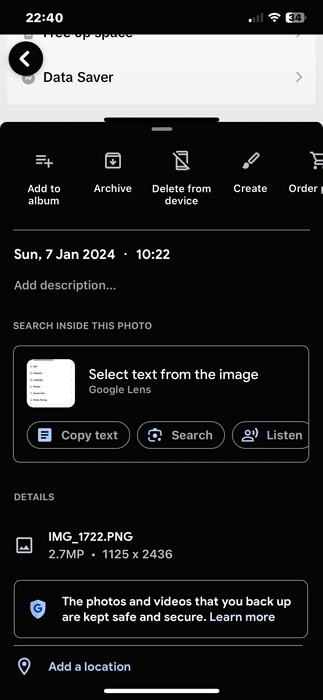
Step 2: Tap the “Three-dot” horizontal icon.
Step 3: Select “Add a Location” from the “Menu” that pops up.
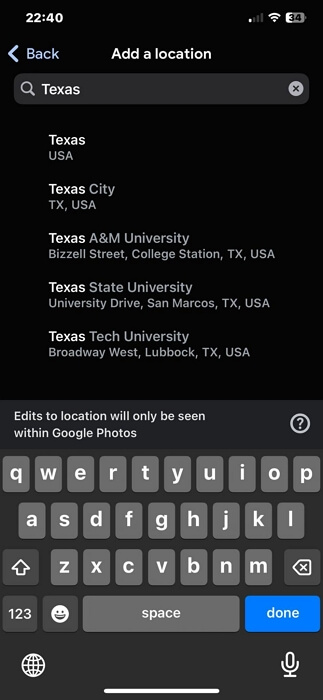
Step 4: Enter a “Location” in the field that says “Enter Location”. Then, select the correct option from the “Search Result”.

Method 2: Add Location To Multiple Photos
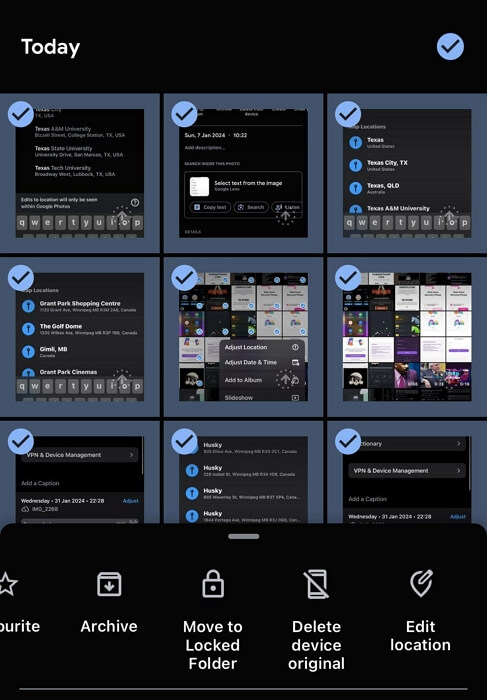
Step 1: Go to “Google Photos” and select “Photos” to add a location.
Step 2: Swipe from left to right on the “Menu” that pops up from the bottom of your iPhone screen. Then, select “Edit Location”.
Step 3: Type in the “Location” into the search field and select the correct option from the search result. The selected location should be added to your photos instantly.
Bonus 1: How to Fake Location on iPhone While Taking Photos
When it comes to faking location on your iPhone while taking photos, iWhere iPhone Location Changer makes it easier than you might think!
Whether it’s for privacy, security, or simply for fun, iWhere iPhone Location Changer offers efficient features that you can use to fake iPhone locations while taking photos or performing other location-based activities. It allows you to utilize advanced location-faking algorithms to spoof your iPhone location from a computer without getting detected.
Also, iWhere supports excellent location faking modes, allowing you to fake your iPhone location from a specific region or multiple regions. Plus, you can import GPX files to add custom routes to simulate your location effortlessly.
Key Features
- Best one-click iPhone location faking software.
- Simulate your iPhone location for any kind of app and website using one-stop mode, multi-stop mode, or joystick mode.
- Efficient joystick functionality specially created for playing location based AR games like Pokemon Go.
- Boasts the finest user interface that makes navigation easy for all users.
Step 1: Open the “iWhere iPhone Location Changer” app on your computer and click “Start”.

Step 2: Connect your iOS device to the computer using a good USB cable and click on “Modify Location".
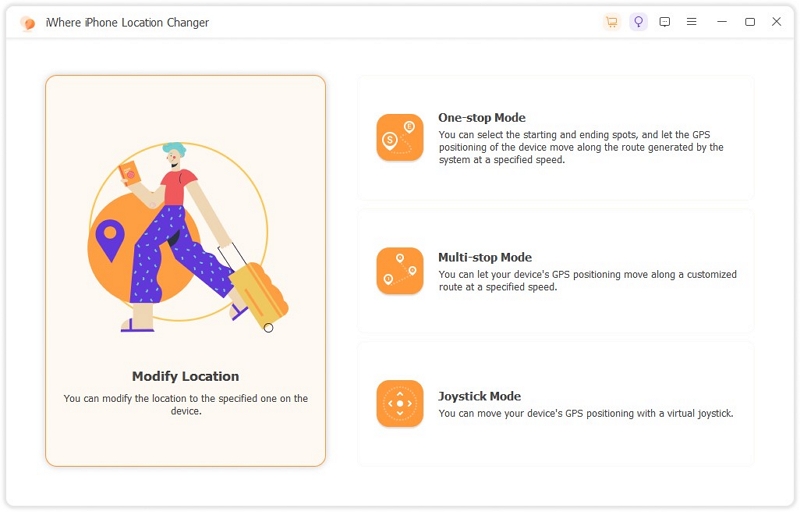
Step 3: Now, a map, just like the one in the screenshot below will appear with your current location. You just have to enter a “Destination” to fake your location into the “Search Field” at the top-left and click “Confirm Modify” to start faking your iPhone location.
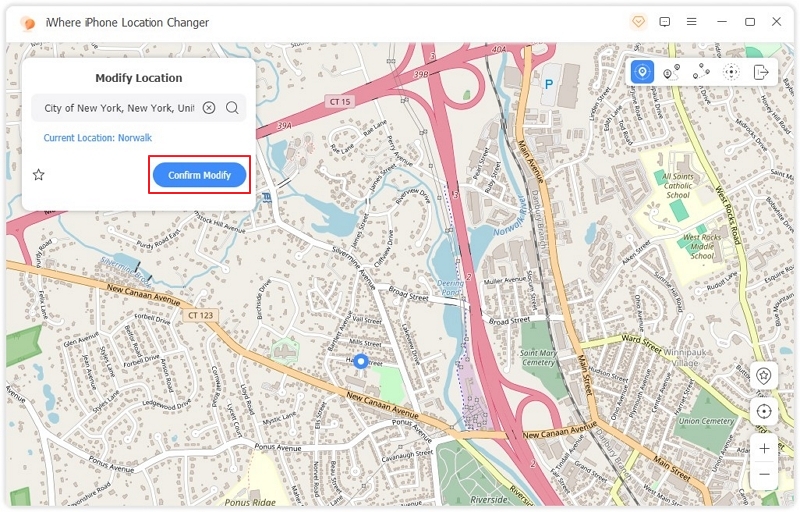
Once you start spoofing your iPhone location, pictures you take will appear in the region you used as a fake location.
Bonus 2: How to Show or See Photos’ Location on iPhone
If you’re wondering how to view the location added to your iPhone photos, we got you covered. You just need to do the following:
Step 1: Go to the “Photos” app on your iPhone.
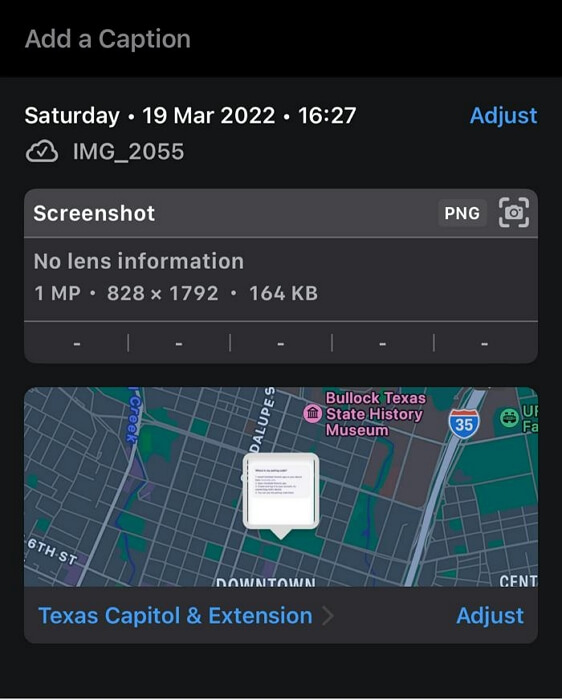
Step 2: Select the “Photo” that you want to view location from and tap on the “i” (info icon), at the bottom of the screen.
Step 3: You should see the photo’s location. You can even change the “Location” by tapping “Adjust”.
Bonus 3: How to Add Location to iPhone Photos with iCloud Sharing
In case you share photos with someone via iCloud, you can also add information about the location where the photos were taken. This involves manually creating an album of the photos and adding the location data. The process has been explained in the steps below.
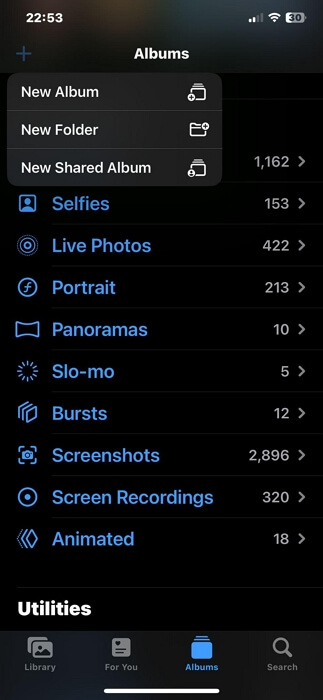
Step 1: Open your iPhone “Photos” app and select “Album” from the bottom of the screen.
Step 2: Tap on the “Plus” icon at the top-left and select “New Shared Album”.
Step 3: Add the location information just in the text box as shown in the screenshot below and tap next.
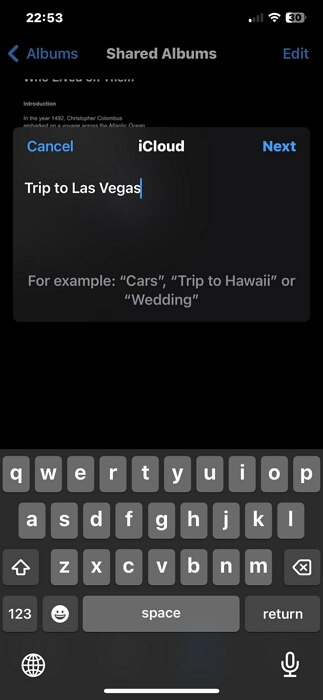
Step 3: Add the people you want to share the photos with and tap “Create”.

FAQs
Why Won’t iPhone Photos Show Location?
If iPhone location does not show in your photos, then you have not turned on the location service feature for the camera app. Or it could be due to bugs, as there have been several reports from iOS users online concerning iOS 14 and iOS 17.
How Do I Allow My iPhone to Show Location on Photos?
To allow your iPhone location to show on your iPhone, you must enable the Camera app access to your iPhone location. Change the settings from “Never” to “While Using The App”.
Conclusion
The location feature in iPhone photos app is a simple yet powerful feature that can add a whole new dimension to your photo collection. So, whether you choose to add locations to your photos automatically or manually, the above guide has provided the necessary information to help you execute the task smoothly. We also discussed how you can fake your iPhone location when taking photos on iPhone. All you need is the powerful iWhere iPhone Location Changer for such a task.