Ready to discover a way to create Ingress new portal? Before Pokémon Go became a sensation, Niantic introduced Ingress, a revolutionary game. With over a million players worldwide, Ingress lets you interact with mysterious portals scattered around real-world locations, all detected by your device’s GPS. These portals come in green, grey, or blue, representing different factions in the game. While the game can be thrilling, it does involve a lot of moving around, which might not suit everyone. In this article, we’ll discover how to add portals in Ingress. Also, we’ll introduce the best way to change Ingress Prime’s GPS location.

Part 1: What is Portals in Ingress?
In “Ingress”, Portals are real-world locations marked by players using their mobile devices. These locations can be anything from landmarks, public art installations, historical sites, or unique local businesses. Portals serve as points of interaction within the game, where players can deploy resonators and other items to control them for their faction, either the Enlightened or the Resistance. They are the focal points of gameplay, as capturing, linking, and controlling Portals are essential for strategic dominance in the game.
Ingress Portal Criteria Details:
Here are the details for the Ingress portal criteria:
- Public Spaces: Portals should be located in public spaces that are safe and accessible to everyone, such as parks, plazas, and public art installations.
- Historical or Cultural Significance: Portals should have historical, cultural, or artistic significance. This could include landmarks, statues, murals, and other noteworthy features.
- No Duplicates: Portals should not duplicate existing portals in the same area. This helps ensure a diverse and interesting playing experience for players.
Part 2: How Do I Add Portals to Ingress?
Wondering how to add portals in Ingress? Adding portals to Ingress is a crucial aspect of gameplay, as portals serve as key locations for interaction within the game. Here’s how to add portals to Ingress:
Step 1: Tap Main Menu, then Nominations (you need to be at least level 10).
Step 2: Go through the info screens and tap NEXT.
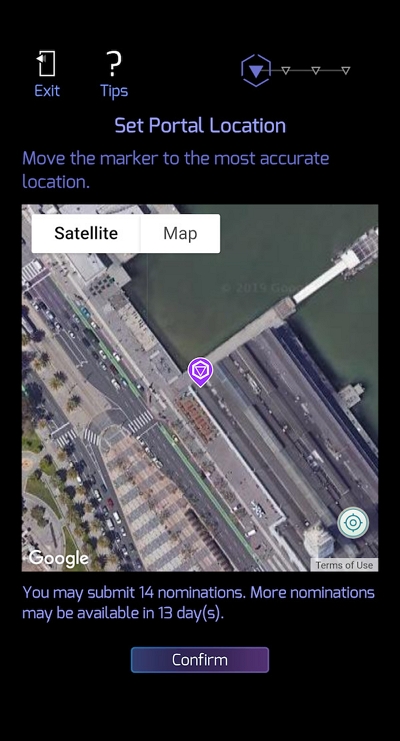
Step 3: Drag the map to place the Portal marker where you want, then tap “Confirm”.
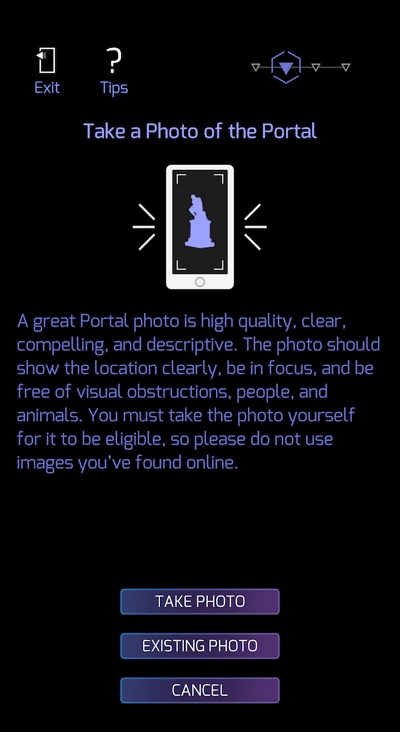
Step 4: Take a clear photo of the Portal or choose one from your phone.
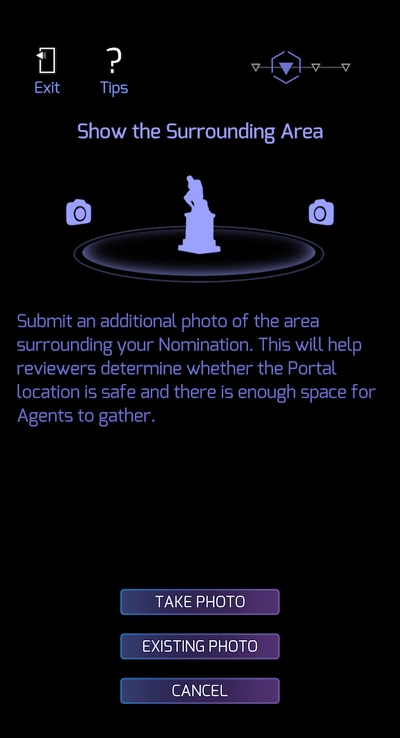
Step 5: Take another pic of the area around the Portal, then tap NEXT.
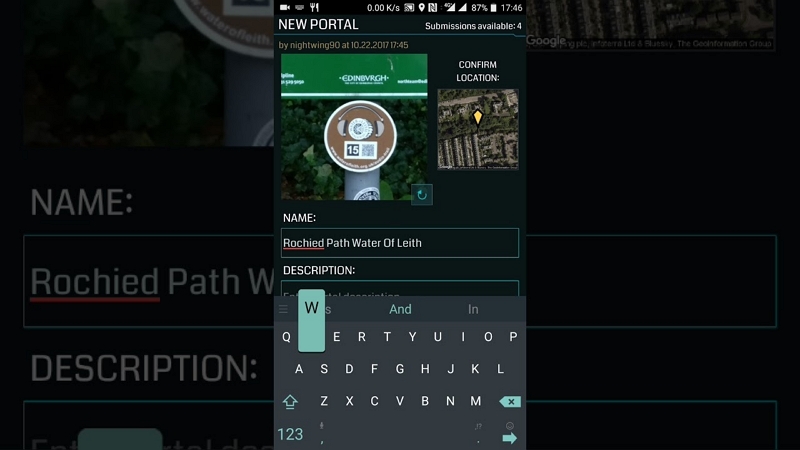
Step 6: Name the Portal and add a bit about it.
Step 7: Review everything and tap “CONFIRM”. Once done, you’ll get an email confirming it’s under review. It might take a while, but hang tight. You’ll be updated via email –
- If approved, great! Your contribution could bring more explorers. Not all nominated Portals make it into Ingress, though.
- If not approved, check the Portal criteria and try again. We get lots of nominations, but not all make it. Ready to add some awesome spots? Let’s go!
Part 3: How to Create Ingress Portal?
Creating an Ingress portal can be exciting, but it’s crucial to stick to the rules to make sure your submission goes through smoothly. Follow these steps to Ingress create new portal:
Step 1: Ensure your level. Make sure you’ve reached level 10 in Ingress. You can find out if you’re eligible to submit portals by looking for the NOMINATIONS button in the Main Menu.
Step 2: Remember the limits. Know that there’s a cap on how many nominations you can make, especially if you’re below level 10. You can only nominate 14 Points of Interest (POIs) every two weeks.
Step 3: Pick the right spot. Before submitting a portal, consider these points:
- The spot should be easy for others to reach and in a safe area.
- It must be something made by people and not moving.
- Avoid areas that might disrupt emergency services or are off-limits.
- Don’t submit things in private places, on roads, or in nature spots like lakes.
Step 4: Submit your chosen spot properly. Once you’ve found a good spot, follow these steps:
- Tap the NOMINATIONS button in the Main Menu.
- Make sure the location marker is spot on.
- Take a clear photo of the spot yourself, making sure it’s good quality and no people are in the shot.
- You can add more photos to show what the area looks like.
- Give your portal a name and write a bit about it, like its history or why it’s special.
- Double-check everything before you send it off.
- Be patient – approval takes time as higher-level players review them.
Follow these steps to up your chances of getting your portal approved. And always be mindful of where you’re submitting portals – quality and suitability matter.
Part 4: How to Submit Portal Edit in Ingress?
Once you’ve reached Level 10 in Ingress, you gain the valuable ability to suggest edits for Portals, including changes to their title, photo, description, or location. Follow these steps to Ingress submit new portal –
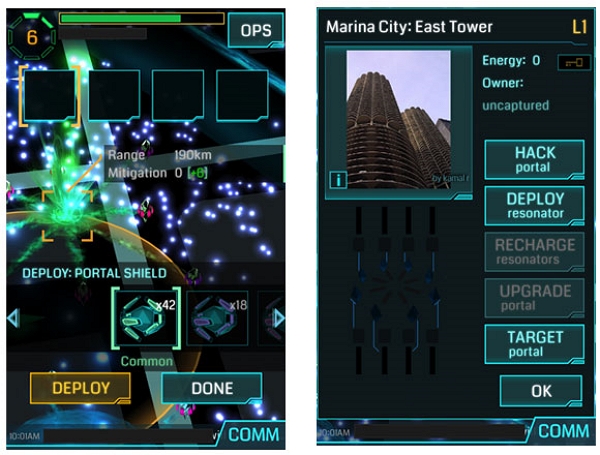
Step 1: Access the Portal Details. Start by locating the Portal in your Scanner. You can do this by tapping on it directly on your screen or by selecting the Portal’s name from the COMM interface.
Step 2: Select Edit Option. On the Portal details page, tap the three dots menu located in the upper right corner.
Step 3: Choose Edit Type. Depending on the edit you wish to make, select the appropriate option from the menu:
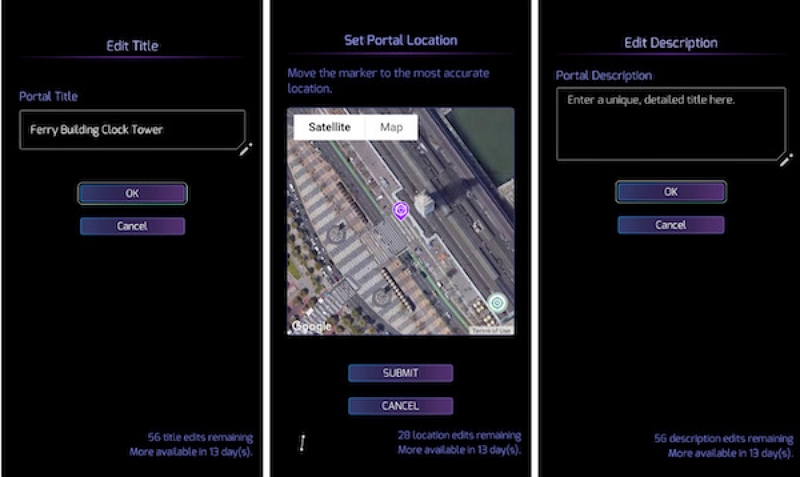
- Edit Title: If you want to suggest a new title for the Portal.
- Edit Location: For proposing a change in the Portal’s geographical coordinates.
- Add/Edit Description: To enhance or modify the existing description of the Portal.
Step 4: Provide Correct Information. Fill in the necessary details on the next screen. For location edits, you can adjust the marker on the map until it accurately reflects the desired location.
Step 5: Submit a Photo. If you’re suggesting a new photo for the Portal, tap “ADD PHOTO.” You can either take a new photo using your device’s camera or choose one from your device’s gallery.
Step 6: Finalize Submission.After selecting or capturing the photo, tap “SUBMIT” to send your edit suggestion for review.
Bonus: How to Change Ingress Prime GPS Location?
Switching gears to discuss changing the GPS location in Ingress Prime, a helpful way is to use the iWhere iPhone Location Changer. This tool gives you lots of options to change where your phone says you are. Once you install the app and connect it to your phone, you can easily move to any place you want. Plus, the iWhere iPhone Location Changer has different modes for changing your location, like one-stop, multi-stop, joystick mode, and modify mode, so you can have fun moving around virtually. It also lets you do things like bring in or send out GPX files, control how fast you move, and keep track of where you’ve been, all while making sure your gaming experience stays smooth.
Key Features:
- Change Speed: You choose how quickly your character moves, anywhere from walking pace to super-fast (1 m/s to 50 m/s).
- Modify Mode: Adjust your character’s route while they’re moving, ensuring they go where you want them to right away.
- Joystick Mode: With its handy GPS joystick, you can move your Ingress GPS location anywhere.
- Privacy: The iWhere technology helps you keep your online activities private and get around location-based restrictions.
Here are the steps to change Ingress Prime GPS location with iWhere iPhone Location Changer:
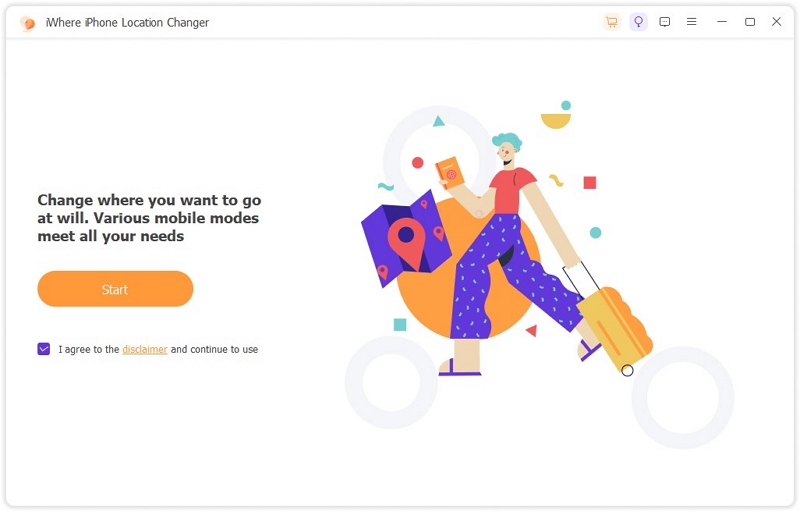
Step 1. Get started with iWhere: Open the iWhere iPhone Location Changer app from their official website. Connect your iOS device to the PC with a USB cable. Click “Start” and check the box below it.
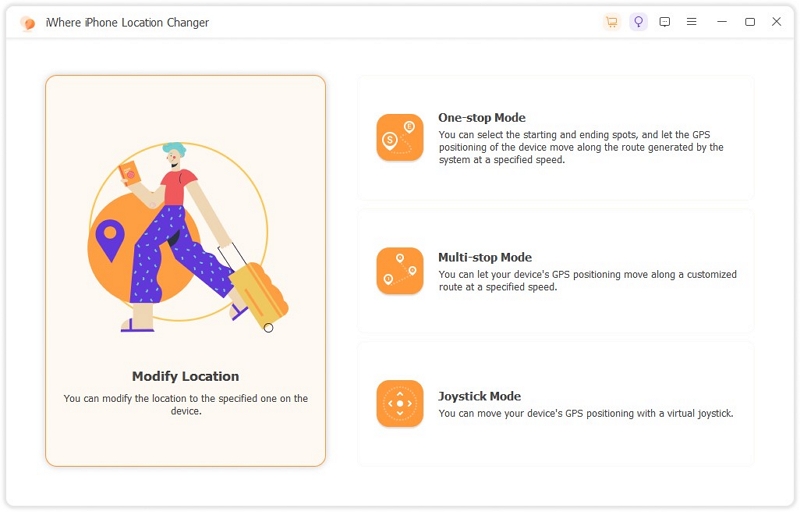
Step 2. Choose Mode: You’ll see 4 options on the program: Modify Location, One-stop mode, Multi-stop mode, and Joystick mode. Choose “Modify Location” and hide your live location.
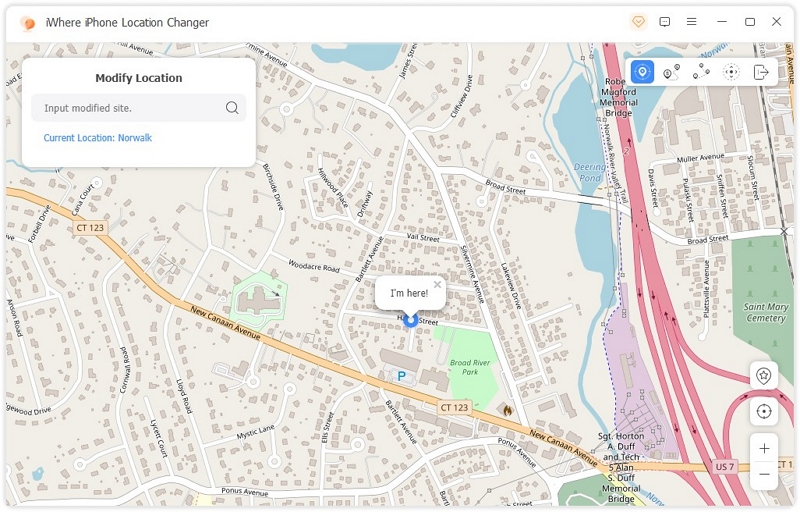
Step 3. Check your Live Location: When you select “Modify Location,” a map will appear showing where you are. You can zoom in or out for more details.
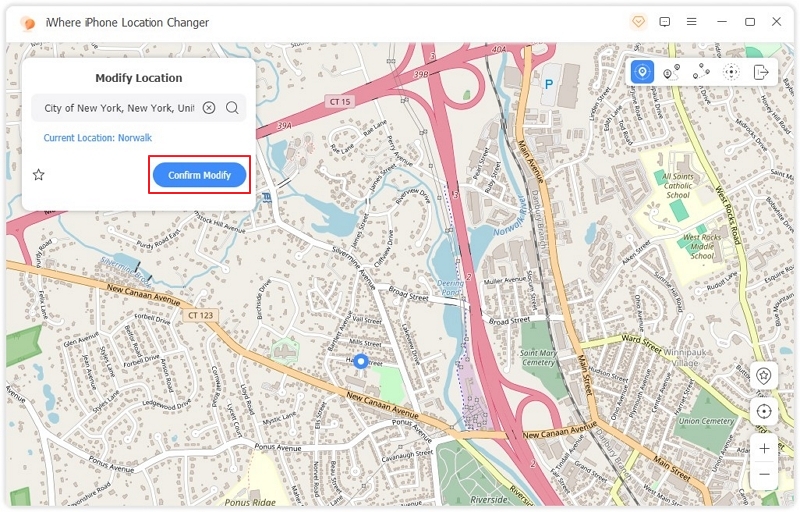
Step 4. Change Location: To change your location, type a new place into the search box or drag the map to where you want to be. Then, click “Confirm Modify” to update your location.
Conclusion:
We discovered how to add portals in Ingress in this article. Ingress is a popular game loved by many worldwide because it lets you interact with portals for an exciting experience. Adding portals is important because it makes the game more interesting. By following the rules, you make sure the portals you add are good. If you want to make your gaming experience even better, you can use the iWhere iPhone Location Changer. It helps you control where your game says you are, making it easy to explore different places in the game. iWhere is easy to use and has many useful features, making it great for anyone who loves playing Ingress.