Updated on 2024-12-09
2749 views
5min read
GPS navigation apps like Google Maps are a lifesaver when finding your way around unfamiliar locations. However, when you experience poor GPS location accuracy these navigation apps tend to pin you in a different location on the map. If you’re in a similar situation, calibrating your device’s GPS is the way to go.
This post covers all you need to know about GPS calibration on Android and iOS devices. From when you should calibrate your GPS to the most effective steps to calibrate GPS and tricks to improve your location privacy on iPhone & Android.
Part 1: When Should You Calibrate GPS On Android/iPhone
Calibrating the GPS on your Android or iPhone can be beneficial in various scenarios to ensure accurate location tracking and navigation. Here are five scenarios when calibrating the GPS is recommended:
- Upon Traveling to a New Location: When you travel to a new area or city, especially one that is geographically distant from your usual location, calibrating the GPS can help ensure accurate positioning and precise navigation.
- After Software Updates or System Changes: Following a software update or significant system changes on your device, recalibrating the GPS can help realign the location services with the updated software, ensuring optimal accuracy and performance.
- When Experiencing Inaccurate Location Data: If you notice that your GPS is consistently providing inaccurate location data, recalibrating it can help resolve this issue.
- When Using GPS-Dependent Apps for Navigation: Prior to using GPS-dependent apps for navigation, such as map services or location-based services, it’s advisable to calibrate the GPS. This ensures that the information provided by the apps is based on an accurately calibrated GPS.
- After Prolonged Periods of Non-Use: If your device’s GPS has been inactive for an extended period, recalibrating it before using location services again can help ensure that it accurately detects and communicates your location.
Part 2: How To Calibrate GPS On Android/iPhone
Calibrating the GPS on your Android or iPhone can significantly enhance the accuracy and reliability of your device’s location services. Here, we will introduce you to two unique techniques you can use to calibrate GPS on Android and iPhone.
Method 1: Calibrate GPS on Android/iPhone Via Settings App
Calibrating your GPS via settings is an effective way to improve location accuracy on any GPS app on your Android or iPhone. Follow the steps we’ve outlined below to calibrate GPS on your Android or iPhone via settings now;
Steps on iPhone
Step 1: Open the “Settings” app on your iPhone and find your way to “Privacy & Security”.
Step 2: Tap on “Location Services”.
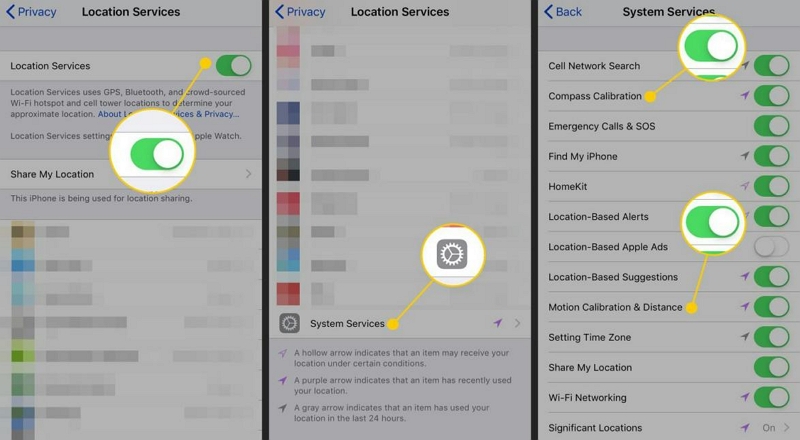
Step 3: Scroll to the bottom of the page and tap on “System Services”.
Step 4: Turn on the toggle next to “Compass Calibration”.
Steps on Android
Step 1: Go to the “Settings” app on your Android.
Step 2: Find and select “Location”. Then, tap the “Slider” next to it to turn it on.
Step 3: Under “Location”, select “Improve Accuracy”.
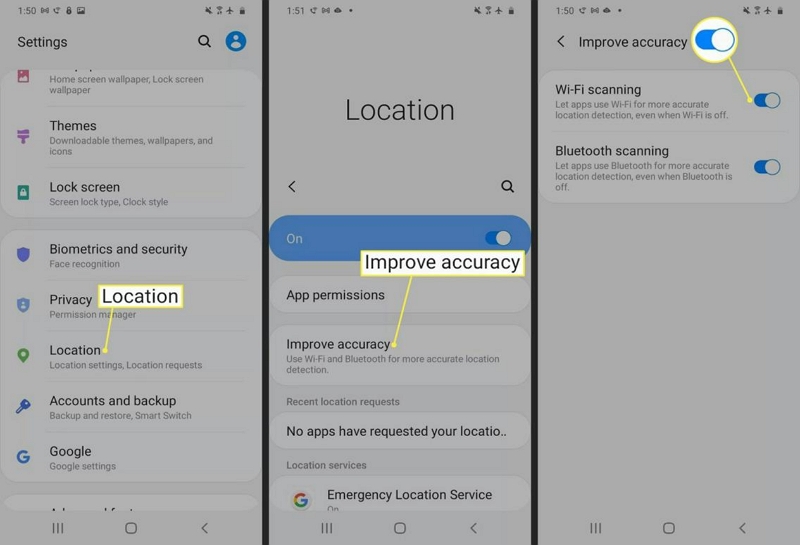
Step 4: Turn on the toggle next to “Wifi Scanning” and “Bluetooth Scanning”.
Method 2: Calibrate GPS on Android/iPhone Via Google Maps App
If you’re using the Google Maps app, you can easily calibrate your GPS directly from the app. All you need is to follow these steps;
Step 1: Open “Google Maps” on your Android or iPhone.
Step 2: Tap on your current location. Your current location is indicated with a “Blue” circular icon on the map.
Step 3: Tap on “Calibrate”.
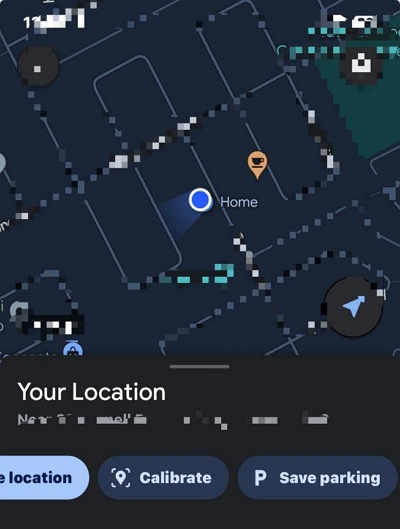
Step 4: Select “Start” in the pop-up message.
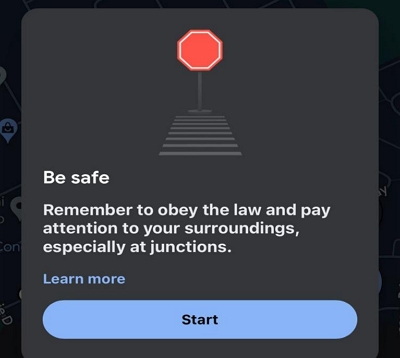
Pro Tip: Zoom in on the map before calibration to ensure accuracy. If you miss the blue dot, simply cancel and try again.
- For better results: Ensure that you are outdoors or in an open space, as GPS accuracy can be limited indoors.
- If your location accuracy remains low, Google Maps will prompt you to calibrate again. Alternatively, you can manually select the Calibration option under “Share Location” or “Save Parking Spot.”
Bonus Tips: Advanced Calibration Methods
In some cases, your GPS might require extra effort for calibration. Here are two additional techniques to refine your GPS accuracy.
Using the Camera for Real-Time Scanning (iPhone and Android)
Google Maps can also use your phone’s camera to improve location accuracy by scanning your environment. Here’s how to do it:
- Hold your phone in front of you with the camera facing outward.
- Move your phone in a horizontal line, ensuring it captures the surroundings, such as buildings or street signs.
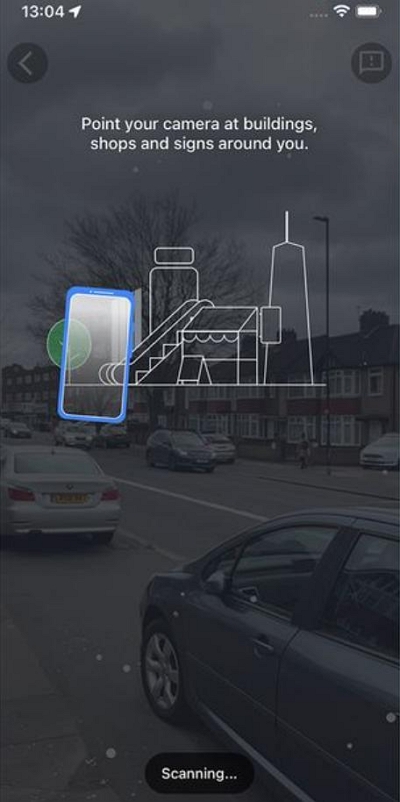
This method is only effective when you’re on the street, as the app needs a clear view of your surroundings to accurately calibrate your location.
 Note for iPhone users:
- This is the only method available to calibrate Google Maps using real-time scanning. If it doesn’t work, try moving to a different location.
For Android Only: Rotate Your Phone in an 8-Shape Pattern
On Android, you can improve GPS accuracy by rotating your phone in an 8-shape motion.
- Follow the on-screen instructions and rotate your phone carefully in the shape of the number 8.
- Ensure that the phone remains level during the rotation to optimize calibration.
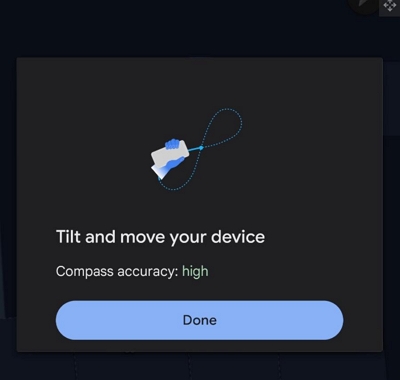
For Android Only: Use the Compass Option
If you’re unable to use real-time scanning for calibration, Android users can opt to use the phone’s built-in compass to refine GPS accuracy.
- When prompted, tap the Compass button on the screen to activate it.
- Follow the instructions to rotate the phone and use the compass to improve location accuracy.
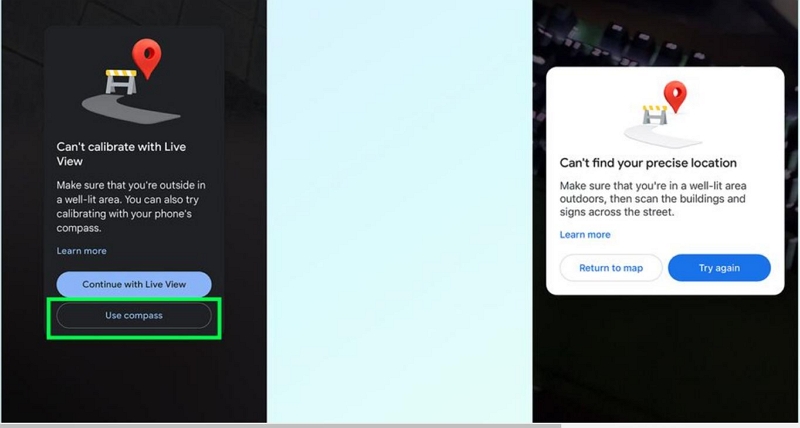
 Note for iPhone users:
- iPhones will be prompted to try real-time scanning again or to return to the map for further calibration.
These advanced methods, when combined with the basic calibration techniques, can greatly enhance your device’s GPS accuracy. Whether you’re navigating through city streets or tracking a fitness activity, precise location data is essential for a seamless experience.
Trick Of The Day: How To Spoof GPS On Android/iPhone Without Being Detected
Besides calibrating your device’s GPS, we’ve also discussed a helpful trick you can use to spoof your iPhone/Android GPS to protect your location privacy on location-based apps. Read on to find out how these tricks work.
Spoof GPS On iPhone & Android With Professional Location Spoofing App
When it comes to spoofing GPS location on iPhone and Andorid, you need a professional location spoofing app like iWhere Location Changer for iPhone and Android to get the job done seamlessly.
iWhere is one of the leading location-faking apps for iPhone and Android that complies with Apple’s policy, and it supports a wide range of apps, including location-based AR games, dating apps, social media apps, live streaming apps, and lots more.
With iWhere Location Changer, you can simulate your iPhone/Android location without jailbreaking or rooting. It also offers many efficient features, including multiple location spoofing modes, one-click location faking, history, flexible joystick, etc.,
Key Features
- Fake iPhone and Android location with 100% accuracy and privacy.
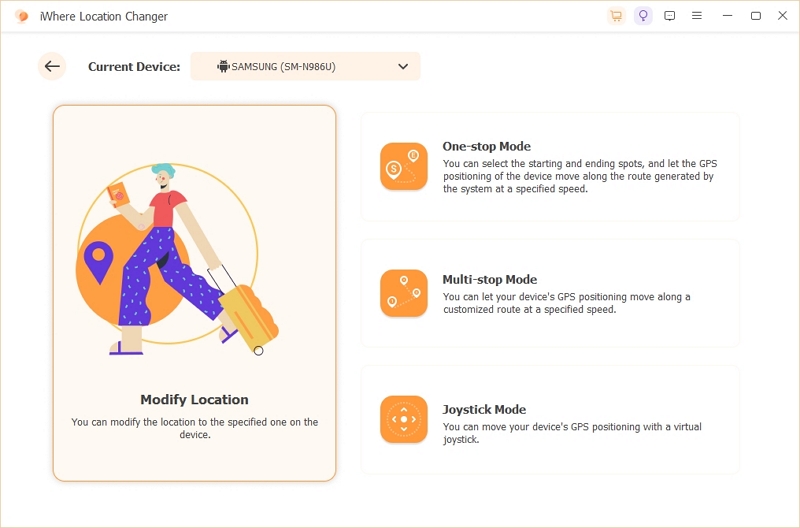
- Boasts four types of location faking modes: modify location, one-stop, multi-stop, and joystick.
- Offers adjustable movement speed to enable you to change moving speed within the range of 1 m/s to 50 m/s when cycling, walking, or driving.
- Automatically save locations you’ve visited in history to allow you to easily find them whenever you wish to reuse them.
How to use the iWhere Location Changer for iPhone and Android to Fake GPS Location on an iPhone:
Step 1: Launch the iWhere app and click on “Start”.

Step 2: Connect your iPhone/Android to the computer and select “Modify Location” as the preferred mode to fake location.
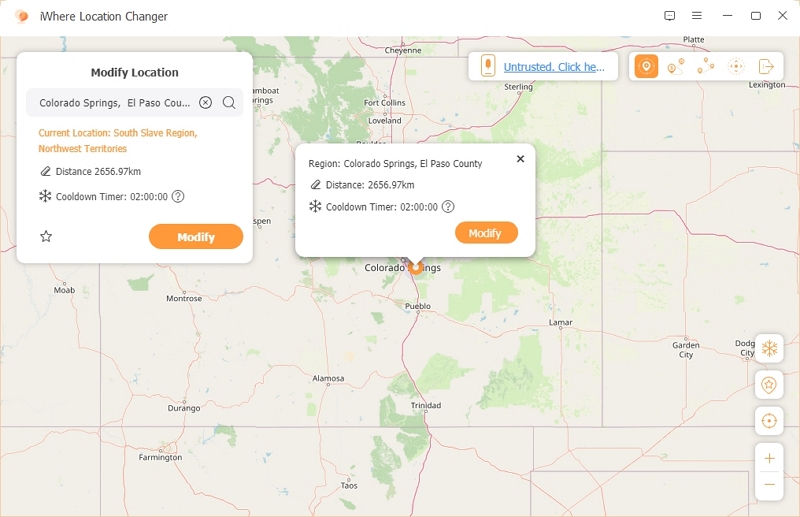
Step 3: Use the + and – buttons to zoom in and zoom out the “Map” displayed on your screen to view different locations. Then, select a “Destination”.
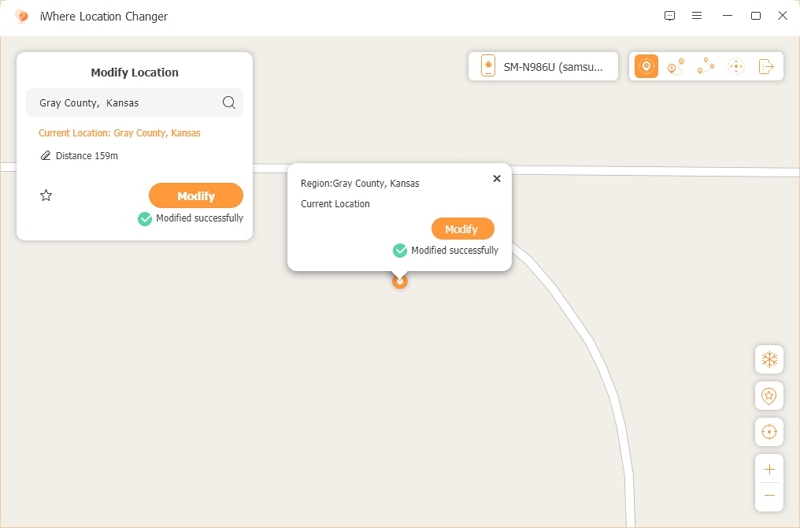
Step 4: Finally, click on “Modify” to confirm the action.
Conclusion
Calibrating the GPS on your Android or iPhone device is a simple, yet efficient way to improve the accuracy of location-based services and navigation apps. With the steps provided in the article above, you should be able to calibrate your device’s GPS without compromising its regular operations.
Also, in case you want to protect your location privacy online, we recommend using a GPS location spoofing app like the iWhere iPhone Location Changer for iPhone or Fake GPS app for Android. Both tools are 100% trusted and reliable.
