Updated on 2024-06-21
2166 views
5min read
When GPS stops working on your Android Or iOS device, you tend to experience issues performing location-based operations. But you don’t have to panic in such a situation.
To help you out, we will teach you some of the reasons you might be experiencing GPS not working problems and how to fix it on Android and iOS devices using ten workable solutions.
Part 1: Why is GPS Not Working on Your Phone?
There are several common issues that can cause GPS to malfunction on both Android and iPhone devices. Understanding these issues can help you identify the root cause of the problem and find an appropriate solution.
- You’re in a place with weak signal or obstacles, your GPS might not work well.
- Old software can mess up your GPS.
- Incorrect settings can prevent your GPS from working as intended.
- The GPS cache on your device can become corrupted, resulting in inaccurate location information.
- The calibration of your GPS is off, it can lead to inaccurate location readings.
Part 2: How To Fix GPS Not Working On Android
Now you understand what could be causing your Android/iPhone GPS to stop working, let’s check out some solutions you can use to fix the issue.
Method 1: Turn Off and Turn On GPS Feature
Turning off and turning on the GPS feature on your Android/iPhone should always be your first approach to dealing with GPS not working problems. It’s a quick way to fix minor glitches that might cause the GPS to stop working.
The following steps explain how to turn off/on GPS on Android/iPhone:
Steps on iPhone
Step 1: Find your way to the “Settings” app and select “Privacy & Security”.
Step 2: Tap on “Location Services”.
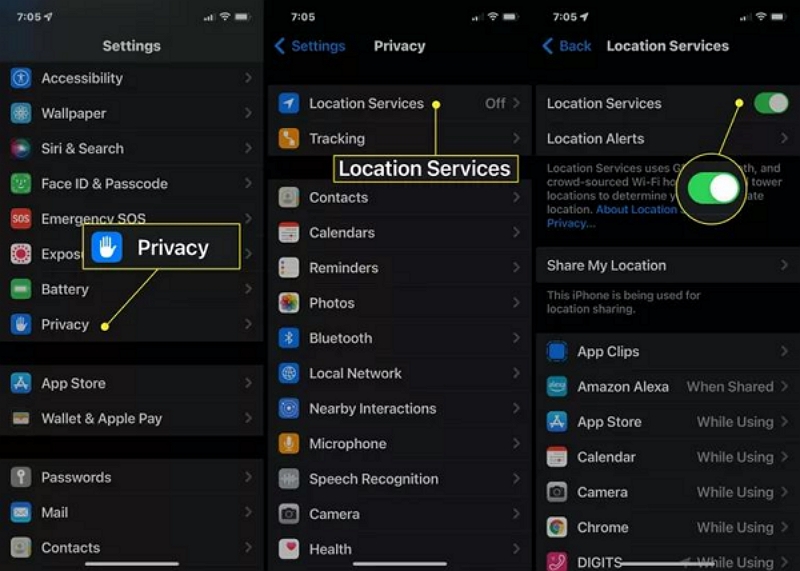
Step 3: Tap on the “Slider” next to “Location Services” to turn it off. Then, turn it back on after a few seconds.
Steps on Android
Step 1: Navigate to the “Settings” app.
Step 2: Find and select “Location” settings.
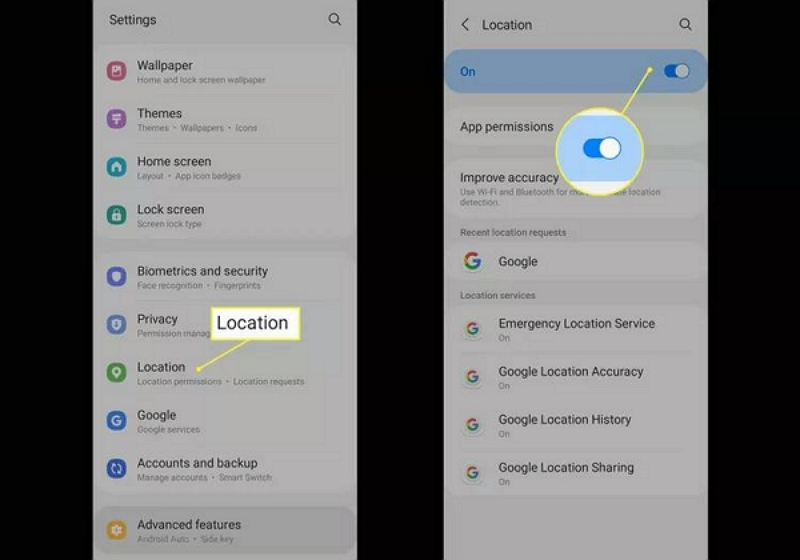
Step 3: Turn off the location “Slider” and turn it back on.
Method 2: Enable & Disable Airplane Mode
Another quick troubleshooting method involves toggling the Airplane Mode on and off. This action can help reset the device’s connections and potentially resolve any issues affecting the GPS functionality.
For iPhone
Step 1: Open the “Control Center” on your iPhone.
Step 2: Tap on the “Airplane” icon to turn “Orange” to enable airplane mode.
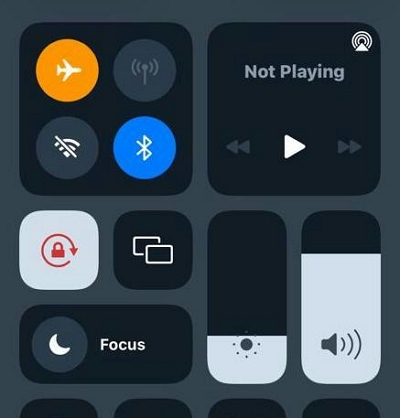
Step 3: Tap on the Airplane icon again to disable the feature.
For Android
Step 1: Swipe down from the top of your device screen to open the “Quick Settings’.
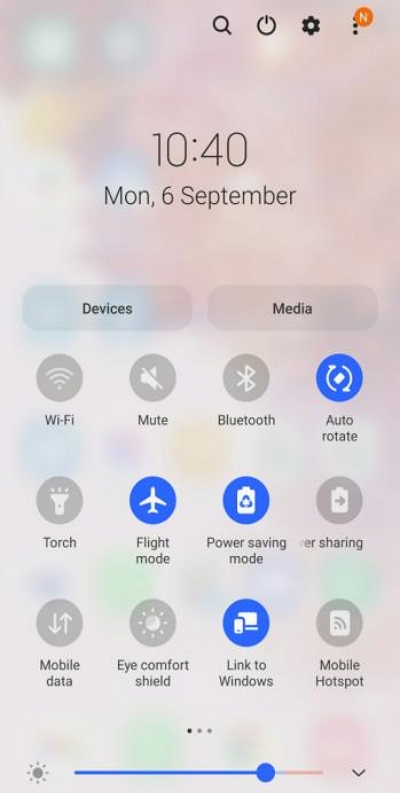
Step 2: Locate the “Airplane” mode and tap on it to enable it. After that, disable it and check if the GPS starts working properly.
Method 3: Disable Battery Saving Mode
If your GPS is not working as expected, it could be due to the device’s power-saving settings. Disabling the battery-saving mode can ensure that the GPS functions optimally without any restrictions.
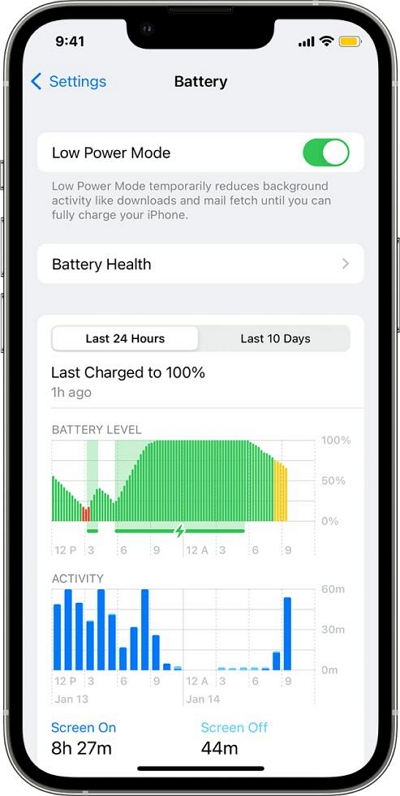
For iPhone
Step 1: Go to the “Settings” app.
Step 2: Tap on the “Battery”
Step 3: Turn off “Battery Saver Mode”.
For Android
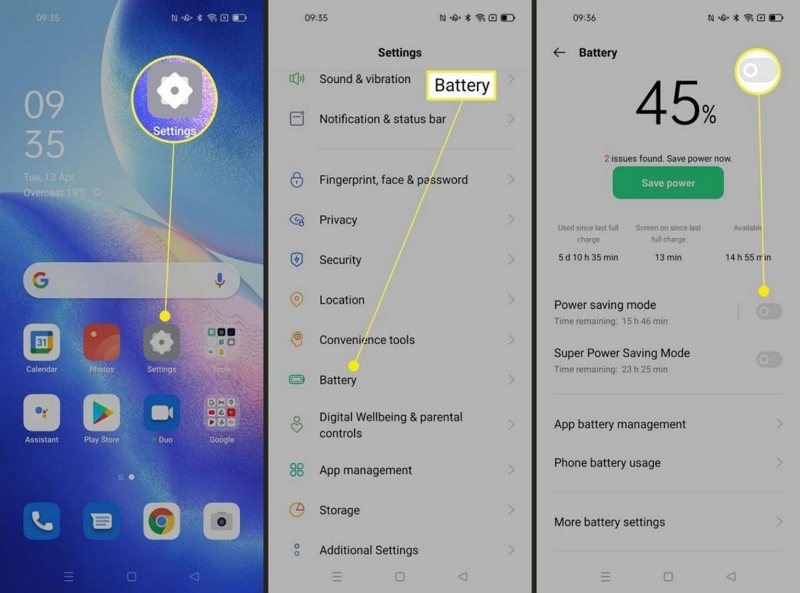
Step 1: Open the “Settings” app.
Step 2: Select “Battery”.
Step 3: Turn off the toggle next to “Power Saving Mode”.
Method 4: Restart Device
If the situation is still the same, restarting your phone can often work wonders. This will clear any temporary issues and get the GPS back on track.
For iPhone:
Step 1: Hold down the “Power” and “Volume Up” buttons if you’re using iPhone X or later.
- Hold the “Side” button if you’re using iPhone 8 or earlier.
Step 2: Do not release the button(s) until the “Power Off” slider appears.
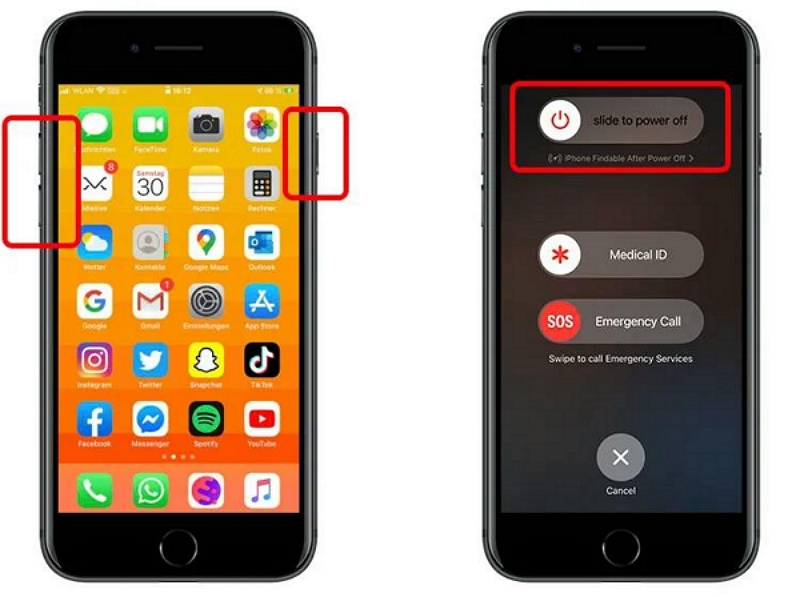
Step 3: Swipe the “Power Off” slider to the right to turn off the phone. Then, turn it back on afterward.
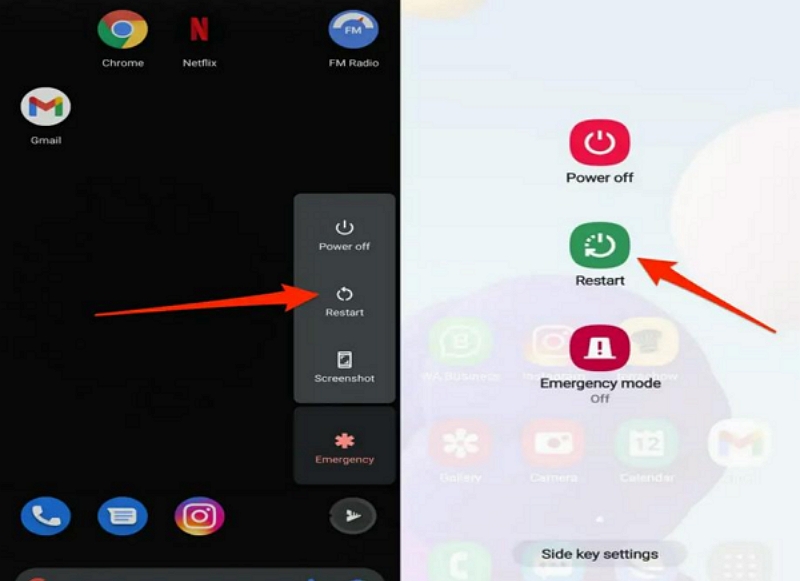
For Android
Step 1: Press the “Power” button until the “Restart”/”Power Off” option appears.
Step 2: Tap on “Restart” and wait for your phone to restart.
Method 5: Check GPS Apps Location Permission
Ensuring that the relevant apps have the necessary location permissions is crucial for proper GPS functionality. Verifying and adjusting these settings can help resolve GPS issues on both Android and iPhone devices.
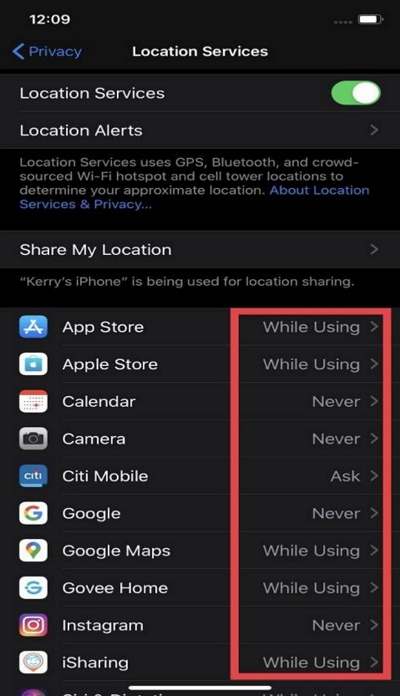
For iPhone
Step 1: Start the “Settings” app and choose “Software & Services”.
Step 2: Tap on “Location Services”.
Step 3: Select the “Maps” app and choose “Always”.
Android
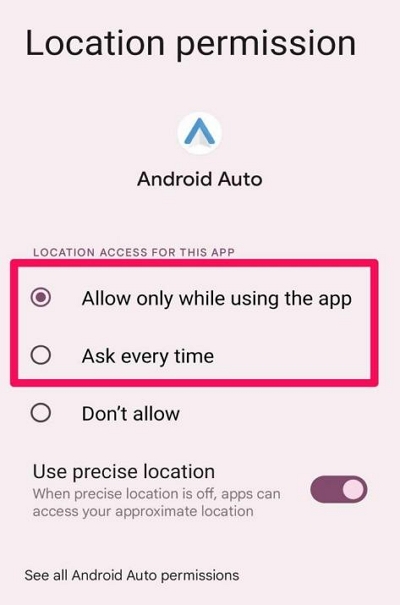
Step 1: Launch the “Settings” app and select “Apps” settings.
Step 2: Choose “App Location Permission”.
Step 3: Find and select the “Google Maps” app. Then, allow it to access your location.
Method 6: Clear GPS Cache Data
As surprising as this might sound, the accumulation of cache data over time can interfere with the GPS functionality. So, we advise you to clear the GPS cache on your Android or iPhone to eliminate any corrupted data that might be compromising the GPS functionality.
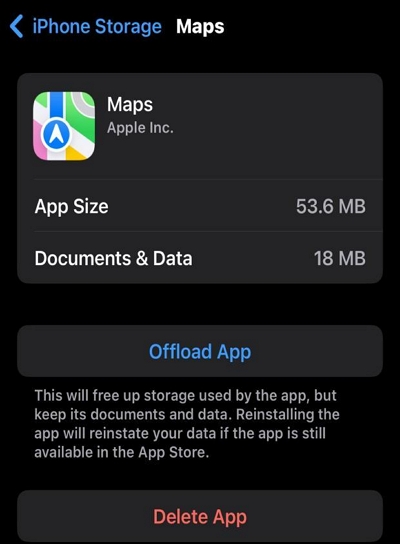
For iPhone
Step 1: Open your iPhone “Settings” and choose “General” settings.
Step 2: Tap on “iPhone Storage”.
Step 3: Find and select the “Maps” app. Then, tap on “Offload App” to clear its cache.
For Android
Step 1: Open “Settings” and go to “Application Manager”.
Step 2: Find the “Google Maps” app and tap on it.
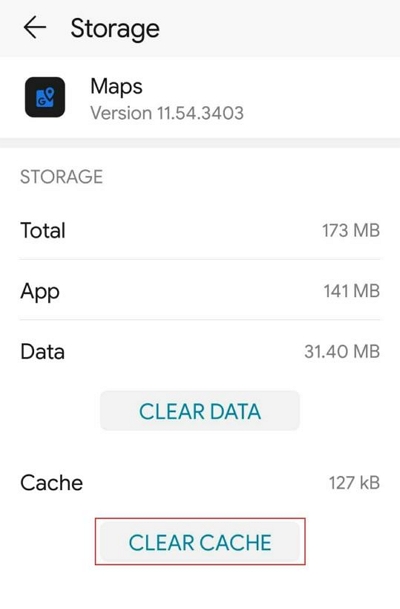
Step 3: Tap on “Clear Cache” and confirm your choice once prompted.
Method 7: Reset Network Settings
If you’re yet to fix the issue, then you should reset your device’s network settings. This method can help refresh the network connections and restore proper GPS functionality.
For iPhone
Step 1: Launch “Settings” and select “General”.
Step 2: Choose “Transfer or Reset iPhone”.
Step 3: Tap on “Reset” and select “Reset Network Settings”.
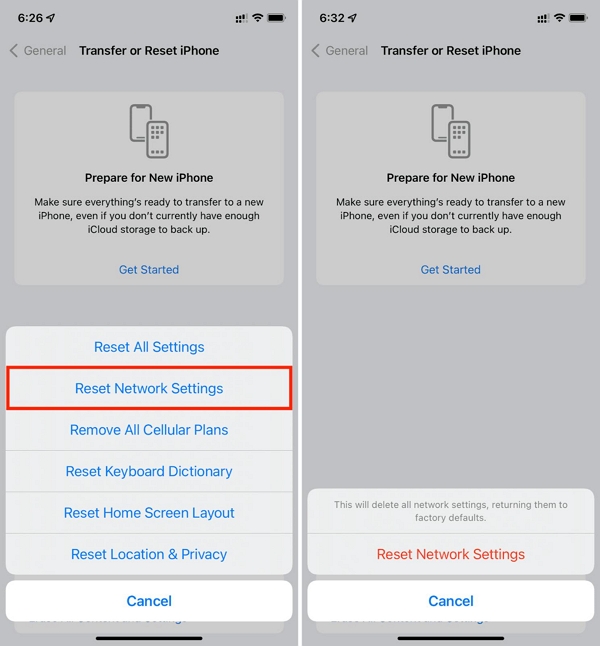
Step 4: Select “Reset” again.
For Android
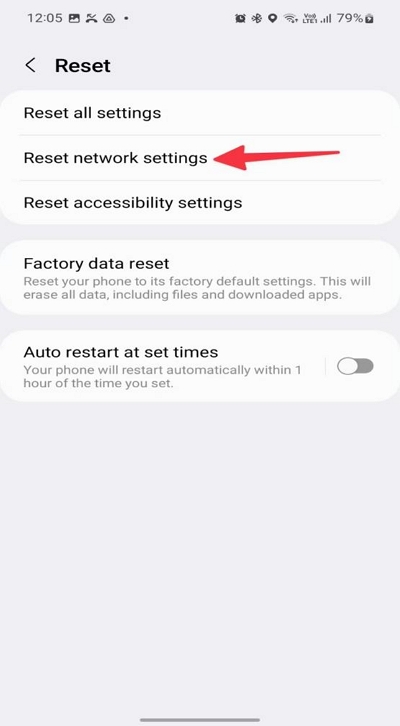
Step 1: Go to “General Management” under your phone Settings.
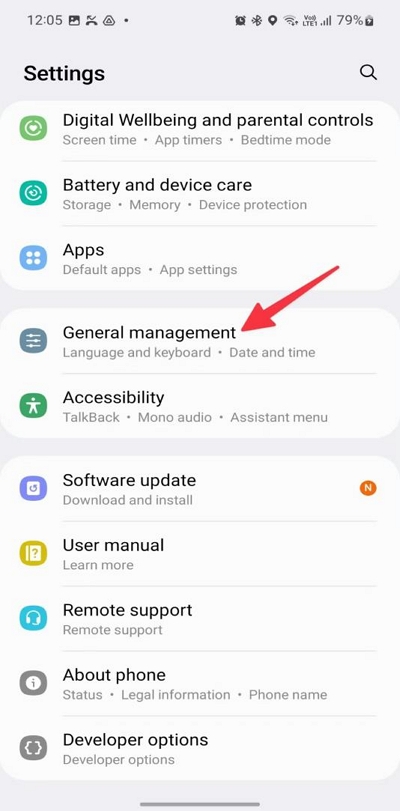
Step 2: Select “Reset”.
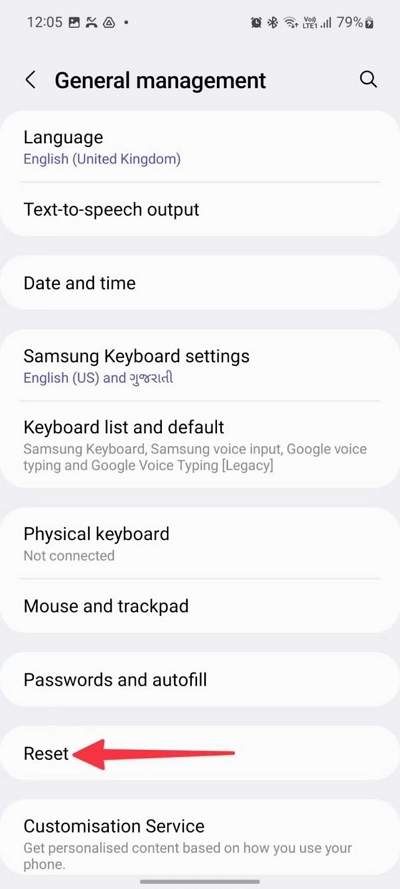
Step 3: Tap on “Reset Network Settings” complete the on-screen instructions.
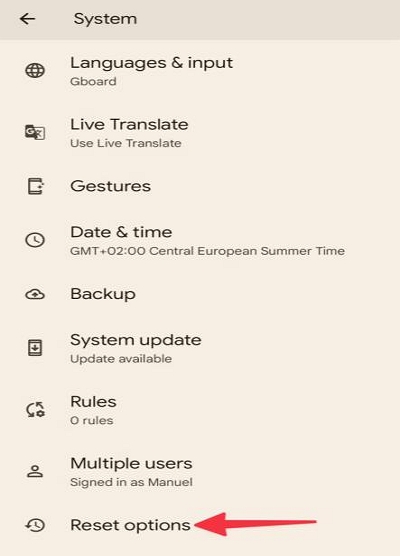
Other Android
Step 1: Go to the “Settings” app and find “System” settings.
Step 2: Choose “Reset Options”.
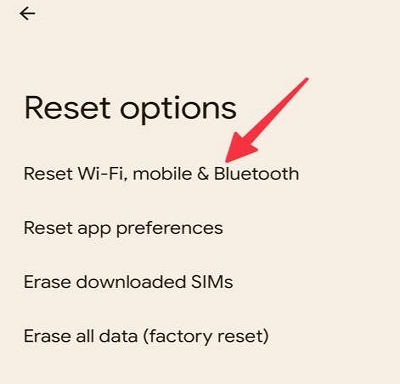
Step 3: Select “Reset WiFi, Mobile, & Bluetooth.
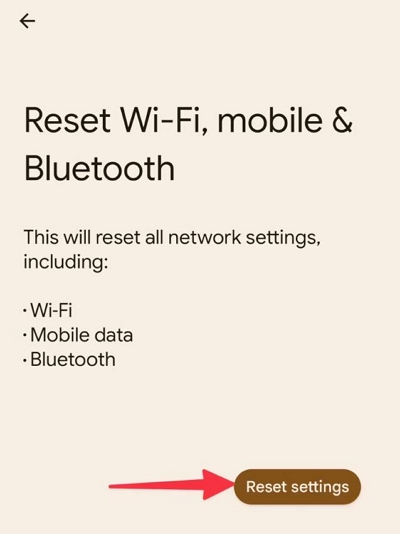
Step 4: Tap on “Reset Settings”.
Method 8: Update Device Software
Your device’s software version might be the problem if the problem persists. Updating your phone’s software can address known bugs or issues that may be affecting the GPS.
Here is how to update software on Android and iPhone:
For iPhone
Step 1: Go to “General” settings under your iPhone “Settings”.
Step 2: Select “Software Update”.
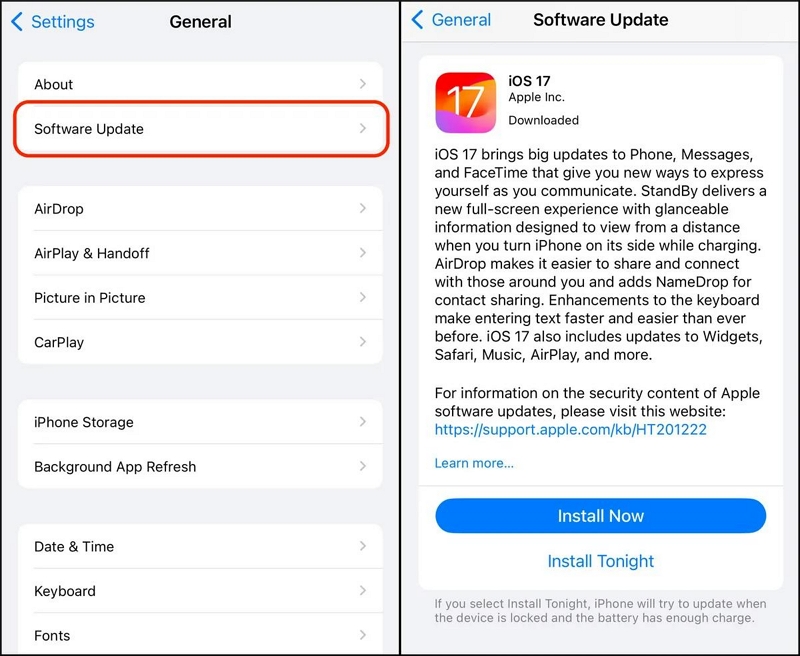
Step 3: Tap on “Install Now” to download and install the latest iOS software.
For Android
Step 1: Open the “Settings” app.
Step 2: Navigate to “About Phone” > “Software Information”.
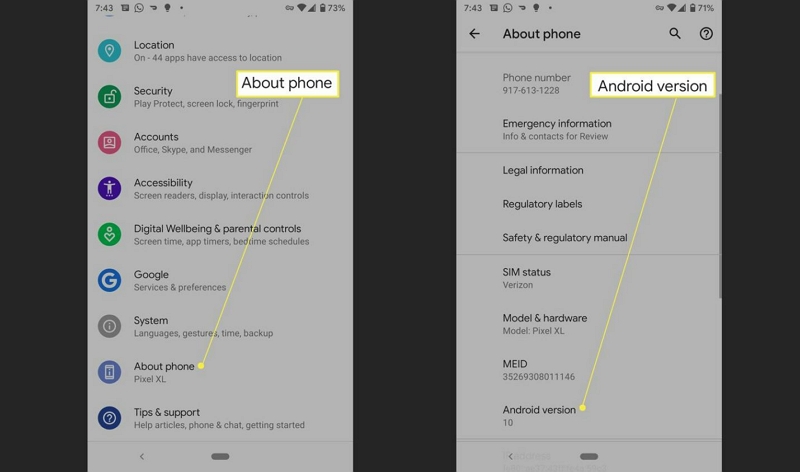
Step 3: You should see your “Android version” information. If it’s not updated, follow the relevant instructions to update it.
Method 9: Calibrate GPS Location
GPS calibration is also an effective way to fix GPS not working on Android and iPhone. It allows you to improve the accuracy and performance of the GPS, ensuring that it’s properly configured for precise location tracking.
The following steps explain how to calibrate GPS location on Android or iPhone:
For Android
Step 1: Open the “Settings” app.
Step 2: Choose “Location” and ensure it’s enabled.
Step 3: Select “Improve Accuracy”.
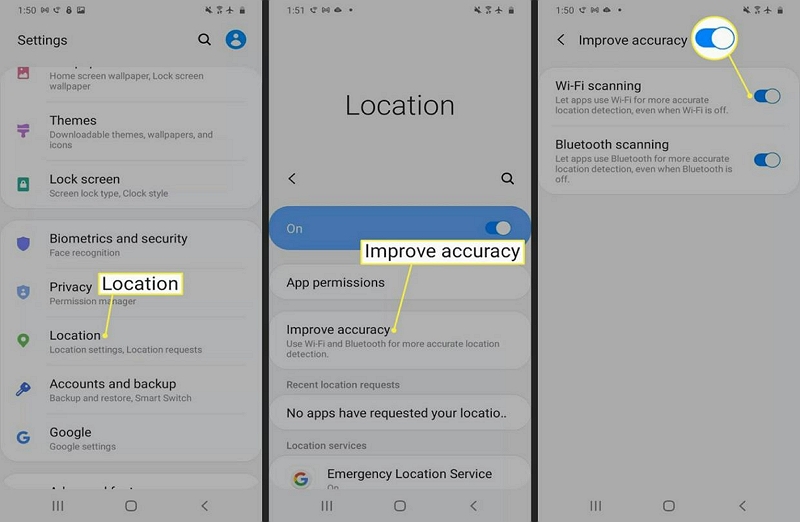
Step 4: Turn on “Wifi Scanning” and “Bluetooth Scanning”.
For iPhone
Step 1: Start the “Settings” app on your iPhone.
Step 2: Select “Privacy & Security” > “Location Services”.
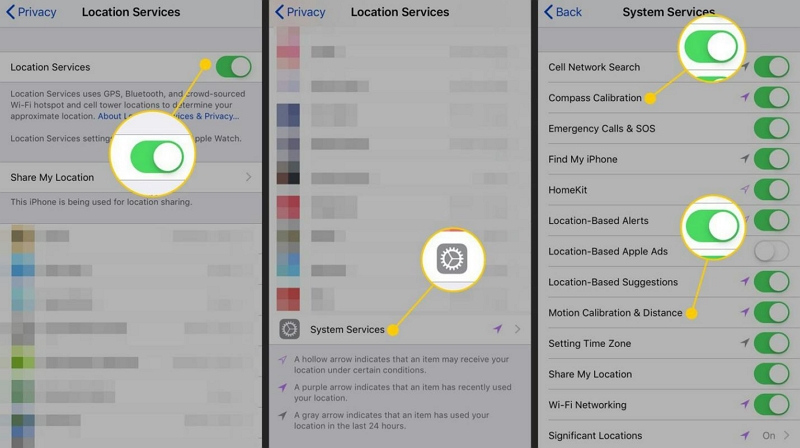
Step 3: Locate “System Services” at tap on it.
Step 4: Turn on the “ Slider” next to “Compass Calibration”.
Method 10: Seek Professional Assistance
If all else fails, seeking professional assistance from a qualified technician or the device manufacturer can help diagnose and resolve any underlying hardware or software issues affecting the GPS functionality.
Trick Of The Day: Change iPhone GPS Location With iWhere Professional Location Spoofer
If you ever find yourself in a situation where changing your iPhone GPS location is a necessity, you can always count on a professional location spoofing app like the iWhere iPhone Location Changer.
Since its introduction, this app has been a game-changer for many folks, including non-techy to change iPhone GPS location in different scenarios. It allows you to change location on dating apps, social media apps, Map apps, Find My, and when playing location based AR games without root or jailbreak.
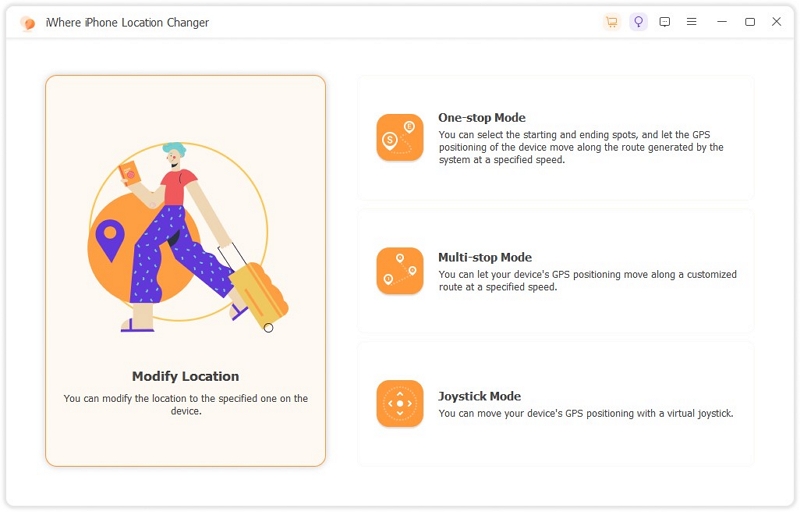
Also, iWhere supports more than one location spoofing mode (including one-stop mode, multi-stop mode, and joystick mode), customizable speed, import/export GPX, etc. So, you can’t go wrong when you have this app at your fingertips.
Key Features
- Offers the best one-click location spoofing solution.
- Joystick mode allows you to move freely just by using your computer’s keyboard or cursor to fake location.
- Fake iPhone location with custom routes using one-stop mode or multi-stop mode.
- Boasts a 100% success rate and top-notch privacy.
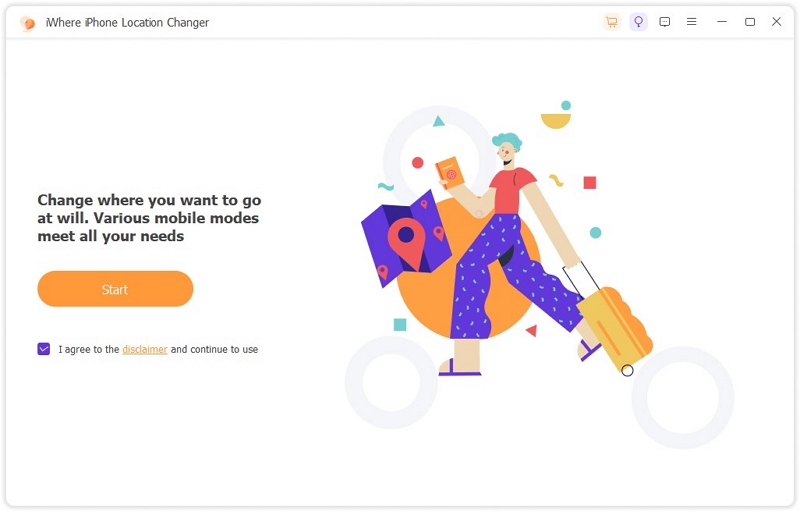
Step 1: Start the app and click “Start”. Then, connect your iOS device to the computer to establish a connection.
Step 3: Choose “Modify Location”.
Step 4: Use the “+” and “-” buttons at the bottom right corner of the screen to zoom in/zoom out the map to view different regions and select a preferred “Destination”. The destination should appear in the “Search” field at the top-right side.
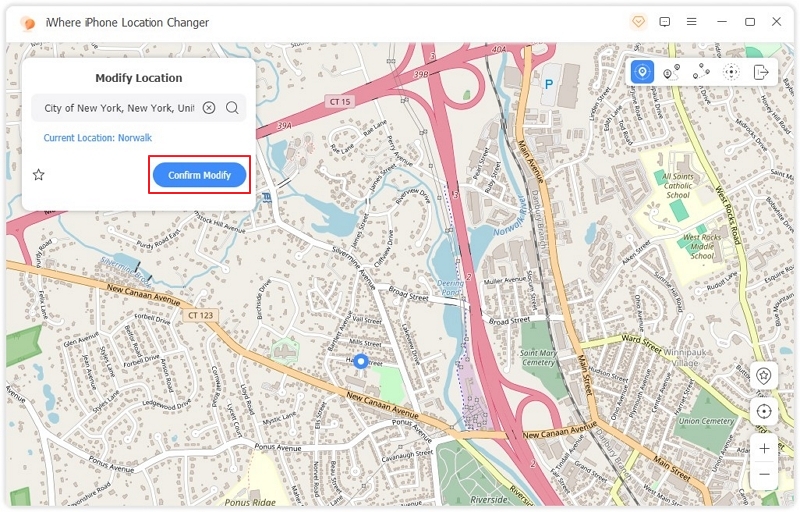
Step 5: Click on “Confirm Modify” to complete the task.
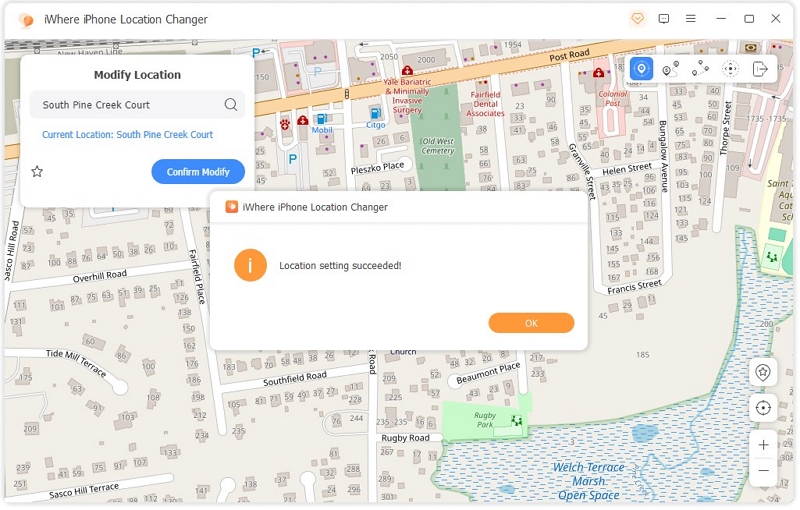
Once you complete the steps, you can start accessing region-specific content on your iPhone without any limitations. However, ensure you don’t disconnect your iPhone from the computer. Otherwise, you need to repeat the procedure.
Conclusion
Addressing GPS issues on your Android or iPhone can be efficiently achieved with the workable solutions provided in this article. From simple toggling of settings to more advanced troubleshooting methods, the techniques can effectively resolve GPS-related problems within a few minutes. All you just need is ti implement the solutions correctly, and you’ll be able to regain access to navigation and location services on your device.
