Are you struggling to alter your real-time location on your iPhone using Xcode and found yourself here in the course of sourcing for a guide? If so, you’ve made it to the right page. In today’s post, we will reveal the complete guide to use the Xcode to change your iPhone location. Additionally, we will share with you the best alternative to use when Xcode fails to work. Read on!
Overview on Xcode
Developed by Apple Inc., Xcode is a popular program with a comprehensive suite of features that you can select from to design workable software that is compatible with macOS, iOS, iPadOS, WatchOS, or tvOS. Among the features supported is the location simulator which you can leverage to customize your iPhone GPS so you appear in a fake location without being there in person. It also supports other useful features such as the interface builder for graphics designers, code editor for programmers, debugger for finding and fixing bugs in codes, etc.
How to Change Location on Real iPhone Device with Xcode
Go to the App Store on your macOS and install Xcode. After that, launch the app and follow the steps below to change your real iPhone device location:
- On the Xcode main interface that pops up, select Create a new Xcode project from the options displayed.
- Next, select iOS from the top menu bar on the subsequent screen and click on Single View App. Hit Next to proceed.
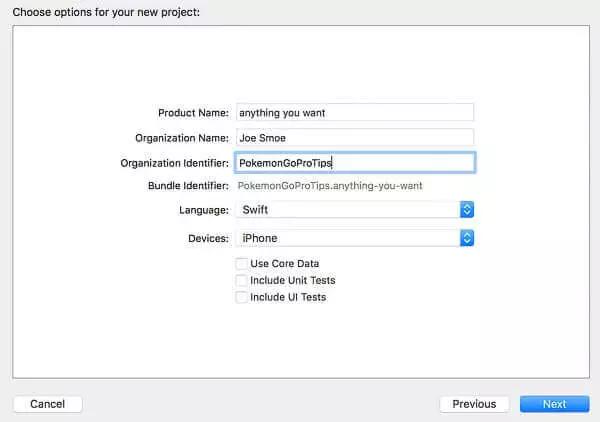
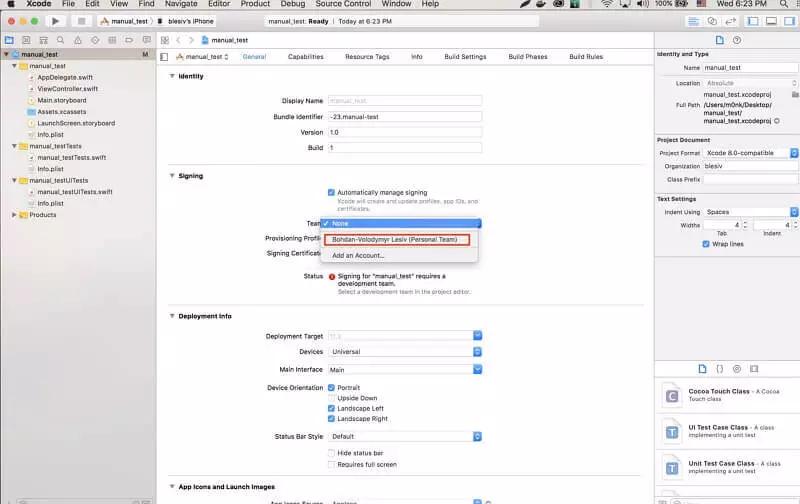
- An interface requesting you to choose the options for your new project will appear. Fill in the project name and other necessary fields. As for the part where you have Team, kindly sign in to the Apple ID linked to your iPhone.
- Tap Next.
- Now, Xcode will request you to save your setup somewhere on your computer. Select a destination path, uncheck the source control box and click Create.
- Browse the internet for the longitude and latitude of the GPS location you want your iPhone to use and copy it down.
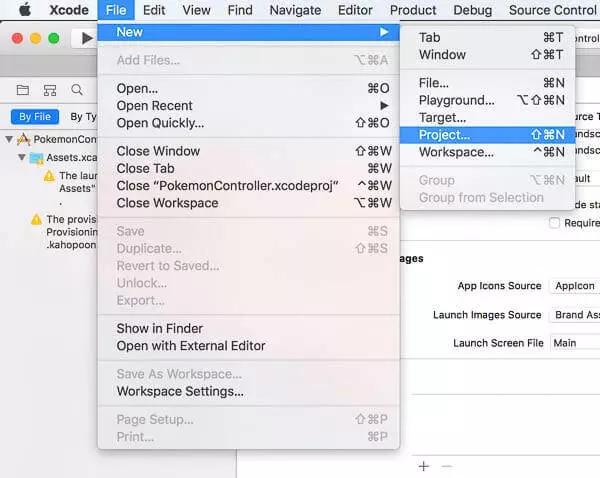
- After that, go back to the top of your Xcode screen and click on File.
- Select New > File and a window will pop up.
- Input GPX in the filter field and click on Next.
- Another window will pop up on your screen. Go to where you have Save As and input the name of the location you want to migrate to and click Create.
- Once done, the GPX file interface will come up. Head to where you have the longitude and latitude and paste the correct data for the new location you want your iPhone GPS to start reading.
- After completing that, change the location name underneath and save your settings.
- Go back to the main project page again and ensure that your iPhone is the selected device for this operation.
- Once done, click on the Play button at the top of the Xcode screen and wait patiently until the Build Succeeded notification appears on your computer screen.
- At the bottom of the Xcode screen, click on the location icon and select the new location you just established. Your iPhone GPS should start showing the newly selected position.
Alternative Way to Change iPhone Location without Xcode
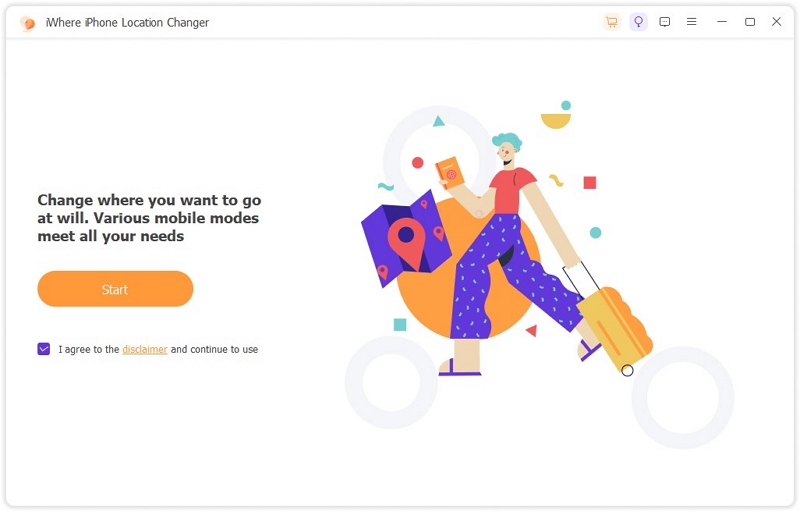
Although Xcode is a useful tool for modifying iPhone location, it isn’t easy and convenient to apply in some way. Rather than investing in such a tool, we present to you a top-quality location spoofing tool – iWhere iPhone Location Changer. With this professional tool, you can easily take full charge of the GPS destination of any iDevice within minutes. iWhere helps you to modify your iPhone location to read any location around the globe without hinting anyone about your action. This software with its comprehensive UI is super safe to use and fits in nearly all scenarios you may think of, from creating prank videos to privacy, gaming, and many more.
Key Features
- Modify your iPhone or iPad location within a few clicks without jailbreaking.
- Allow you to select your preferred GPS destination by either importing GPX files or typing the address manually.
- Easily simulate GPS movement along a predetermined path at your desired speed.
- Integrates smoothly with GPS-based social media platforms such as Tinder, Snapchat, Facebook, Bumble, and several others.
Steps to Change iPhone Location Using iWhere
Step 1: Install iWhere iPhone Location Changer on your computer through the official webpage, run it afterward, and check the box for terms and conditions when the quick start page pops up. Once done, click Start.
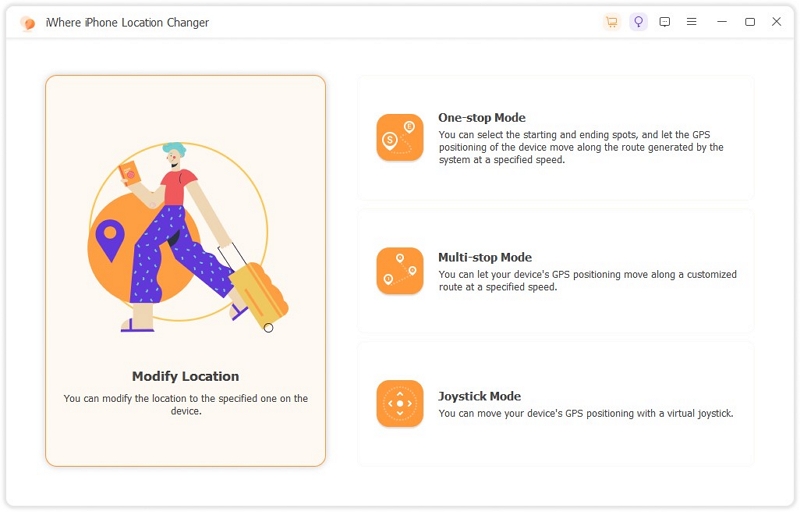
Step 2: With the help of a workable USB cable, connect the iPhone you want to modify its location to your computer. After that, choose Modify Location from the GPS modification feature displayed on your screen.
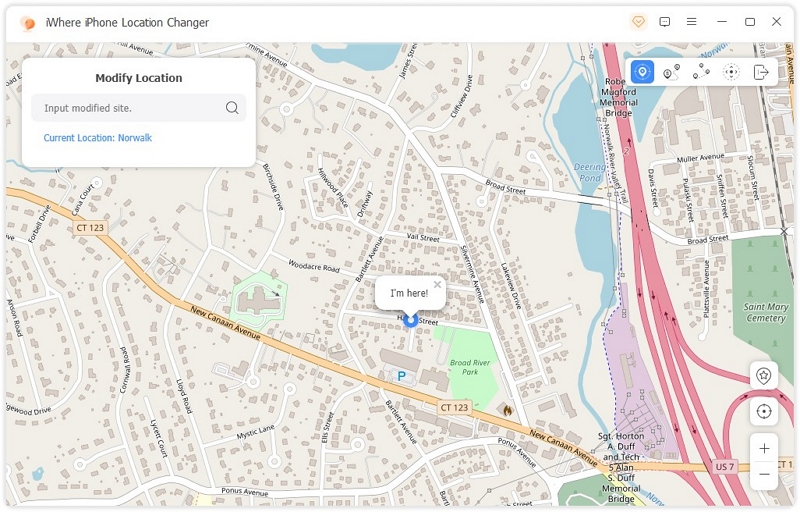
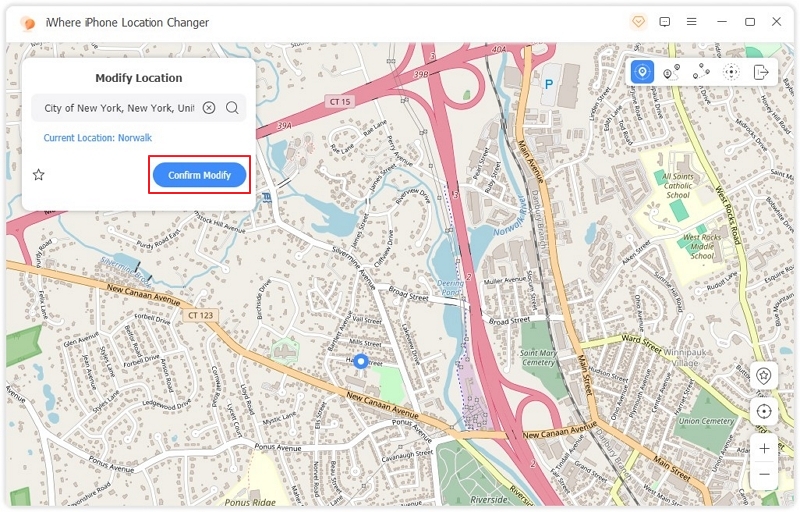
Step 3: Now, the following screen with your current position will pop up. Navigate to the left side of your screen and input a destination you would like your iPhone GPS to read henceforth.
Once you are done with that, hit the blue Confirm Modify button to validate your setup. iWhere will immediately alter your iPhone GPS to the newly selected position and this will apply to all location-based apps you have on your device.
Xcode V.S. iWhere iPhone Location Changer
Here is a chart showing the strengths and weaknesses of Xcode compared to iWhere iPhone Location Changer. Use it to evaluate both tools and make an informed decision on which one to invest in:
| Features | Xcode | iWhere iPhone Location Changer |
|---|---|---|
| Simplified UI | x | √ |
| GPS Modification | √ | √ |
| Route Planning | x | √ |
| Speed Alteration | x | √ |
| Integration with the latest iOS Versions | x | √ |
| Multi-Stop/Joystick Mode | x | √ |
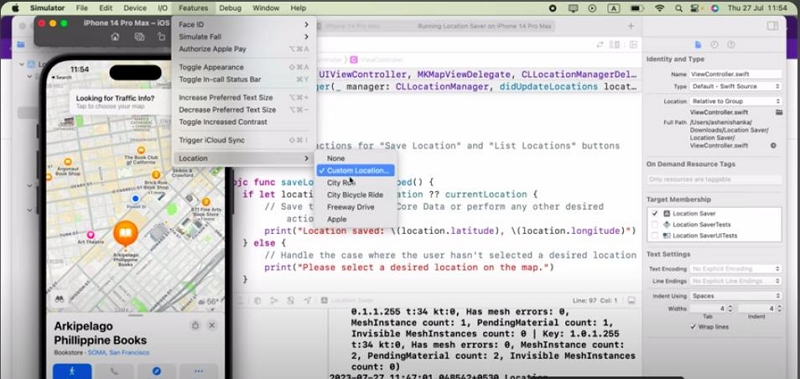
How to Change iOS Simulator’s Location in Xcode
If you need to change the GPS location of an iOS simulator via Xcode, follow the steps below:
- Launch Xcode.
- Proceed to the top of the screen and click on Features from the options shown.
- Select Location from the drop-down menu.
- Next, click on Custom Location and fill in the latitude and longitude.
- Once done, save your settings and your iOS simulator’s location will be updated.
Conclusion
Simulating your iPhone GPS via Xcode isn’t a challenge if you follow the guide provided in the post. However, the procedure to follow is quite lengthy, so we suggest using the best alternative iWhere iPhone Location Changer. The software changes your iPhone location discreetly without compromising your device.