Updated on 2024-04-17
2429 views
5min read
Whether you want to direct your friends to your place of residence, attract customers from certain regions to your business or increase engagement on your post, adding location to your Instagram would be a handy way to achieve this. However, not so many people are clear on how it’s done.
Is this the same for you too? Don’t worry, you are on the right page as we walk you through how to add location to Instagram. It doesn’t just end there as we also intend to describe how to fake your Instagram location. Continue reading!
Part 1. How to Add New/Custom Location to Instagram
Adding a custom or new location to Instagram is quite tricky as the platform supports limited addresses on its map. However, experts have devised a way to go about this. You can take advantage of Facebook address customization feature to import new or custom locations on your Instagram profile.
To do this, follow the directions below:
- Open Facebook on your phone, and input your details in the appropriate fields to sign in to your account.
- Proceed to create a post by tapping the empty field labled What’s on your mind?.
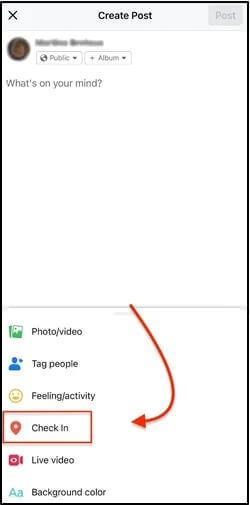
- Located at the bottom of the same interface, you will find some customization buttons. Select Check-in to add a custom location.
- Next, grant Facebook permission to use Location Services on your device by clicking on Turn on Location.
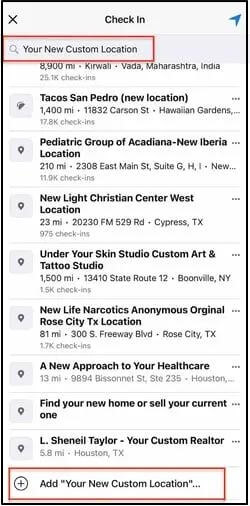
- Now, input the location you want to appear on your Instagram page and click on Add [the Location Name].
- Once done, go to the page titled Create a Place and provide more details about the location you entered. Alternatively, you can click on I’m currently here and Facebook will link the place to your current location.
- After that, check-in the address and that’s all. Your Instagram profile should carry the new/custom location.

Part 2. How to Add Fake Location on Instagram
If you feel your Instagram profile isn’t driving the right amount of engagement to your content, or want to prank your friends about your current location on your stories/posts, then it’s time to manipulate your GPS algorithm and migrate to a new region. However, for this to happen, you need a location spoofing tool like iWhere iPhone Location Changer.
This software is one of the leading iOS spoofing tools that does a pretty amazing job in of simulating the GPS of an iDevice. iWhere iPhone Location Changer is capable of changing the location of your device to any address of your choice which in turn affects the activity of all location-based apps, whether installed or not. Some of the apps are: Instagram, Facebook, Google Maps, Find My, etc.
iWhere stands out among others in the same industry. The reason for this can be attributed to the flexibility in usage and the comprehensive set of tools it supports. For instance, this software has the Multi-Stop mode customization feature which lets you create a track which you want your iPhone to navigate.
Key Features
- Customize your GPS algorithm to any location of your choice with 1-click.
- Use the Joystick Mode to explore different parts of the globe for gems on Pokémon GO without jailbreaking your device.
- Easily simulate GPS on popular apps such as Facebook, Instagram, Google Maps, Apple Maps, and many others.
- iWhere is fully compatible with Windows, Mac and all iOS versions.
Steps to Add Fake Location on Instagram
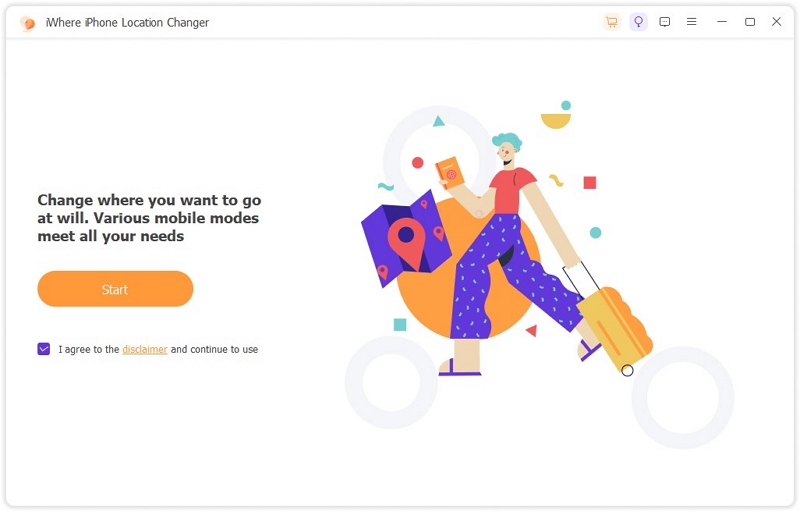
Step 1: Start by visiting the official website for iWhere iPhone Location Changer to download and install the software on your computer. Run the software, check the terms and conditions box, then click Start.
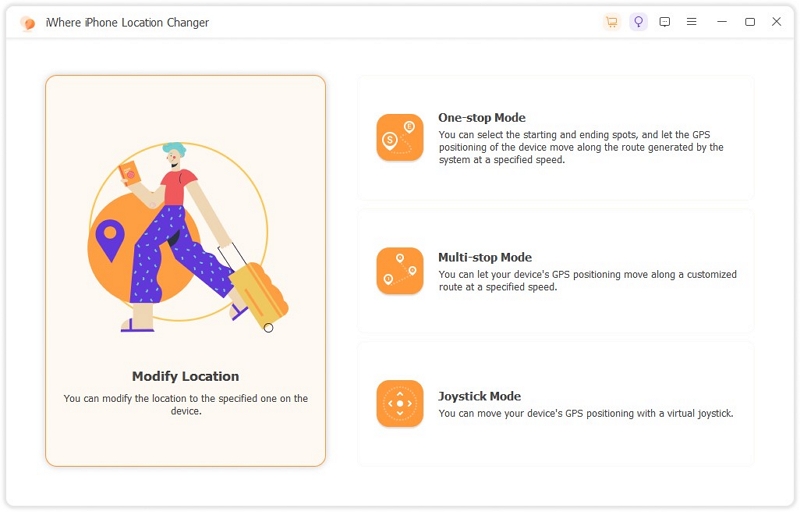
Step 2: Plug your iPhone into the computer using a certified lightning cord, then choose Modify Location to alter your GPS algorithm.
Step 3: Next, a mapping interface showing your current position will pop up. Proceed to the left sidebar of your screen and enter the preferred GPS location you want to appear on your phone. After that, click Confirm Modify.
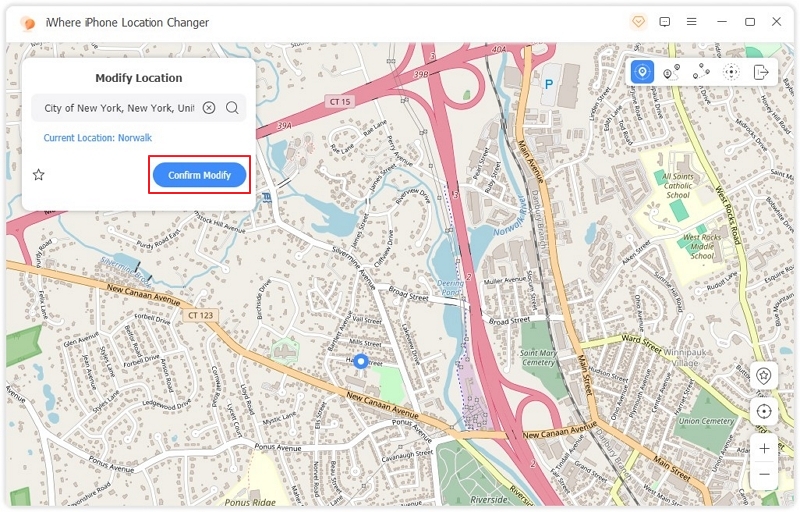
Now, your iPhone will start reading the newly selected GPS and you can now use it on your Instagram profile.
Part 3. How to Add Location to Instagram Post
Another way to add your location to Instagram is to import a location on your posts. When you do this, your viewers can tell where you are or were, in case you’ve exited the place. To do this, you must grant Instagram permission to the location services on your phone.
Here’s how to add location to your Instagram post:
- Launch the most recent version of Instagram on your phone and log into your account.
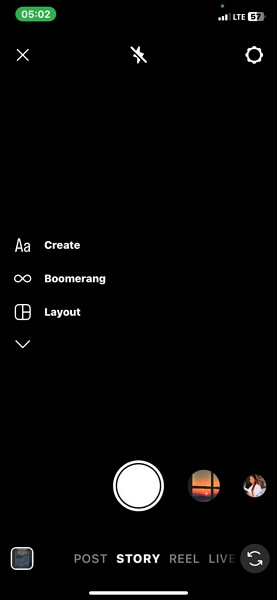
- Swipe from left to right and select POST from the options at the bottom of your screen.
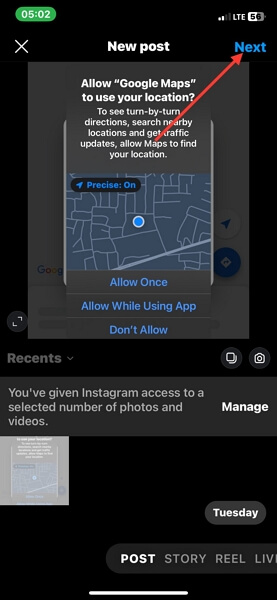
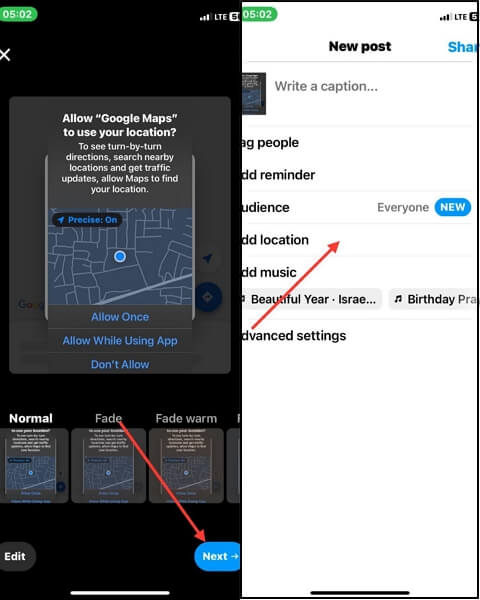
- Next, upload a picture or video from your photos app and click on Next at the upper right corner of your screen.
- Tap Next > Add Location.
- Now, select an address from the location displayed on Instagram. Alternatively, you could search a location by entering the address in the search bar.
- Hit the Share icon at the upper right corner of your screen to upload the post.
Part 4. How to Add Location to Instagram Story
You can also leverage your Instagram Story to share your location with your followers on your timeline just like we have above. However, for this, you are importing a location tag on your post. Follow these steps to add your location to your Instagram Story:
- Launch the Instagram app and click on the circular icon bearing your profile picture to upload your Story.
- Import an image or video from your gallery. Better yet, you can create one.
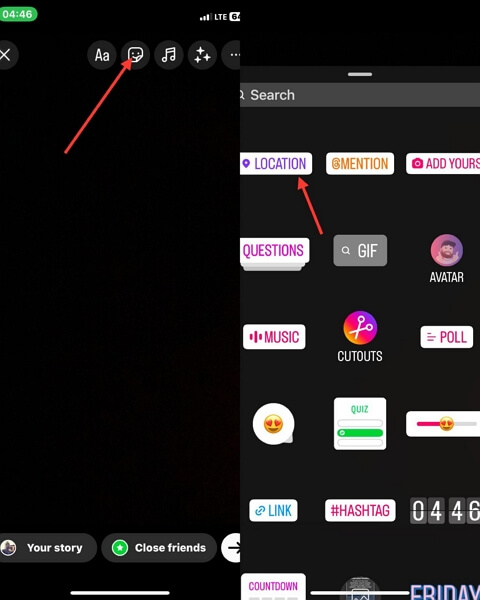
- Next, hit the Sticker icon at the top of your screen.
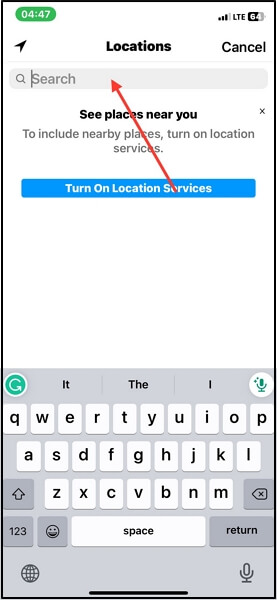
- Select LOCATION from the customization options displayed and Instagram will direct you to the screen below:
- Search your location by entering the address in the search field or you choose from the lists you have on your screen.
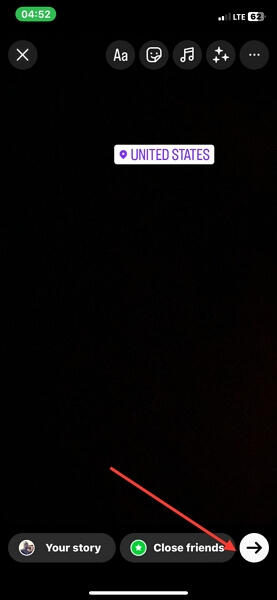
- Drag the location sticker to your desired position on the image or video and click the white Arrow at the lower right corner of your screen to proceed.
- Now, click Share to upload the Story so your followers can view and see where you are.
Part 5. How to Add Location to Instagram Profile
From your Instagram profile, you can always update your followers about your location. All you need is to edit and add your location link to the profile. This can be done at intervals or once depending on your choice. However, you need to generate and copy the location link you want to use from Google Maps.
Use the illustrative guide below to add location to your Instagram via your profile:
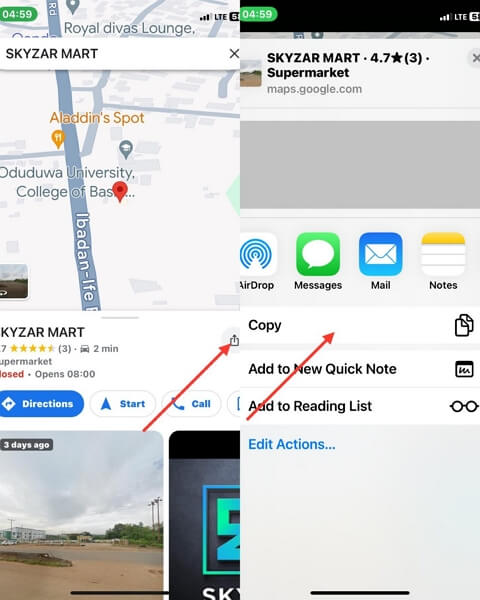
- Open Google Maps on your iPhone.
- Enter the address you would like to appear on your profile in the search bar.
- Once the location pops up, click on the Share icon and hit Copy to add to your clipboard.
- Now that you’ve successfully copied the address, launch Instagram and sign in to your profile.
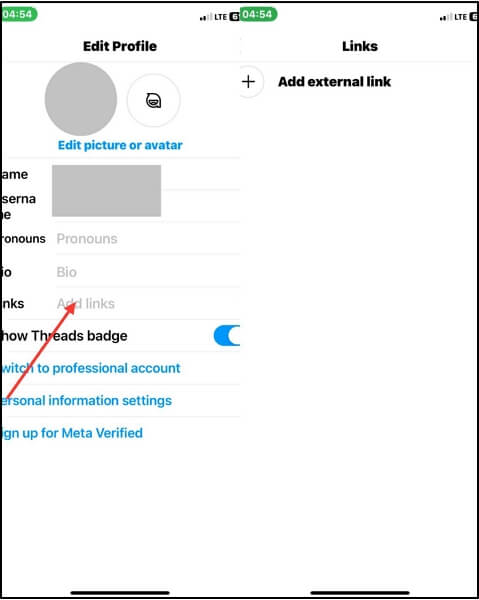
- At the lower right corner of your screen, you will find the profile picture tab. Click on it to proceed.
- Hit the Edit profile icon underneath your Instagram profile picture.
- Next, click on Links > Add external link.
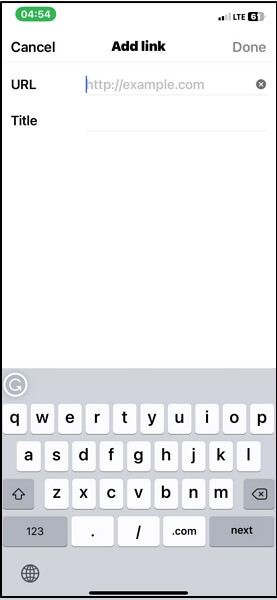
- Paste the address link in the URL panel and enter a Title if you wish to.
- After that, click on Done and refresh your profile. The location would be updated on your profile.
![]()
Part 6. How to Add Location to Old Instagram Post
Perhaps there’s an old post you want to add a location to, you can apply the following stepwise guide to do that:
- Launch Instagram on your phone.
- Tap on the profile photo icon at the bottom right corner of your screen and the response page below will appear:
- Click on the old post that you want to add location to.
- Hit the three horizontal dots at the top right corner of your screen and some settings icons will come up.
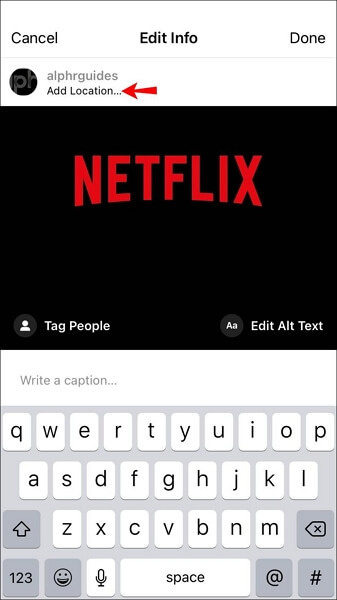
- Select Edit > Add Location.
- Now, input the location you want to appear on the old post and click Done to save the changes.
![]()


Part 7. How to Add Business Location to Instagram
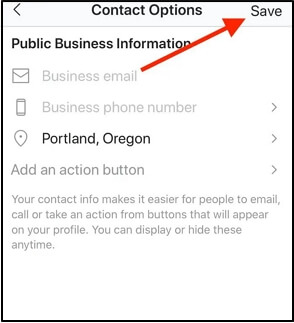
For folks with a business Instagram page, you can add your business address to your profile page in case your customers need to get in touch with you in person. Here’s the simple guide you need to follow to do this:
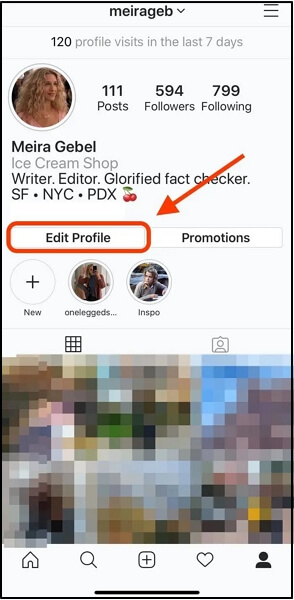
- Launch Instagram and click on your profile picture at the lower right corner of your screen.
- Tap on Edit Profile to proceed.
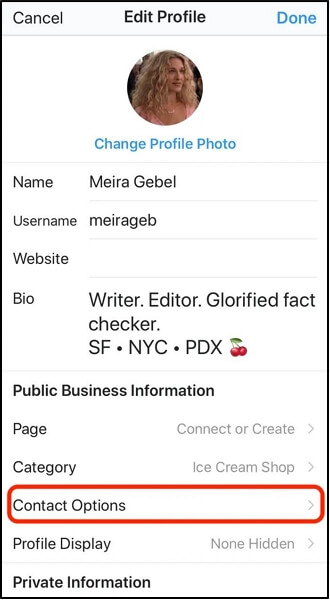
- Next, click on Contact Options.
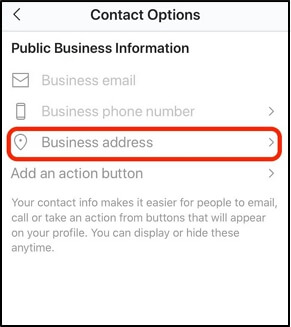
- Choose Business address when the next screen appears.
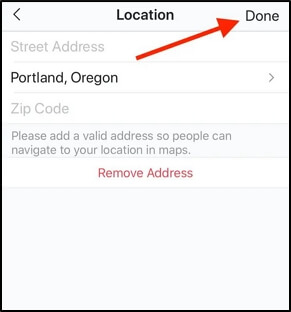
- Now, input your address in the field in the correct order and click Done.
- After that, click on Save and your business location will pop up on your Instagram page immediately.
Conclusion
Adding location to your Instagram page has never been this easy until now. By applying the procedures shared in this post, you can add your location to Instagram. It doesn’t matter whether you want to add location to a new post, old one, profile page, story, or business account, this post explains all. If you are looking to fake your location, iWhere iPhone Location Changer has got you covered.
