Updated on 2024-06-13
2407 views
5min read
Changing your home address on iPhone can be helpful in different situations. Perhaps you just relocated to a new region and you’re trying to get familiar with different routes to locate your new home, you want to identify where various basic amenities are located from your home, etc.
Fortunately, there are several ways to change your home address on iPhone. This post covers the most effective ways to change home address on iPhone using five quick and simple methods.
Part 1: Quickest Way to Change Home Address on iPhone to Any Region
A quick and reliable way to change your home address on iPhone to any region is by using the iWhere iPhone Location Changer app. This fantastic app is trusted by millions of users for simulating iPhone location to teleport to anywhere around in just a few clicks.
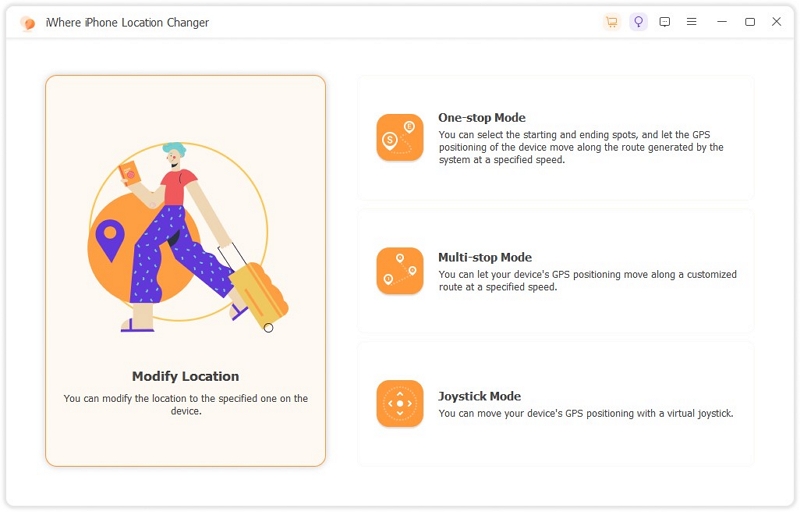
Whether you wish to change your home address on iPhone to prank someone, bypass the geographic restriction on your device, access restricted features on certain apps, or more, iWhere will offer you an interactive map with lots of advanced features like multiple location-changing modes: One-stop Mode facilitates the creation of routes from a starting point to a destination; Multi-stop mode Can create routes for your iPhone to follow using more than one spot on the map; Joystick Mode offers a joystick feature that enables better control when playing games just by using your cursor or keyboard to get the job done quickly and easily.
Moreover, iWhere is not limited to just changing location for home address on iPhone. You can also utilize this software to play location-based AR games like Pokemon Go and Monster Hunter Now.
Key Features
- Import/Export GPX Files: You can save your favorite routes by importing and exporting GPX files, enhancing the flexibility of altering GPS locations.
- Privacy Protection: iWhere utilizes advanced encryption technology to enable users to stop being tracked without anyone knowing and hide their location, providing privacy protection while using location-based apps and social media platforms.
- Historical Records and Adjustable Moving Speed: The tool allows users to save historical spots and routes and adjust the speed of simulated movement(1m/s-50m/s), offering a comprehensive experience for altering virtual locations.
How to Change Home Address on iPhone with iWhere
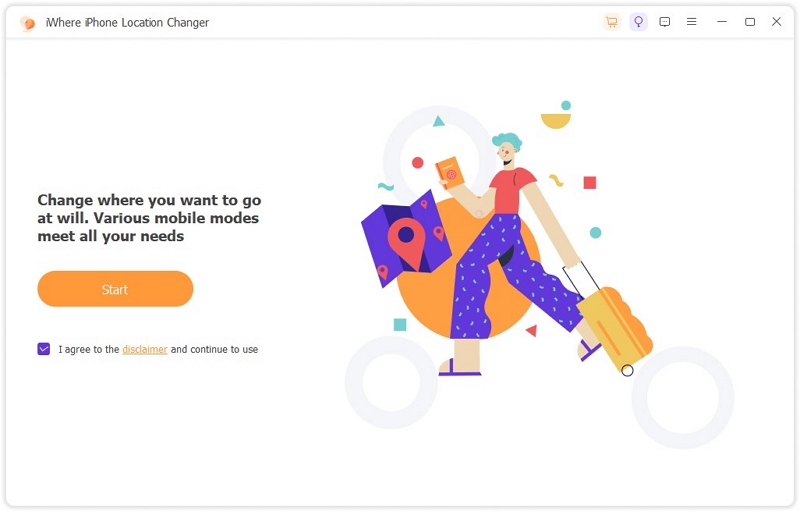
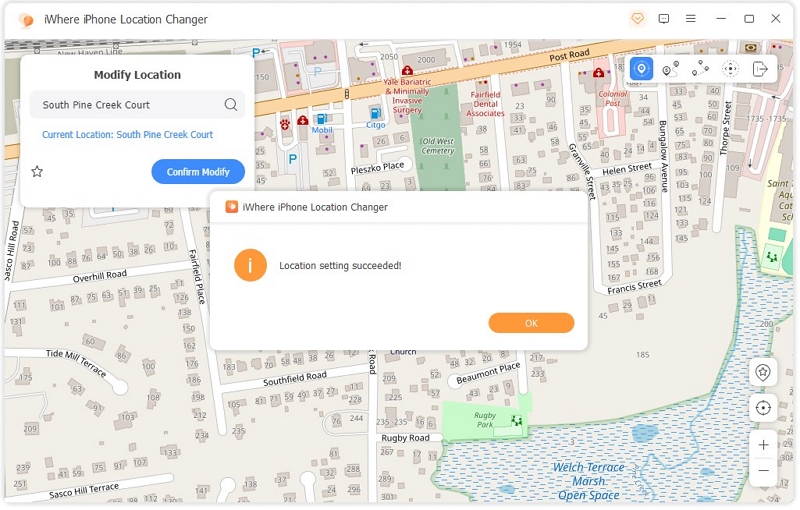
Step 1: Open “iWhere iPhone Location Changer” and click on “Start”.
Step 2: Connect your iPhone to the computer and choose “Modify Location” mode.
Step 3: View different locations on the “Map” that appears on your screen and enter the “Target location” into the “search box” at the top-left.
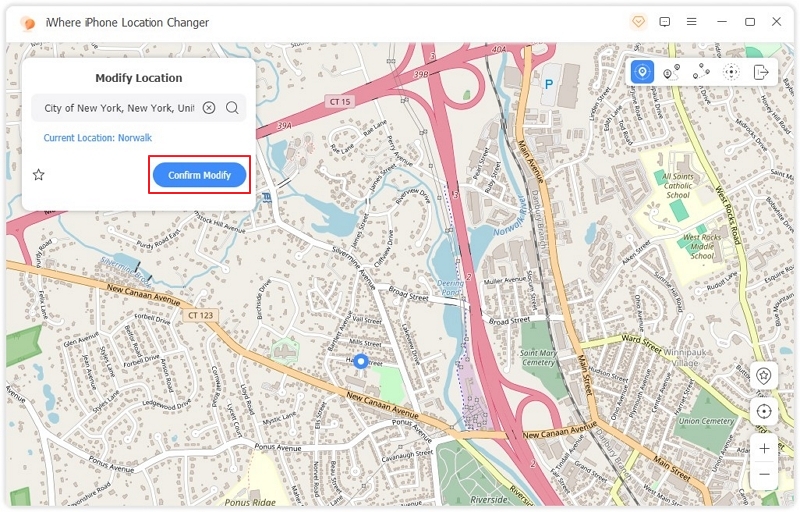
Step 4: Click on “Confirm Modify” to finish.
Part 2: How to Change Home Address in Apple ID on iPhone
If your main objective is to get accurate location-based services and purchases on App Store or while using other online websites, changing your home address via Apple ID is the way to go. This can be done via your iPhone’s settings. However, you will need to provide a payment method used in the location of your new home address to be able to complete the process. Here is how it works:
Step 1: Head to the “Settings” app on your iPhone and tap on your “Apple ID” banner.
Step 2: Choose “Media & Purchases” and select “View Account”.
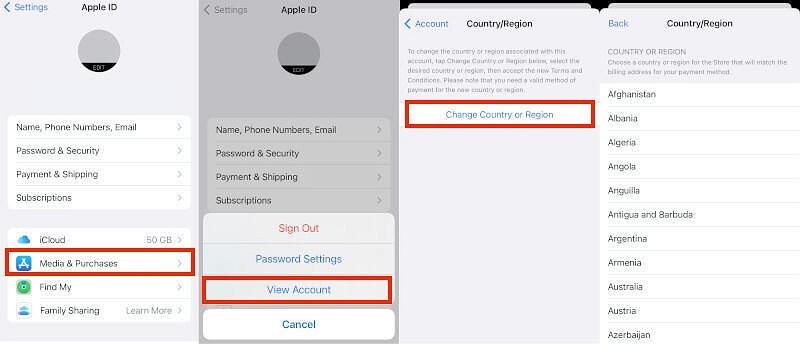
Step 3: Tap on “Country/Region”.
Step 4: Accept the relevant “Terms & Conditions” and proceed to change your home address.
Step 5: Navigate to the “Billing Address” section and enter your new home address.
Then, enter your “Payment Method” and follow the on-screen instructions to complete the process.
- You need to cancel all current subscription to be able to change your address.
Part 3: How to Change Home Address in Apple Maps on iPhone
You can also change your home address on iPhone via Apple Maps. This is very helpful, especially if you rely on Apple Maps for the navigation of your new city. Follow these steps to change your home address in Apple Maps:
Step 1: Launch the “Apple Maps” app.
Step 2: Swipe up from the bottom of your iPhone screen and select the option that says “Home”.
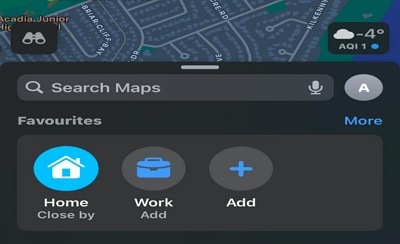
Step 3: Tap on the “Pencil” icon next to the “Home address” that is currently displayed on the map.
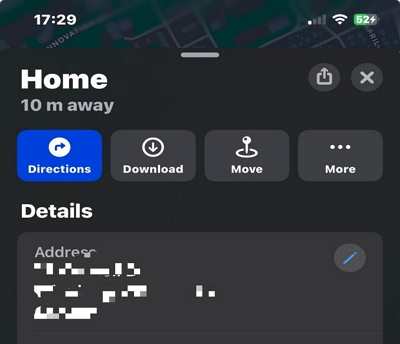
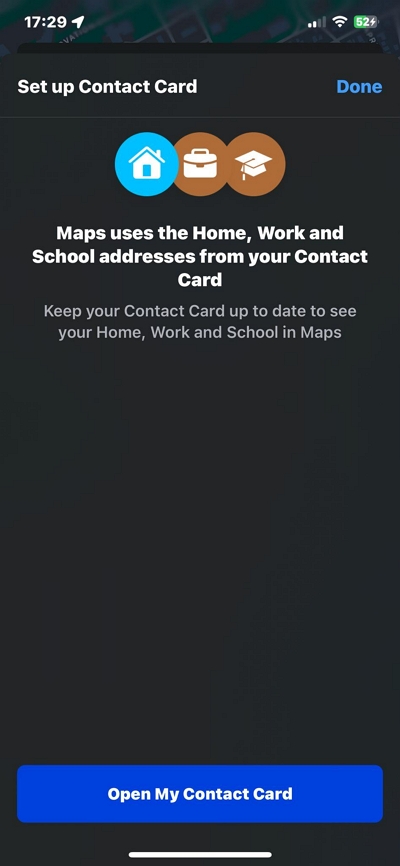
Step 4: Tap “Open My Contact Card” from the pop-up.
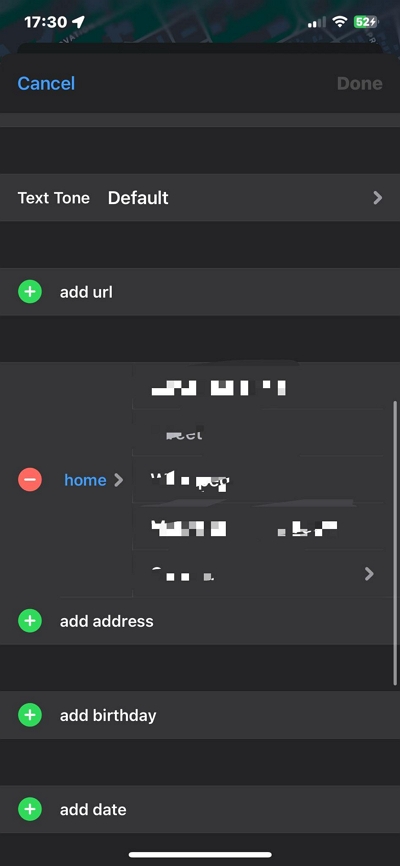
Step 5: Scroll to “Address” section and enter your new home address information. Then, tap on “Done” to activate the changes.
Part 4: How to Change Home Address in Google Maps on iPhone
Adding your home address to Google Maps on iPhone can be useful if you want to get more detailed information about amenities like hospitals, restaurants, grocery stores, gyms, and lots more within your new location. All you need to do is to follow the steps below:
Step 1: Open the “Google Maps” app.
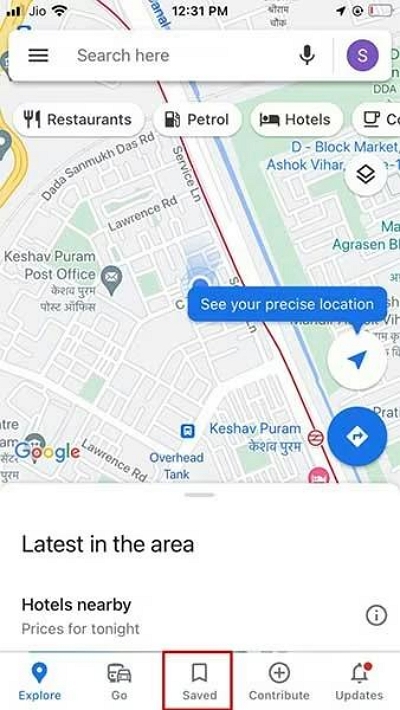
Step 2: Tap on the option that says “Saved” at the bottom of your screen.
Step 3: Select “Labelled”.
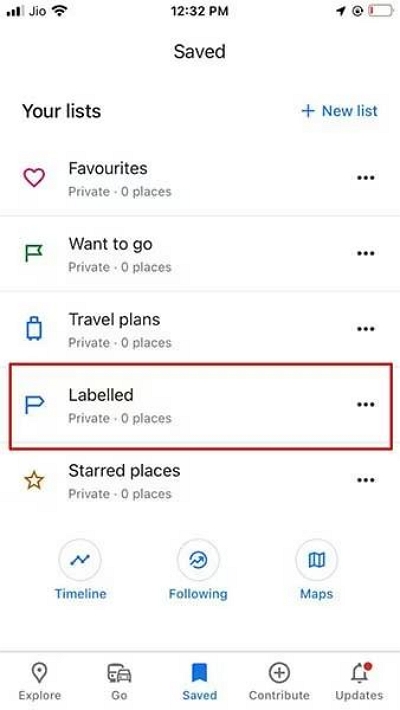
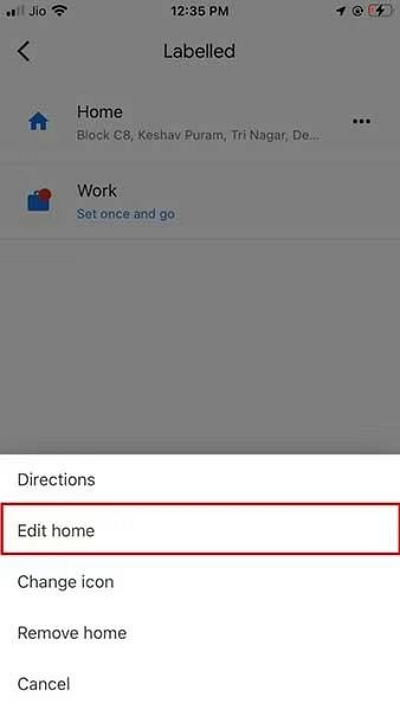
Step 4: Tap on the “three-dot” icon at the right side of the current home address and select “Edit Home”.
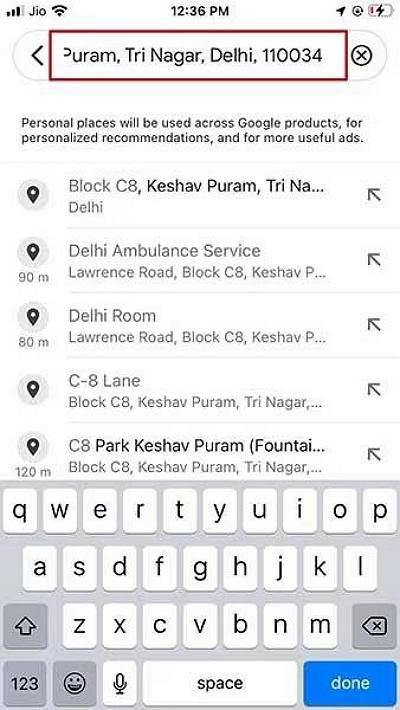
Step 5: Delete the current home address in the “Search field” and enter the new one. Then, tap on “Save” to confirm the new home address.
Part 5: How to Change Home Address on iPhone Auto Fill
Another important place you might want to update your home address when you relocate is in your iPhone AutoFill. This helps you streamline form filling and ensure accurate information input. Here’s how you can easily change your home address for AutoFill on your iPhone.
Step 1: Open your iOS device “Settings”.
Step 2: Find “Safari” and tap on it.
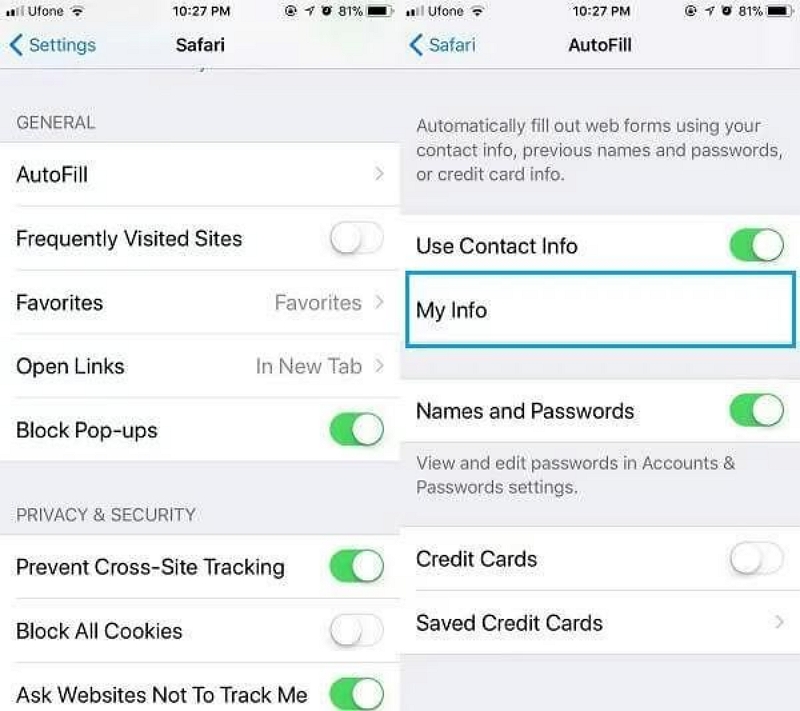
Step 3: Scroll to “General” section and select “AutoFill”.
Step 4: Turn on the toggle next to “Use Contact Info”. Then, tap on “My Info” and select your personal contact from the pop-up to save the address.
Conclusion
Changing home address on iPhone is a simple task that can be executed within a few minutes. In the article above, we’ve shared different workaround that you can use to change home address on iPhone for any purpose. Whether it’s to bypass geographic restrictions, download Apps from App Store, use Google Maps/Apple Maps, or update your AutoFill address data, you just need to follow the relevant steps to get the job done.
