Whether you want to direct a friend to your place of residence, update your colleagues about your whereabouts, or find the easiest route to your destination, a mapping platform like Google Maps is a landscape technology you could leverage on. This program with its comprehensive interface allows you to share your location with your friends, relatives and colleagues effortlessly.
It doesn’t just end as you are also allowed to select a duration for which you want to share your GPS thereby making location sharing more detailed. Sharing your location with Google Maps is one of the simplest tasks you could engage in on the platform. However, the procedure to follow can be quite dicey depending on how much info you want the GPS data to display to your recipient. This post will do justice by discussing how to share location on Google Maps.
Conditions for Sharing Location on Google Maps
Prior to sharing your location on Google Maps, there are certain prerequisites you must check. Some of them are listed here:
- Make sure you have the latest version of the Google Maps app installed on your iPhone or Android.
- The recipient must have Google Maps to view the GPS details you shared.
- Ensure you have a Google Account and it’s signed in on Google Maps.
- Location services must be enabled on your device.
- A reliable internet connection must be available to fetch and share your real-time GPS data.
What People Can See from Shared Google Maps
When you share your GPS data with someone using Google Maps, the following details are displayed:
- Your name and the picture you uploaded on your profile.
- Your phone battery life and a charging icon in case you connect it to power.
- Your device’s most recent location, regardless of whether you are using a Google app or not.
- Nearby locations and a direction based on your request.
- The distance between the person and yourself.
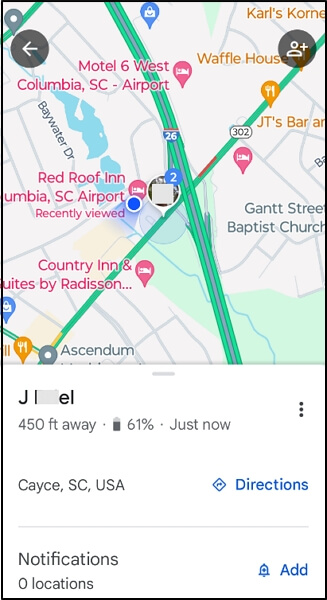
You can include additional information, but the above are the basic details that will appear on the recipient’s screen.
How to Share My Location on Google Maps
Below, we have the procedures you have to follow to share your location plus how to embed a few pieces of info like the time frame for which the GPS data will be available to your recipient:
- Open Google Maps on your device.
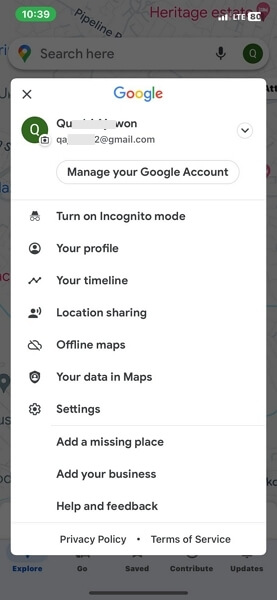
- Tap on the profile icon at the upper right corner on the subsequent screen.
- Select Location Sharing when the drop-down menu pops up.
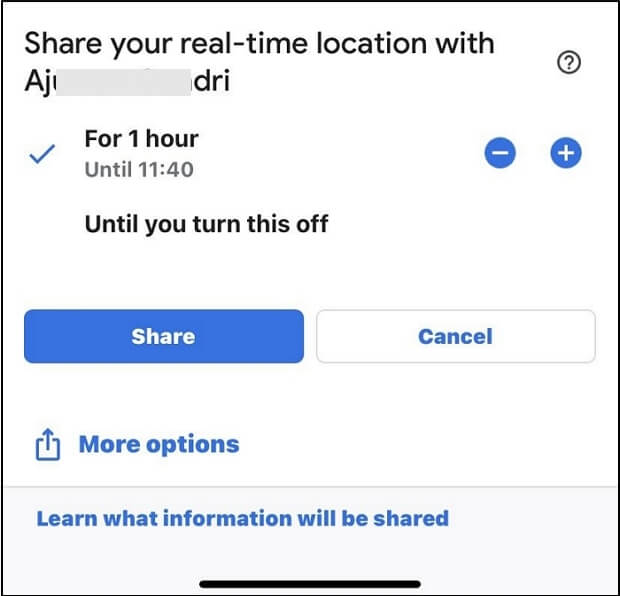
- Tap on the blue Share icon and the response screen below will appear:
- Click on the For 1 hour icon and select the time frame for which your GPS will be available to your recipient.
- Now tap on the profile you would like to share your location with, then click on Share.
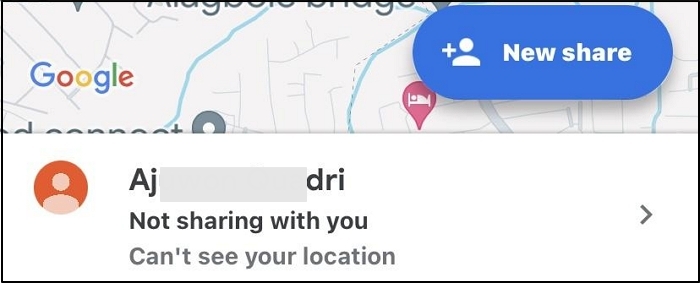
- To add more recipients, hit the New share icon at the lower right corner and select more people to share your location with.
Note: The procedure above only works for sharing your location with a Google Account. If you don’t have the person’s Google profile, you can select other options to send your location link. The recipient just has to click on the link and the location will be displayed on Google Maps.
How to Secretly Stop Sharing Your Location on Google Maps
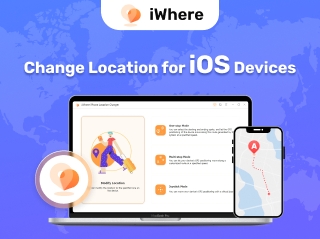
Having discussed how to share your location on Google Maps, you might be interested in manipulating your GPS algorithm to display a fake location for privacy purposes or any security reasons whatsoever. This way, no one can track your real-time location. iWhere is a trusted location mocking software you could rely on to assist you with such an operation.
This software offers an automated approach to change your location to any destination of your choice on all iOS models with little to no stress. It modifies your GPS with high precision so that nobody can know whether or not your location details are real. Another standout feature of iWhere location spoofing tool is the simplified user interface, which makes it easy for anyone to navigate.
We recommend using iWhere to secretly stop sharing your location on Google Maps because of the smooth integration with the app. You can also use it to conceal your location on other apps like Instagram, Snapchat, Facebook, Pokémon GO, and many more. Preinstalled apps aren’t left out, as the software works with Find My, Apple Maps, and iMessage.
Key Features
- Instantly change your iPhone or iPad GPS without stress.
- Flex on your favorite AR games by customizing a route and speed for your in-game characters.
- Export and import location history in GPX format for future reference.
- Simulates GPS movement on all iOS versions.
Steps to Secretly Stop Sharing Your Location on Google Maps Using iWhere
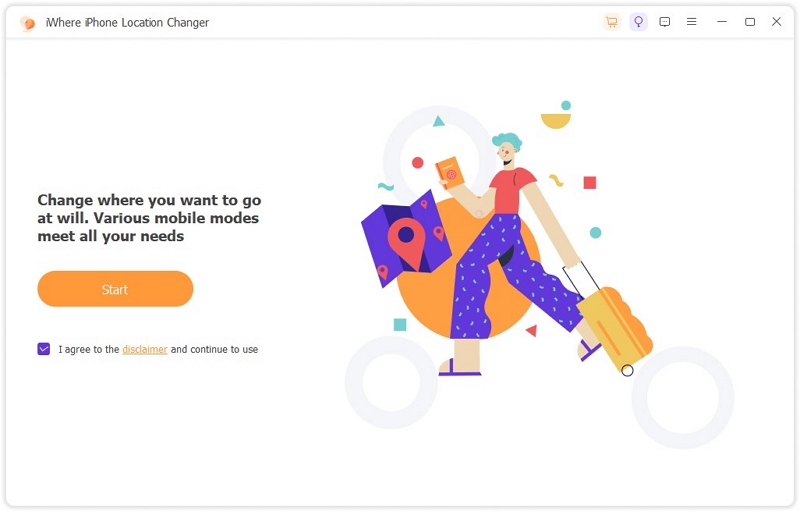
Step 1: Install and open iWhere on your computer. When the quick start page appears, click on the box next to the terms and conditions label, then hit Start.
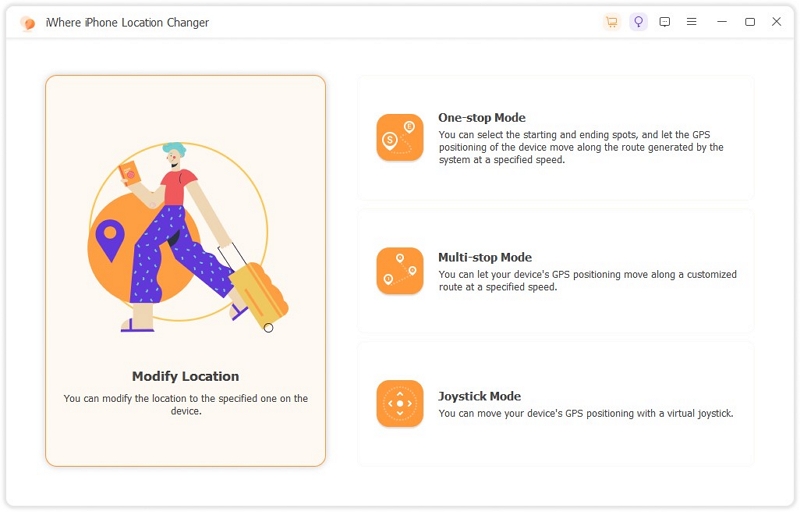
Step 2: Create a connection between your iPhone and computer using a reliable lightning cord. Once iWhere confirms your device is connected, a screen with the 4 GPS simulation modes it supports will come up. Click the Modify Location icon to alter your location.
Step 3: Finally, a map interface with the current location you are in will pop up. Go to the left hand side of the screen, input your desired location and click on Confirm Modify.
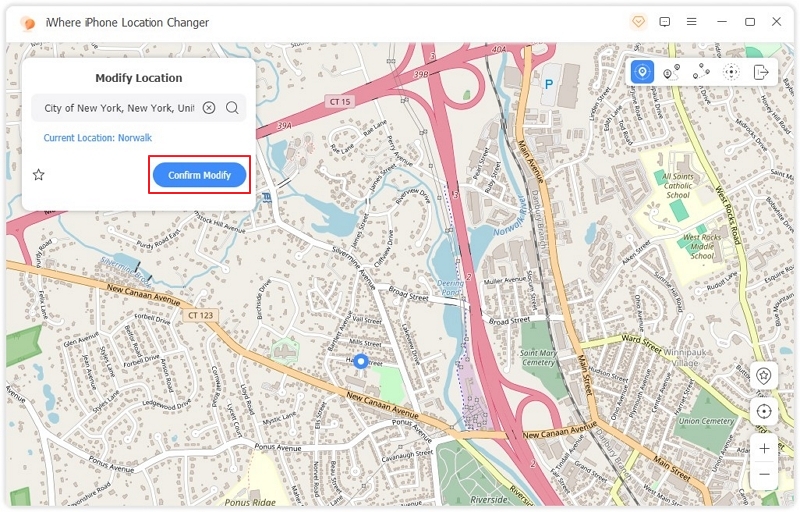
Your iPhone location will change based on your selection and the one on your Google Maps will follow suit.
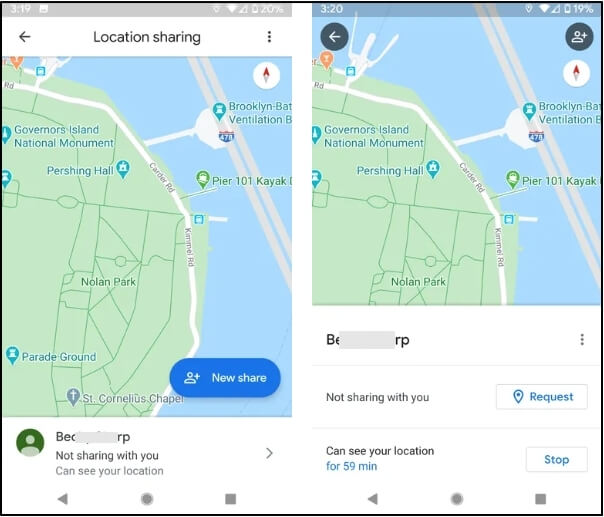
How to Stop Sharing My Location on Google Maps
The illustrative guide to stop sharing your location directly from Google Maps is given below:
iPhone
- Open Google Maps.
- Locate and hit the profile icon situated at the topmost right corner.
- Click on Location Sharing.
- Now, choose the Google Account to stop sharing your location with.
- Afterwards, click on Stop.
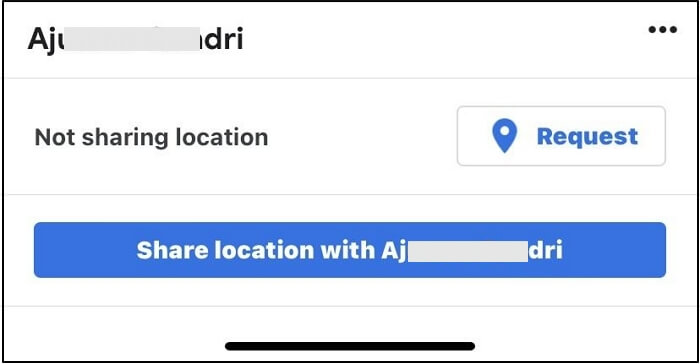
How to Request Someone’s Location on Google Maps
Perhaps you have a friend you want to connect with but don’t know how to get in touch with him or her, you can request the person to share his or her location with you. Google Maps comes with the option for you to request someone’s location. However, either of you must have shared your location with each other in the past.
Here’s the guide for the different mobile operating systems:
- Open Google Maps and click on your profile at the top right corner.
- Tap on Location Sharing, then select the account to request a location from.
- Click on Request to proceed.
- Lastly, click Request again to validate your action.
Conclusion
Now, you have everything about sharing your location on Google Maps. We’ve listed out the conditions to put in place before sharing your GPS data via the platform and how to share, request or stop location sharing. If you want to hide your location while sharing on Google Maps simultaneously, you can use iWhere location spoofer. The software is committed to altering the GPS of an iDevice without notifying others.