Updated on 2024-06-21
3344 views
5min read
Many users often use the location service of Facebook to share their whereabouts at a specific point in time. Adding your location on Facebook is extremely easy but can sometimes be tough if you are a new user. Next, this post will walk you through the various ways to add location on Facebook on both mobile and computer, effectively helping you add location to a new post/profile or update location on Facebook. Let’s read on for details now.
Part 1. Reasons Why You Add Location on Facebook
The location service on Facebook is designed to help you add extra location information to your Facebook account, which could be a post or your profile page. Many folks add a location to their post for memory in order to document their activities at a particular place and time for future reference. It’s mostly used during tourism, and other events.
As for people who add their location to their profile page, it’s just to add extra information about themselves or the business they are into. And this in turn boosts customers’ trust in you and your business.
Part 2. How to Add Location on Facebook via Check In Feature on iPhone/Android
Check In is an advanced feature often used to add a location to a post. It lets you import your current location to both new and existing posts so everyone on your timeline can catch up with whatever activity or event you are into. The steps required to get this done are extremely easy and could be completed on both mobile devices and computers. This section will focus on how to add new locations on Facebook using the check-in feature on iPhone and Android.
iPhone/Android
- Open Facebook on your phone and ensure your internet network is running at optimal levels.
- At the top of your profile page, find the empty field labeled What’s on your mind? and click on it.
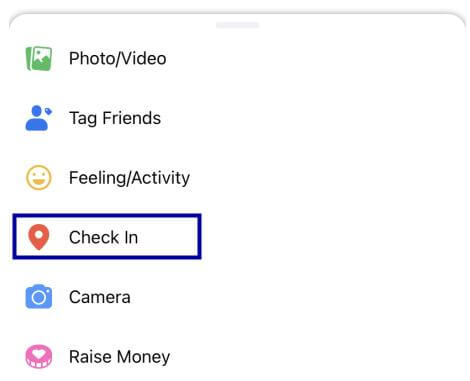
- Edit your post. Then, select Check In when the next screen appears.
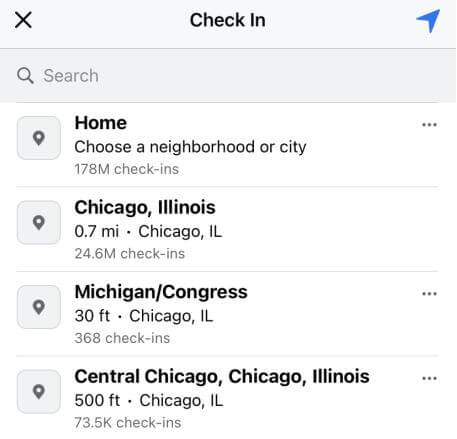
- Next, search for a location you would like to post on your new post and click on it. After completing that, tap on the Post button at the upper right corner of your screen to publish the post.
Part 3. How to Add Location on Facebook via Check In Feature on Computer
For people without a mobile device but who have a computer to access their Facebook account, adding a new location to your posts or status via the Check In feature is straightforward. This is how to go about it no matter the computer operating system you are using:
- Go to the Facebook official website and login your profile.
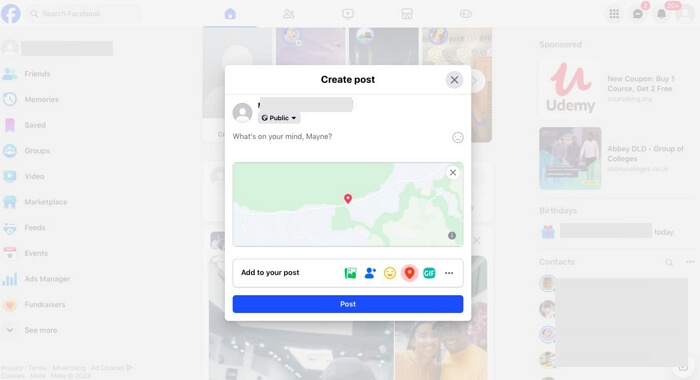
- After gaining access to your account, click on the text bar labeled What’s on your mind? and write your post.
- Next, tap the red location icon, also known as Check In.
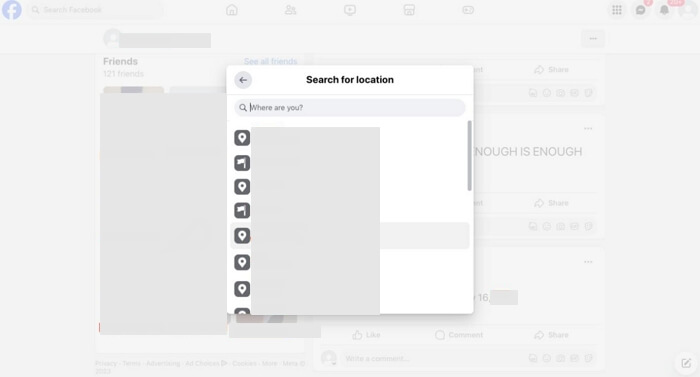
- Another screen with a list of locations you could choose from will pop up. Select a location or type your preferred one in the search bar and click on it.
- Click Post to release the post with location.
Part 4. How to Create A Fake Location on Facebook
Adding a location different from your current one to your Facebook post may lead to account suspension. What can you do if you want to create a fake location on Facebook for privacy protection or other reasons? A third-party location spoofing tool like iWhere iPhone Location Changer should come in handy. With iWhere, you can easily change your GPS location on any iOS device to a wanted destination without others knowing, which in turn affects your activity on other applications. The fake location can be post directly on social media platforms like Facebook, Instagram and many others. Besides, it integrates with AR gaming platforms such as Pokémon Go, and more, enabling you to fake your location without any physical movement.
Features
- iWhere helps you fake your GPS location on Facebook with minimal hassles.
- Allows you to import GPX files to change your location on all iOS devices.
- Supports 3 movement modes which you can select from to customize the route your iPhone moves through.
- Integrates perfectly with Windows and Mac.
Step-By-Step Guide to Create A Fake Location on Facebook
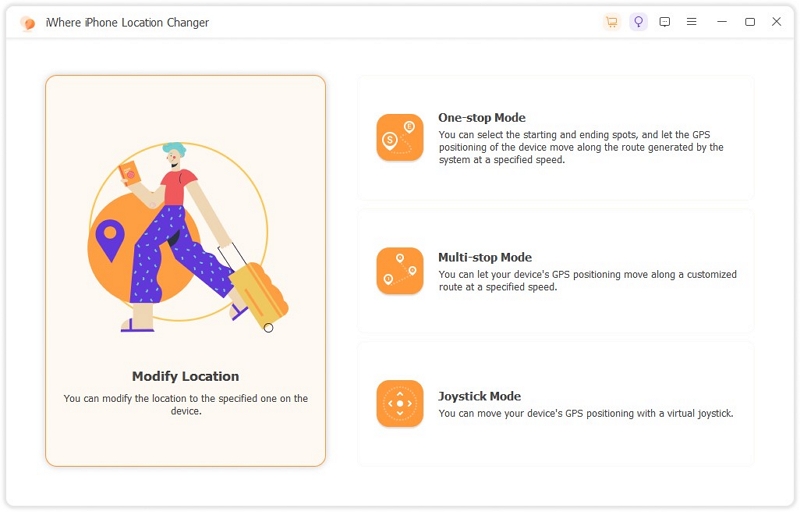
Step 1: Install and run iWhere iPhone Location Changer software on Windows or Mac. Connect your iPhone to the computer using a certified USB cable and click Start. Next, select Modify Location.
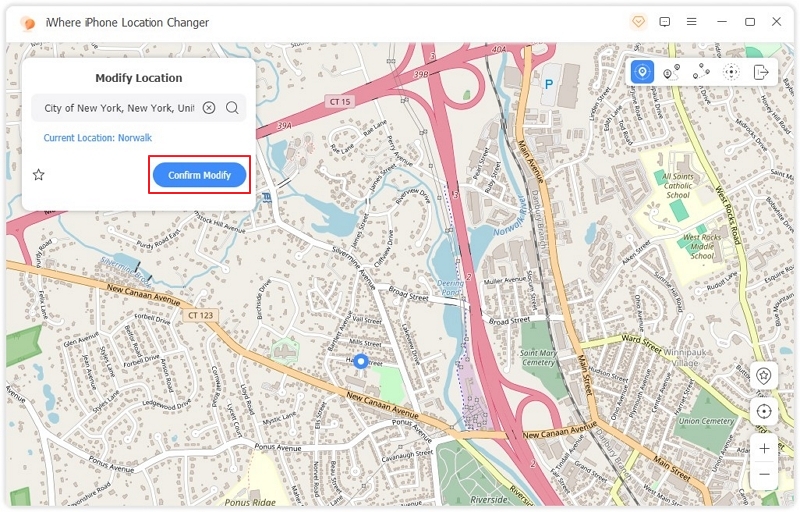
Step 2: On the left hand side of the interface shown, enter your desired location you would like to display on your Facebook account and click on Confirm Modify. Your Facebook profile page will teleport to the selected location automatically.
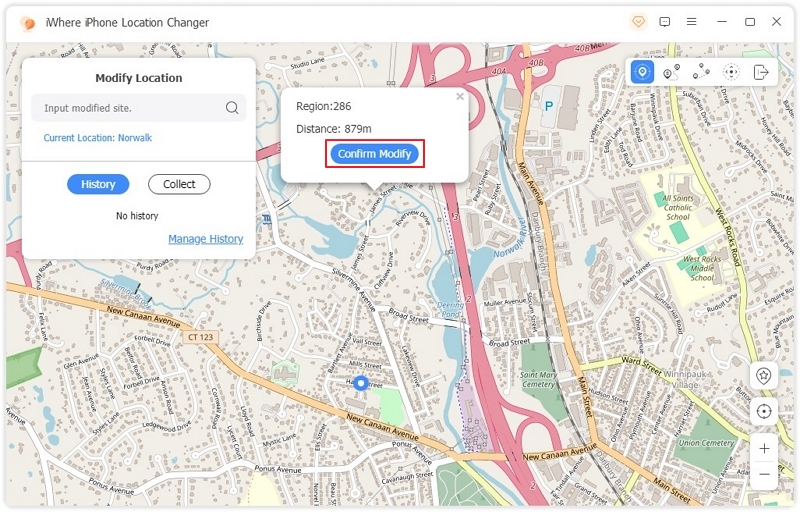
Tip: Alternatively, you can click on any destination on the map displayed and click Confirm Modify to change the location on your iPhone.
After creating a virtual location on your iPhone, it’s available to create a new Facebook post on the iOS device with fake location or add the location to the existing post.
Part 5. How to Add Updated Location on Facebook on Phone/Computer
If you have an existing post you would like to update its location, then the guide below is what you need to complete this:
- Launch your Facebook profile page and click on your Profile Picture at the upper left corner of the screen that appears.
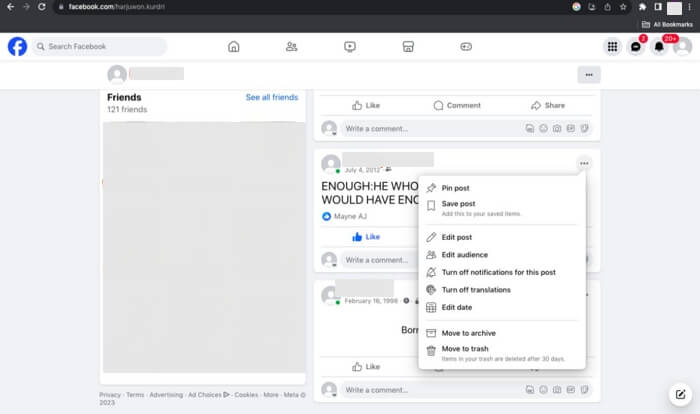
- Scroll through the posts and click on the three dots option beside the post you want to add a new location to.
- Select Edit Post and click on the red location icon. Then update the location.
- After that, save and click on the appropriate button to save the new location.
Part 6. How to Add Location on Facebook Profile
Rather than changing the location on your old or new status, you can change your profile page. The directions you need to apply to do this are easy to implement and here’s how to do it:
- Open your Facebook account page and click on your Profile Picture.
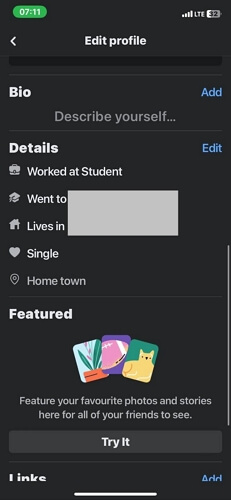
- Click Edit Profile, then swipe down to the section labeled Details.
- Next, tap Edit and this page will pop up:
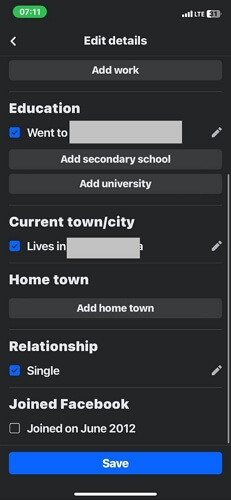
- Head down the page and uncheck the box beside your current location. After that, click the pencil icon and search your preferred location
- Choose the location and click Save to validate your click.
FAQs
Is it possible to add location to an existing Facebook post?
Yes, it is possible to add your location to an existing Facebook post. We’ve demonstrated how this could be done in the part 5 of the article above. Check and apply the stepwise guide given to import your new location on your previous posts.
Can fake locations be detected on Facebook?
No, fake locations can’t be detected on Facebook, especially when you use a spoofing tool like iWhere iPhone Location Changer. However, you must not frequently tamper with your location settings so Facebook doesn’t flag your account for suspicious activities.
Why can’t I add location on Facebook page?
Once you are connected to your Facebook account, adding your location shouldn’t be a challenge. However, if you can’t after applying the solutions above, then you need to check your settings to confirm you’ve granted Facebook the permission to track your location. Here are the steps to allow Facebook to access your location on iPhone.
- Go to the Settings app on your iPhone.
- Select Privacy & Security > Location Services.
- Slide the icon near Location Services in the direction that shows green.
- After that, scroll down to where you have Facebook, click on it and select While Using the App. This way, each time you launch Facebook on your device, your location is automatically documented.
Conclusion
Having demonstrated the different ways to add your location to your Facebook account, managing your location shouldn’t be a tough task to complete anymore. However, mind you, if Facebook isn’t allowing you to add a location different from where you are currently, then iWhere iPhone Location Changer should come to your rescue. iWhere offers the ultimate way to manipulate your iOS GPS which extends to other apps like Facebook and others.
