Updated on 2024-04-18
5094 views
5min read
Photos are great for keeping memories. Besides helping you recollect those wonderful moments you had in the past, you can also find extra valuable information from them and location is a popular one.
Whether you own a mobile device or computer, you can tell where a particular picture was shot using the simple hacks shared in this post. Continue reading as we walk you through how to find location from pictures for free.
Part 1. How to Find Location from Picture on Phone and Computer
Using the built-in Photos app on your phone or computer, you can determine where a picture was shot. But with the conditions that you’ve granted the Camera app permission to use the location service or save the location info when taking the photos on your device.
Find Location from Picture on Android
Discover where a particular image was captured on your Android by following the procedure below:
- Go to the Photos app on your Android phone and tap on any of the images you would like to check its location data.
- At the upper right corner, click on the three vertical dots.
- Now, swipe down a bit and see the exact location where the photo was shot.
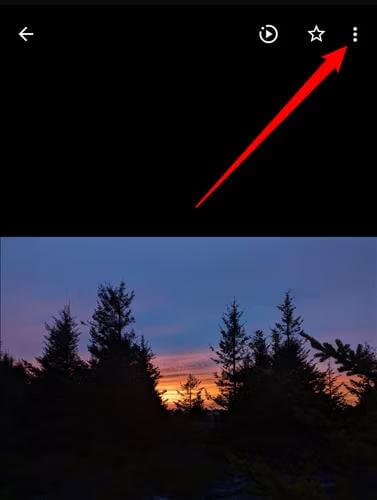
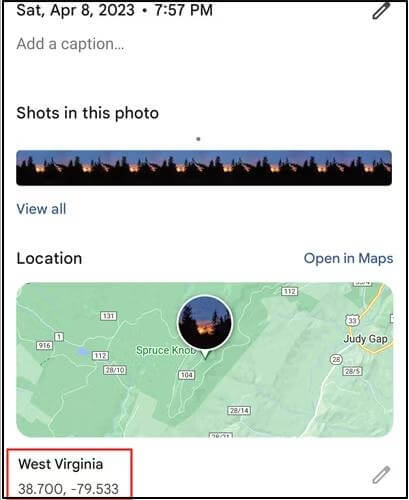
Quick Note: The Photos app also known as gallery is the default app for viewing pictures on stock Android phones, such as Google Pixels and others. However, if you use other normal Androids like Samsung, the gallery app isn’t the same. But the approach is similar as you need to go through the three vertical dots to get a picture location details.
Get Location from Photo on iPhone
Use these steps to determine the location of both new and existing images captured directly from your device:
- Tap on the Photos app icon and a screen with all the images you’ve captured will come up.
- Scroll through the images and click on the one you want to find its location to enlarge your view.
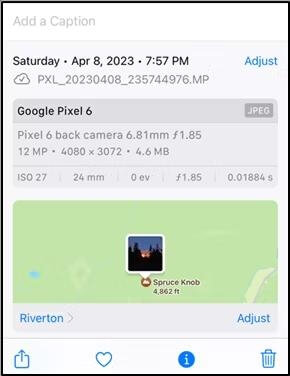
- At the bottom of the screen, you will find 4 icons. Click on i (also known as info) and the screen below will appear.
![]()
Find Out Where A Picture was Taken on Mac
If you take photos using Mac, here’s the simple illustrative guide to discover where you captured the resulting images:
- Go to the Photos app screen and select any of the images.
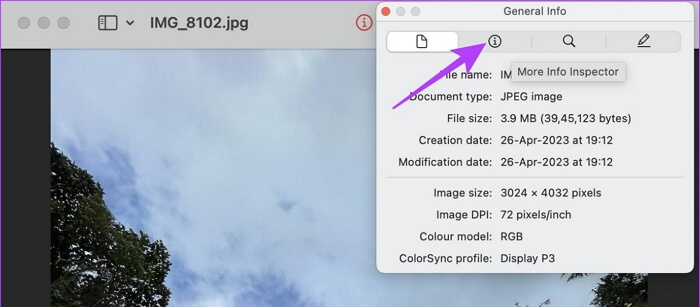
- An interface showing the enlarged version of the photo will come up. Head to the top of the screen and click on i to open the General Info window.
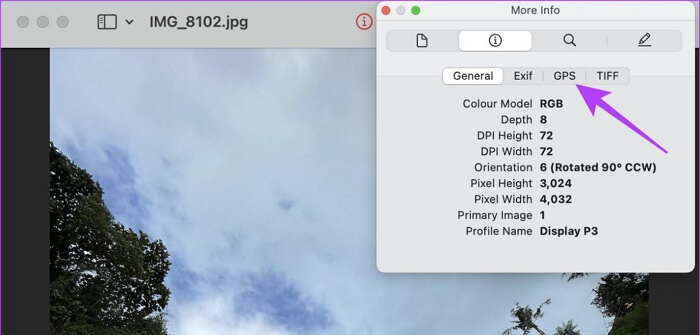
- Click on the i button again to proceed.
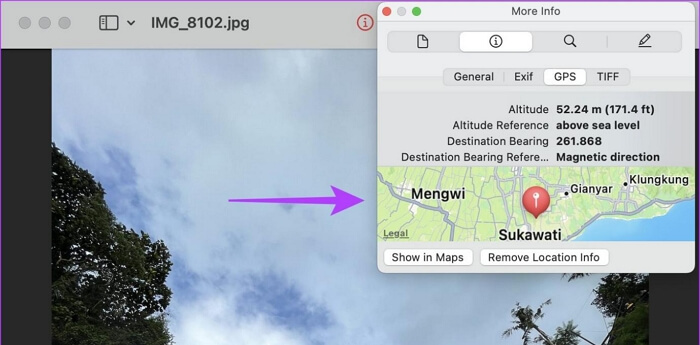
- Next, select GPS from the menu toolbar to view where the photo was shot.
- Now, a screen with the info on where the photo was shot will come up.
![]()
Check Photo’s Location on Windows
For folks who capture photos on their Windows, this is the guide you need to follow to check the location details:
- Locate the Photos app icon and click on it.
- Next, tap on an image you would like to find its location.
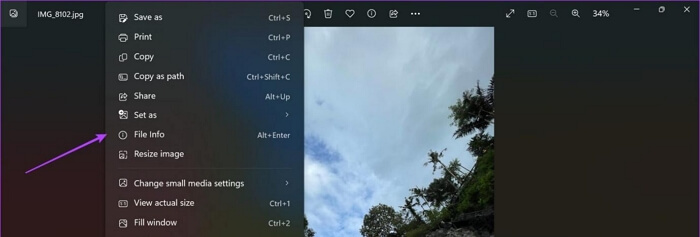
- Right click on the image and select File Info from the flyout menu that pops up.
- Without delay, an info tab will come up on the right hand side of your screen. Navigate to this section and swipe down to access the photo’s location.
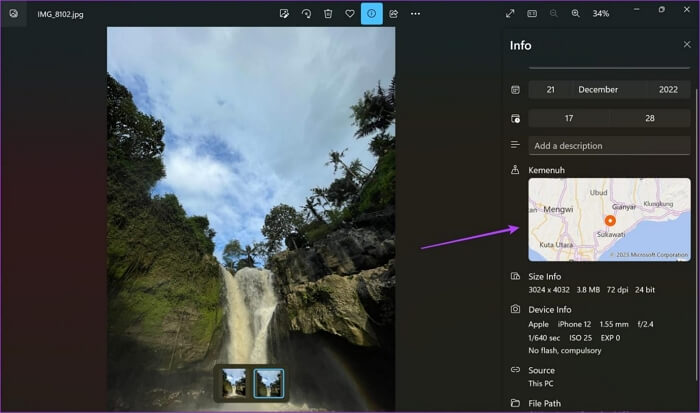
Alternatively, you can use the procedure below:
- Launch the image and right-click on it.
- Select Properties from the options that appear.
- After that, click on Details and a screen with several metadata of the image will come up.
- Scroll down to where you have the GPS coordinates, Longitudes, and Latitude, which signals the location of the photo.
Overall Note: The procedures above only displays location for images shot directly from the device. If you downloaded an image from Google or any third-party site, you can’t verify the exact place where it was captured. Also, it is crucial that you have your internet network activated so the location service can read the correct GPS for your images.
Part 2. How to Identify Location from Photo without Geotag
If you have a picture you didn’t capture directly on your device but downloaded from maybe a social media platform, verifying the location could be challenging. This is because such pictures have been stripped of their EXIF data, which contains your location details. But there’s a way forward.
Here’s how to identify location from photos without geotag:
Check Online Communities
Popular communities such as Quora and Reddit are online platforms where folks from different parts of the world visit to ask and get answers to questions they find confusing. You can leverage these platforms to discover where a specific picture was captured, regardless of whether you have EXIF data embedded in it or not. All you are required to do is to share the picture on either of the platforms, add your question underneath, and the users will surely give a response.
Reverse Image Search
Another quick way to find the location of an image without a geotag is to copy and paste it into Google Images. This platform is loaded with countless images and will display the similar image to yours if there is. In case your picture matches that of any image on Google Images, then you may get some location info of the target image.
Bonus. How to Add a Fake Location for Picture on Social Media
Posting your pictures on a social media platform with your real location on it reveals your privacy. This can sometimes be uncomfortable for some folks. Is this the same for you too? If so then you need a location spoofing tool like iWhere iPhone Location Changer to help you fake your location.
iWhere is a location spoofing tool that’s capable of changing the GPS location of any iOS device so no one can verify where an activity occurred on it. This tool powers an advanced GPS manipulator whose effect extends to all apps you have on the device, including social media and gaming platforms. Examples are Pokèmon Go, Facebook, Instagram, and many others.
Key Features
- Fake your location for pictures on popular social media platforms with just a few clicks.
- Easily change your GPS location by importing GPX files or searching your preferred location.
- iWhere allows you to export, and save your GPS history for future reference.
- Allows you to move your iPhone along specific tracks without any physical migration using one of the 3 movement modes it supports.
Steps to Add a Fake Location for Picture on iPhone
Install iWhere iPhone Location Changer on your PC/Mac and follow the illustration below:
Step 1: Launch the software and check the terms and condition box. After that, click Start.

Step 2: Next, plug your iPhone into the computer using a reliable USB cord. If you are just connecting for the first time, you will receive a prompt on your phone. Click Trust to proceed and the interface below will appear:
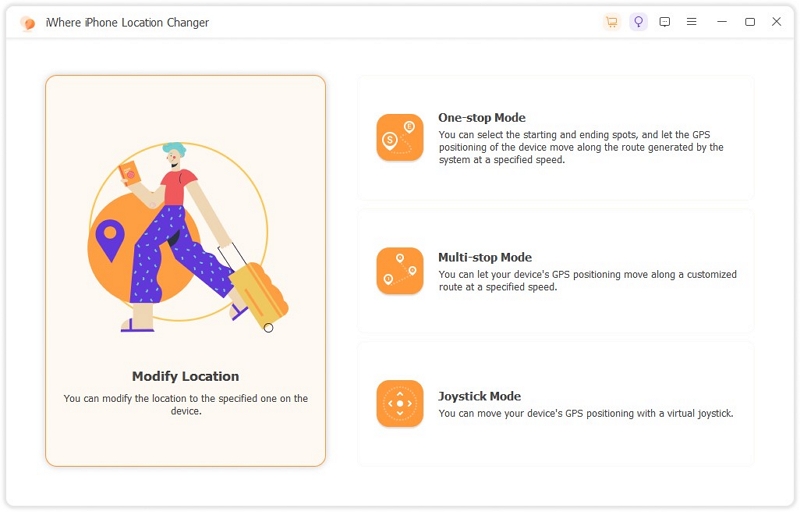
Click Modify Location to continue.
Step 3: Now, iWhere will display a map on your screen. Type your desired destination in the search field on the left hand side of your screen and click Confirm Modify. Your iPhone GPS will migrate to the chosen destination immediately.
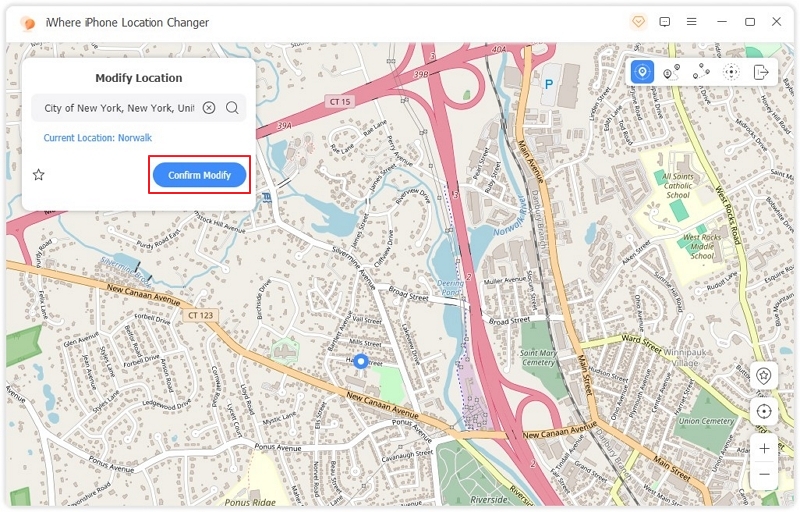
Without delay, your iPhone will start reading the selected location. Now, you can use the fake location for your pictures on any social media platform of your choice.
Conclusion
Having read through the comprehensive guide above, you can now determine where a picture was shot without racking your head or going through the stress of creating a folder to document the location. It doesn’t matter whether the picture was captured on your phone or downloaded. In case you want to post the picture online via an iOS device and don’t want anyone to know the exact location where it was captured, iWhere iPhone Location Changer can help you fake your location. The software helps you manipulate your iOS GPS, so all operations are executed using the new location.
