As we spend more time online, keeping things secure is very important. One significant method to do that is by managing your browser’s location permissions. In this guide, we’ll explore the steps to enable location permission in your browser to ensure a safer and more personalized online experience. So, let’s dive in and make sure your online world stays both secure and tailored just for you.
Part 1: Understanding Location Permissions
Ever wondered why your browser asks for permission to know your location? Let’s clarify the concept of location permissions and why they matter for your online experience.
What Are Location Permissions?
Location permissions give your browser the ability to know where you are in the world. It’s like a virtual map that helps customize your online experience based on your real-world location.
Why It Matters?
Imagine that you are in charge of when and where your browser knows your location. That’s the power of location permissions. It’s about having the power to decide when to share and when to keep your location private. So, why does it matter?
Ever seen messages like location permissions off or you don’t have permission to save in this location? These are reminders to manage your settings. By controlling your location permissions, you’re making your online journey safer and more personalized.
The Benefits of Enabling Location Permission
Now, let’s talk about the good things that happen when you tell your browser where you are.
- Personalized User Experience: Enabling location permission means your online world becomes customized for you. From local news to weather updates, your browser can offer personalized content based on where you are.
- Improved Safety Measures: Knowing your location adds an extra layer of online security. It’s like putting on digital armor to keep your online self safe from potential risks.
- Benefits of Location-Aware Services: Have you ever had your phone suggest nearby restaurants or events? That’s the magic of location-aware services. By allowing location permissions, you open the door to discovering local gems and services that match your interests.
Part 2: Fix You Don t Have Permission to Save in This Location
Let’s explore how to enable location permission in your browsers like Chrome, Safari, and Edge if you get the message “you don’t have permission to save to this location” and keep your privacy & safety in check.
Enabling Location Permission
For Chrome:
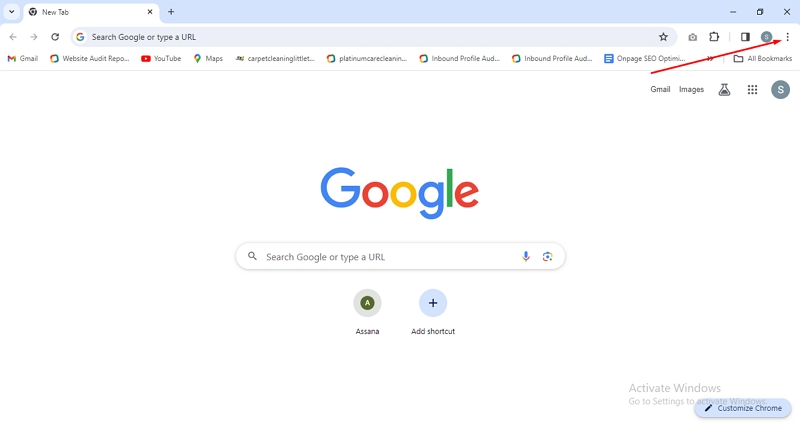
Step 1: Launch Google Chrome and spot the three vertical dots in the top-right corner.
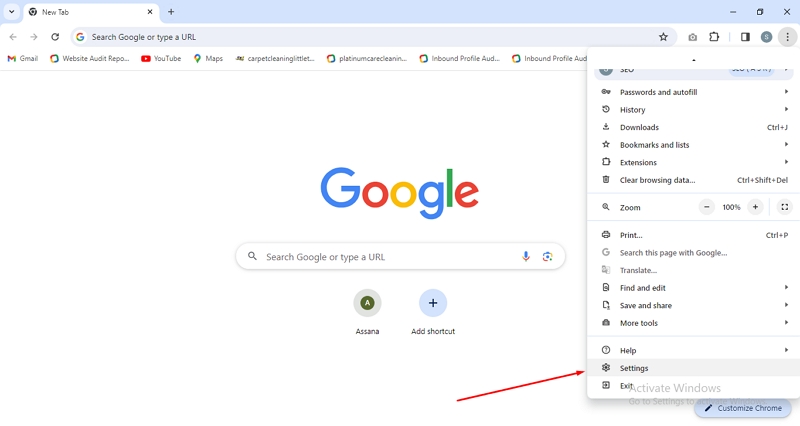
Step 2: Click on the three vertical dots to open the Chrome menu. From the dropdown menu, select “Settings.” This will take you to the Chrome Settings page.
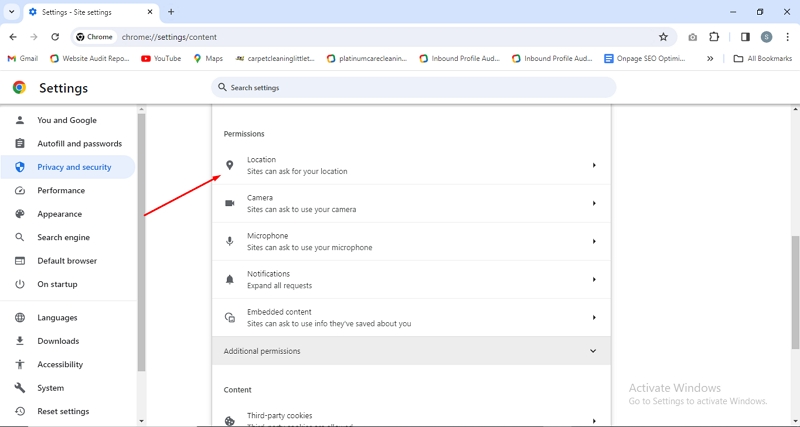
Step 3: On the left-hand side of the Settings page, you’ll find a menu. Click on “Privacy and Security.” Within this section, locate and click on “Site Settings.”

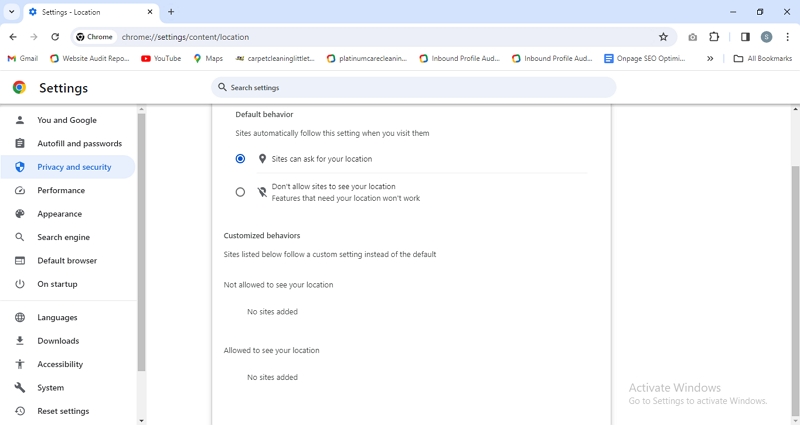
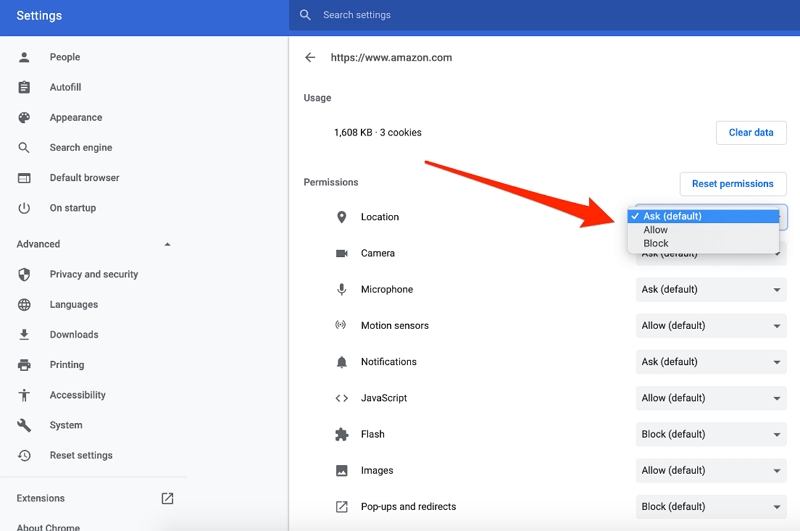
Step 4: In the Site Settings, find the section labeled “Permissions” and look for “Location.” Click on “Location” to access the location settings. Under the Location settings, you will find options related to how Chrome handles location permissions.
Step 5: Choose between “Ask before Access” or “Allow,” depending on your preference.
Step 6: Selecting “Ask before Access” prompts Chrome to request permission each time a website wants to access your location, while “Allow” grants automatic permission.
Step 7: Under “Customizable Behavior,” you’ll see the list of websites with access to your real-time location. If you spot a website you don’t trust, click the “trash” icon to eliminate it from the list. Conversely, if you’ve allowed a website access, you’ll find it under “Allowed to See Your Location.”
For Safari:
Step 1: Open the Safari browser on your Mac. Click on “Safari” in the top menu and choose “Preferences.”

Step 2: In the Preferences window, select the “Websites” tab. On the left sidebar, find and select “Location” under the “Websites” section. This will display options related to location permissions.
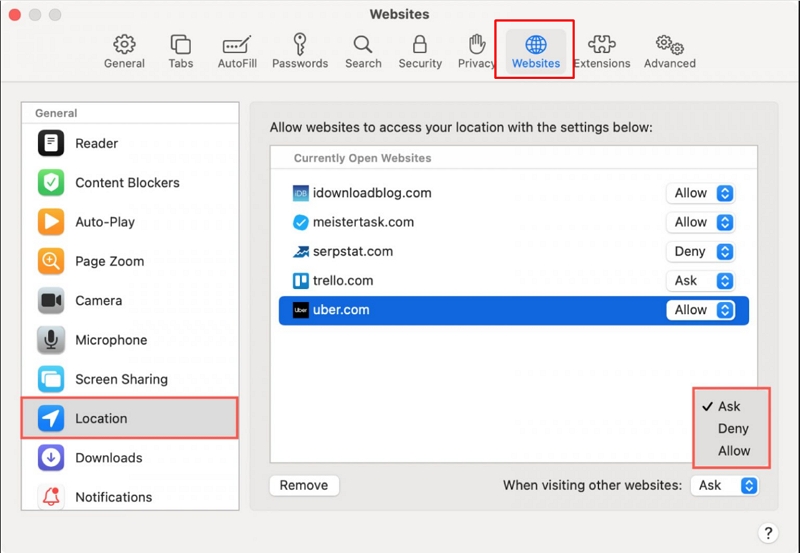
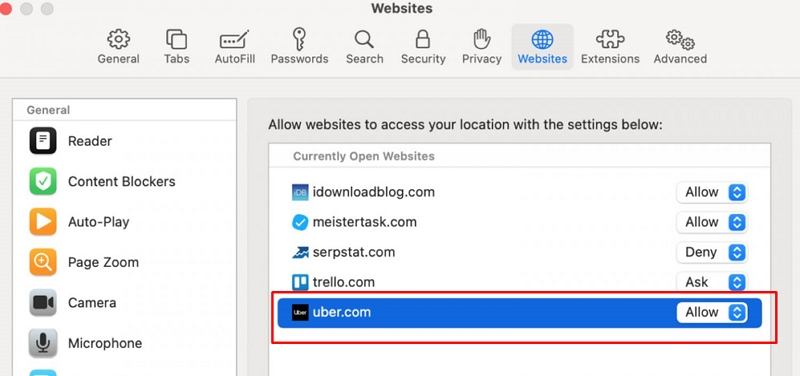
Step 3: In the center of the window, you will see a list of websites. Choose the specific website for which you want to manage location permissions. Once you have selected the website, you’ll see three options: “Deny,” “Allow,” and “Ask.”
Step 4: Choose “Deny” if you want to block the website from accessing your location.
Step 5: Choose “Allow” if you want to grant the website unrestricted access to your location.
Step 6: Choose “Ask” if you want Safari to prompt you each time the website requests your location, allowing you to decide on a case-by-case basis.
Step 7: After adjusting the location settings for the specific website, click the “Done” button to save your changes.
By following these simple steps in Safari preferences, you can effectively manage and enable location permissions for specific websites. Whether you choose to allow, deny, or be prompted for location access, these settings empower you to control how websites interact with your location information, enhancing your privacy and security while browsing.
For Edge:
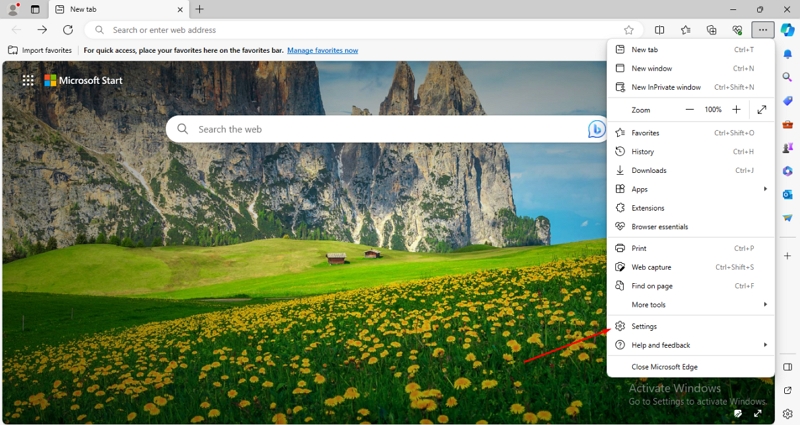
Step 1: Open Microsoft Edge and spot the three horizontal dots in the top-right corner. Click on the dots. This will open a menu. Scroll down & click on “Settings” at the bottom of the menu.
Step 2: In the left sidebar, find and click on “Cookies and site permissions.”
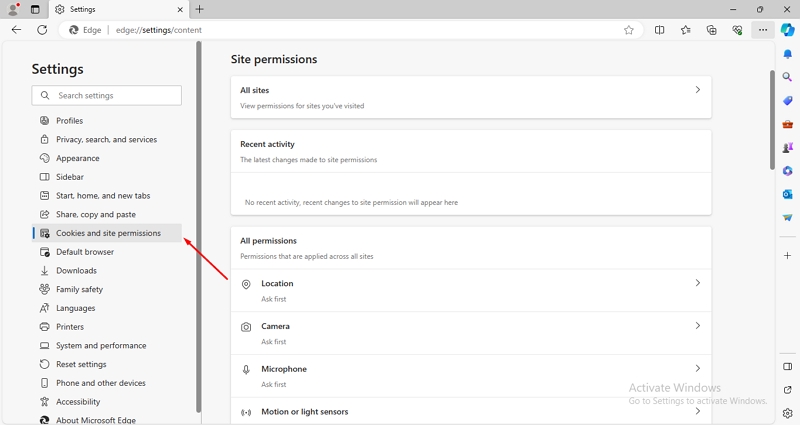
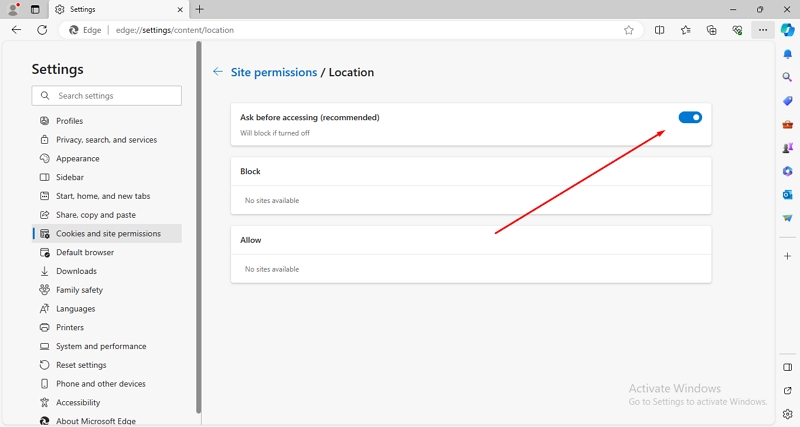
Step 3: Within “Cookies and site permissions,” locate and click on “Location.” You will see the option to toggle the switch for “Ask before accessing (recommended).” If this switch is off, it means location access is allowed without asking.
Step 4: To customize your location settings, click on “Manage” under “Sites that can always use location.” Here, you can add or remove websites from the list of sites allowed to access your location.
Maintaining your privacy and safety is important when allowing location permissions in your browser. By customizing these settings, you are finding the right balance between enjoying location-based services and keeping your personal information secure.
Manual Steps to Restrict Location Access for Chrome:
Taking control of your location data is easy with Chrome:
Step 1: Firstly, launch Google Chrome and then click on the three dots in the top-right corner.
Step 2: Select “Settings.”
Step 3: Choose “Privacy and Security” and then go to “Site Settings.”
Step 4: Navigate to “Location.” And then click “Block”.
Step 5: Under “Customizable Behavior,” review and manage websites’ access to your location. Remove any untrusted sites by clicking the “trash” icon.
By above these steps, you not only fix the permission issues but also actively enable location permission in your browser for a safer and more secure online journey.
Part 3: More Ways to Protect Your Location Privacy via Intelligent Tools
Did you know there’s a smart tool that kills two birds with one stone that protects your online privacy from being tracked by your browser while still allowing you to see more information from around the world?
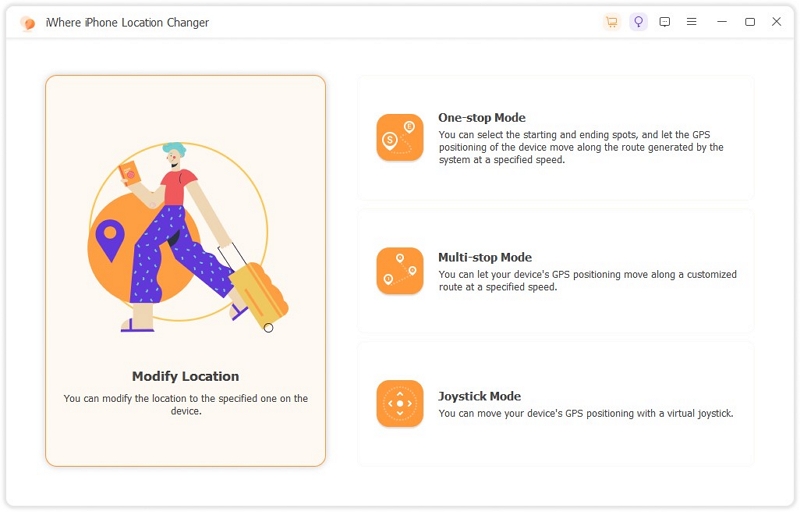
Yes, the smart tool iWhere iPhone Location Changer. It’s software that helps iPhone users fake GPS locations with one click. When you want to hide your location on social media or video platforms, Find My, iWhere can do it quietly. You can also customize the route of the device while playing the AR game Opportunity Location and freely adjust the location movement speed so that you can catch rare Pokemon while lying at home. If you discover a favorite route and want to use it again next time, the software allows you to collect the route and import or export GPX files for free. iWhere iPhone Location Changer offers three mobile modes: one-stop mode, multi-station mode, and joystick mode. The following section describes the specific procedure.
Key Features:
- Support all popular social software and platforms in the market, such as Instagram, Facebook, TikTok, etc. Let you break geographical restrictions to browse more regions of the news or get fans from all over the place.
- With the ability to customize the speed function, there are walking speed, cycling speed, and driving speed, let you play AR games or location-based games without having to pay attention to whether the position needs to move and easily complete the game task.
- Provide rocker mode, one-stop mode, and multi-station mode; you can DIY the route, free to save or collect your favorite route.
Now, let’s talk about changing or activating virtual location permission in your browser using smart tools like iWhere iPhone Location Changer.
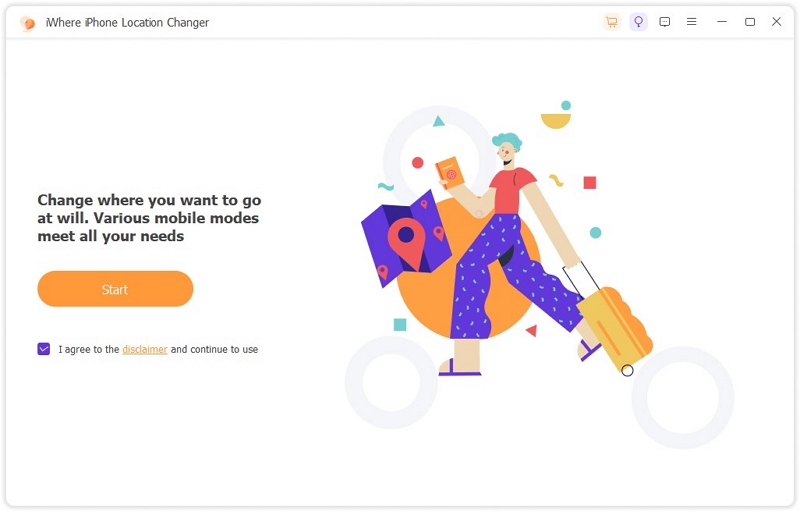
Step 1: Connect Your iPhone. Open iWhere iPhone Location Changer on your computer. Click the Start button to link your iPhone to the computer.
Step 2: Pick a Mode. Choose the mode that suits what you want: Modify Location, One-stop Mode, Multi-stop Mode, or Joystick Mode.
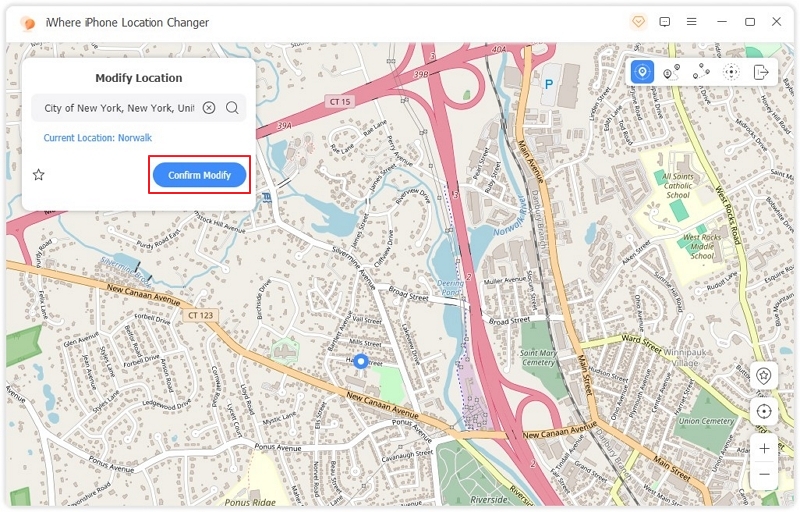
Step 3: Move Your Location. You can use the + and – in the bottom right corner to zoom in on the map or the mouse or keyboard to control the movement of your iPhone. Then select the places you want. Click Confirm Modify to shift your iPhone’s location.
You can go to any corner of the Earth or a popular country and enjoy traveling the world without walking. Also, in this way, you don’t have to manage whether the browser is allowed to access your location, you can surf the web freely, and you can see more news about the region you set up.
Conclusion
In the online world, keeping things safe is a big deal. Managing your browser’s location permissions is a key way to do that, ensuring a safer and uniquely personalized online experience. By understanding the process to enable location permission in your browser, you get to control your online journey, making it just right for you.