Updated on 2024-06-21
2280 views
5min read
We all have different reasons to change location on iPad. But unfortunately, not everyone is familiar with how to get it done. If you’re among such users, don’t panic. This article will show you the ultimate ways to change the location on iPad with WiFi & Cellular data or WiFi only. Read on to find out more.
Part 1: Can You Change Location on iPad?
Yes, you can change your location on iPad. However, the procedure varies depending on the iPad model you’re using. If your iPad is a WiFi-only iPad, you can change its location by changing the location of the Wi-Fi router. However, for “WiFi + Cellular” iPad (iPads that use GPS network to update location) you can use a location changer app like iWhere to change its location.
Part 2: Reasons to Change Location on iPad
Here are some of the reasons why you might need to change location on your iPad:
Access region-specific content: If you intend to access region-specific content or services, changing your iPad location can be helpful. For example, if you are in the UK but want to access USA action movies on a streaming platform, you can change your location to a city within the States to be able to stream movies in that region effortlessly.
Protect Your Online Privacy: Changing your location on iPad can also help you protect your privacy. It enables you to protect your location information from being leaked to apps and online services that you use on your iPad.
Improve GPS Accuracy: In a case where your iPad is not accurately determining your real location, you can change your location manually to improve its accuracy. This is helpful when you’re using a GPS navigation app like Google Maps or a ride-sharing app like Uber.
Part 3: How to Change Location on “WiFi + Cellular” iPad
If you use an iPad that operates with both WiFi and Cellular networks, the best way to change your location is to use a location changer app. A location changer app like iWhere iPhone Location Changer allows you to modify your iPhone, iPad, or iPod location without jailbreaking or causing any harm.
Whether you’re looking to bypass geographic restrictions for websites or apps, change location on a social media platform, spoof location on AR games like Pokemon Go, or more, iWhere iPhone Location Changer has got you covered with advanced features to get the job done with high accuracy. Additionally, iWhere supports many unique features ranging from multiple location spoofing modes, adjustable movement speed, GPX file import/export, map zoom in/zoom out, and many more.
Key Features
- Offers a flexible joystick mode to facilitate seamless location spoofing when playing Pokemon Go.
- Create routes to fake your iPad/iPhone location using one-stop mode or multi-stop mode.
- Automatically saves visited spots to location history for an easy revisit.
- Change iPad/iPhone location with high accuracy.
How to change iPad location with the iWhere iPhone Location Changer
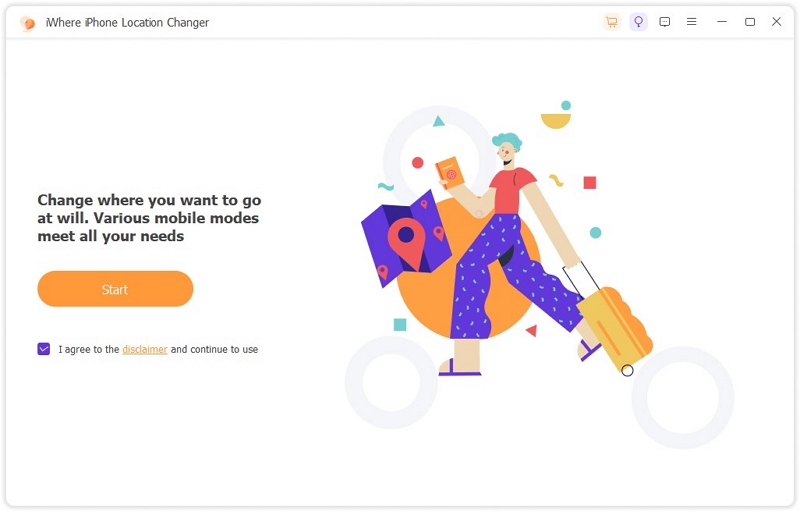
Step 1: Open the “iWhere iPhone Location Changer” app on your computer and click “Start”.
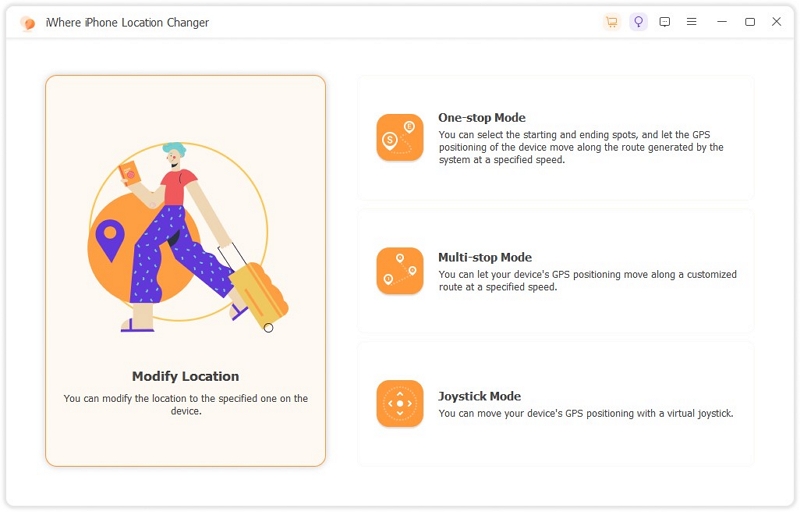
Step 2: Connect your iPad to the computer using a good USB cable and click on “Modify Location”.
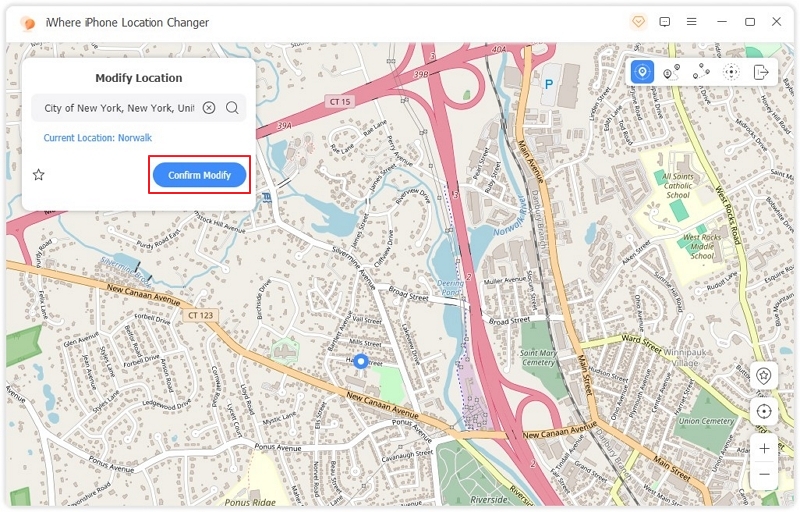
Step 3: Enter a “Destination” to change your location into the “Search Field” at the top-left corner and click “Confirm Modify” to change your iPad location.
Part 4: How to Change Location on “WiFi-Only” iPad
Unlike iPads supporting WiFi + Cellular network, WiFi-only iPads do not have a built-in GPS receiver. They rely on your WiFi network information to provide approximate location data about your device’s location. So, if you’re using a WiFi-only iPad, the best way you can change your location is to connect to a WiFi network that is associated with the location you’d like to switch to.
Part 5: How to Change Apple Store Location on iPad
If you just moved to a new country or you want to download apps that’s not available in your region from Apple Store, changing your location on the Apple Store is the best way to go about it. However, you must be able to provide a payment method supported in the country you intend to switch to.
It’s also important to note that this operation will cancel all your app subscriptions on the Apple Store. Besides, don’t forget to spend any balance remaining on your Apple ID.
Here is how to change Apple Store location on iPad:
Step 1: Launch the “Settings” app on your iPad and tap on the “Apple ID” banner.
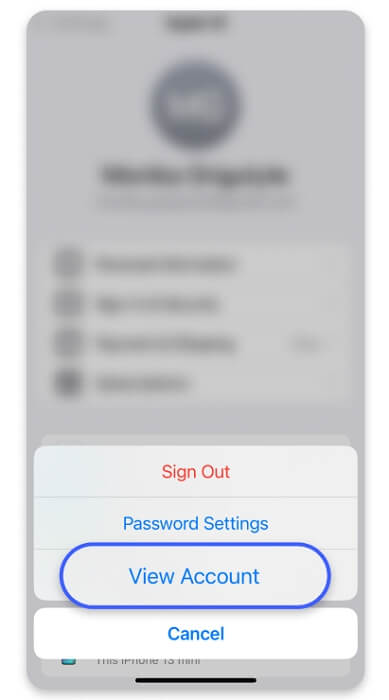
Step 2: Choose “Media & Purchases” and select “View Account”.
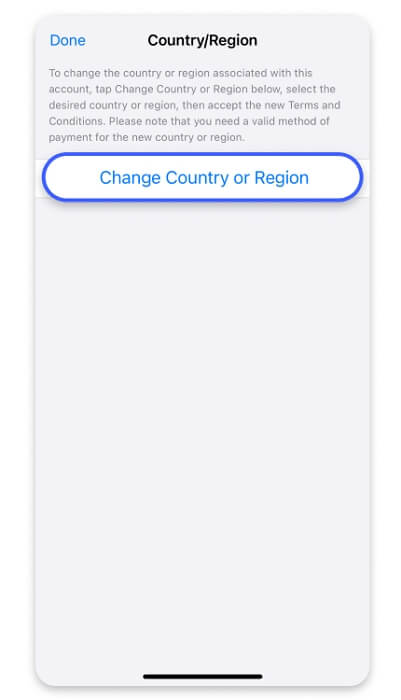
Step 3: Navigate to “Country/Region” and select “Change Country or Region”.
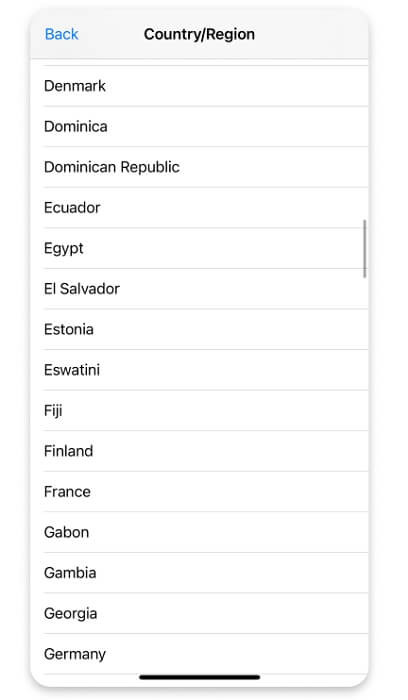
Step 4: Now, choose the “Country” that you wish to switch to on the App Store location.
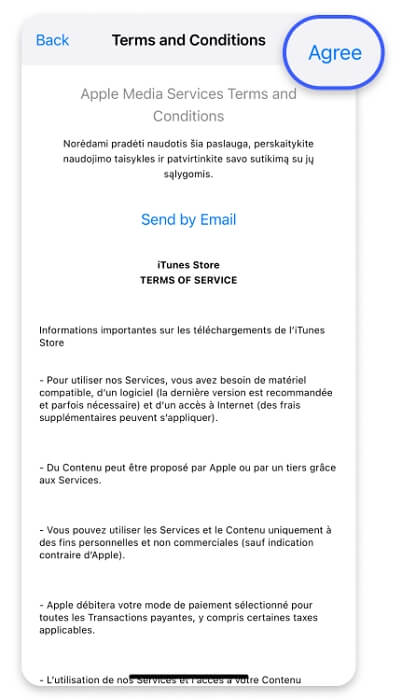
Step 5: Read through the Apple terms and conditions that appear on your screen. Then, tap on “Agree” to proceed.
Step 6: Finally, provide your payment details and follow the on-screen instructions to complete the operation.
Part 6: How to Turn Off Location on iPad
The steps to turn off location on iPad are also pretty straightforward. In this section, we explained how to turn off iPad location completely or for specific apps.
Step 1: Open your iPad “Settings” app.
Step 2: Select “Privacy & Security” setting and choose “Location Services”.
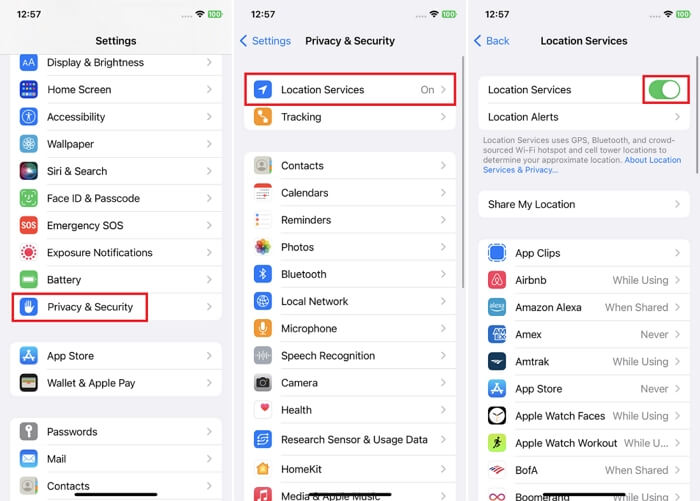
Step 3: Tap on the “Toggle” next to “Location Services” to turn from green to gray to disable it.
Step for Specific Apps:
If you want to turn off iPad location for only specific apps, here is how to do it:
Step 1: Run your iPad “Settings” app.
Step 2: Go to “Privacy & Security” and select “Location Services”.
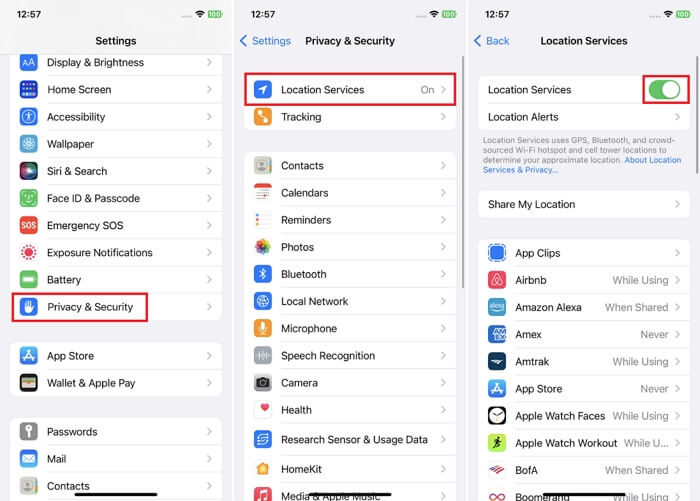
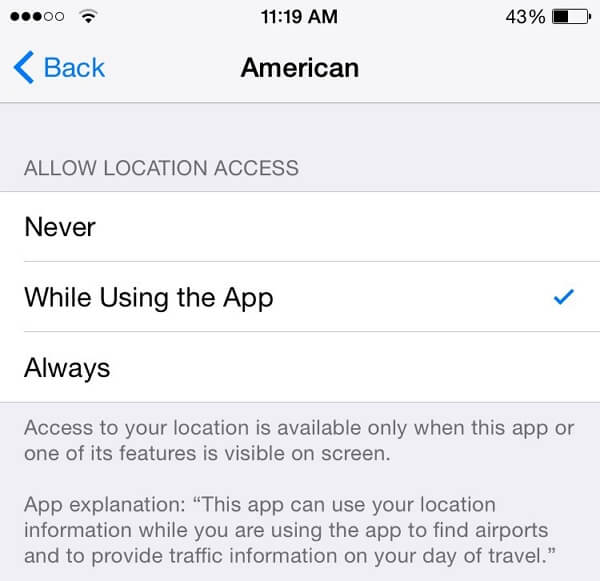
Step 3: Scroll to the apps section and select any app you want to restrict from accessing your location.
Step 4: Choose “Never” to stop sharing your location on the app.
FAQs
Why Does My iPad Think It is In A Different Location?
If you’re using a WiFi-only iPad (iPad that does not use GPS to determine location), then it might be due to a router issue. This usually happens when the Apple database can’t detect a strong nearby router within your current location. However, on a WiFi + Cellular network iPad, this happens when the Location Services feature on your device is disabled.
How Do You Reset Location On iPad?
You can reset the location on your iPad by resetting your iPad’s location & privacy via the Settings app. Here is how to do it:
Step 1: Open the “Settings” app and select “General”.
Step 2: Scroll down and select “Transfer or Reset iPhone”.
Step 3: Tap on “Reset” and choose “Reset Location & Privacy”.
Step 4: Enter your iPad password to authorize the operation.
Conclusion
If you happen to not understand how to change location on iPad, the article on this page has explained all possible methods you can use to operate without requiring technical knowledge. The article shows the best method to change location on both WiFi only and WiFi + Cellular network iPad models. And it also explains how to change Apple Store on iPad. So, be sure to follow the steps that suit your iPad model to get the job done effectively.
