Updated on 2024-08-08
2510 views
5min read
Changing your GPS location has become a thing, especially for folks looking to bypass geo-restricted content, gain access to blocked content, surf the internet anonymously or even stop friends and families from stalking them. However, not everyone understands how it’s done. If you find it tough to change your iPhone location and need a simple guide to do that, you’ve made it to the right post. Here, we will reveal the best 5 ways to change location on iPhone without hassles.
Part 1. How to Change Location on iPhone [Location Applied to All Apps]
Perhaps you want the simplest approach to change location on your iPhone and the corresponding effect will be applied to all other apps, you need a professional iOS location changer to get that done. One tool you can count on in this case is iWhere iPhone Location Changer. This software is an all-around location modification tool designed for users of all levels to alter the GPS location of an iDevice painlessly. It gives you full control of your iPhone location without you having to make any movement. You can use this location spoofing tool to change the location for apps such as Snapchat, Instagram, Facebook, Twitter, Find My, Google Maps, Apple Maps, and more. For Pokémon GO gamers looking to tour different parts of the globe for in-game gems and characters, iWhere is a great tool to invest in. It lets you establish a path with the desired spots and speed, along which your iPhone can navigate.
Key Features
- Change location on iPhone/iPad conveniently within minutes.
- Allow you to customize the GPS speed you want your device to operate and the effect is extended to apps such as Life360 and others.
- Use the built-in One-stop or Multi-stop mode feature to set the starting and ending point you want your iPhone GPS to navigate.
- Get detailed analytic about your previously visited destination in GPX format by importing your location history from iWhere.
Steps to Change Location on iPhone Using iWhere
Download, install and run iWhere iPhone Location Changer on your computer and use the stepwise guide below to modify your phone GPS details:
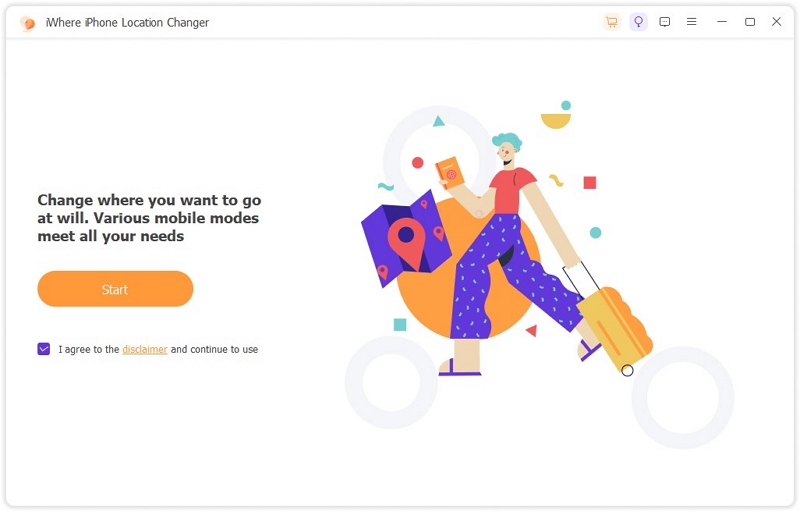
Step 1: On the main dashboard of the software, check the agreement box and click Start.
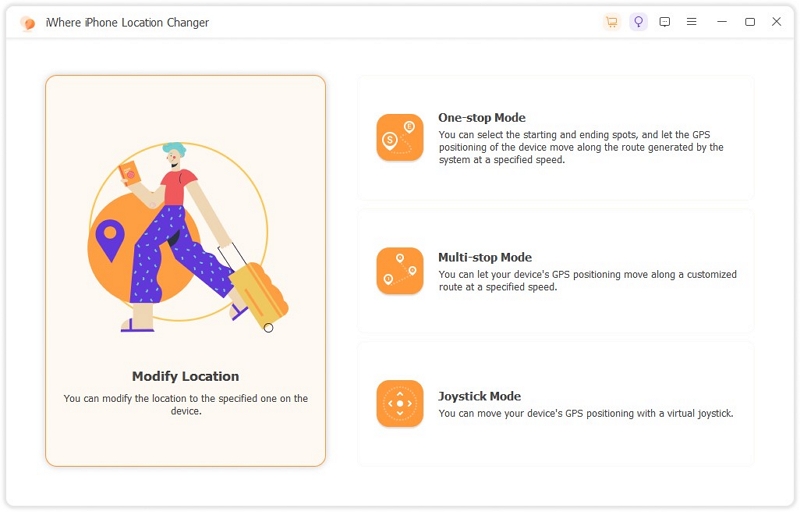
Step 2: Locate the Modify Location feature and click on it.
Connect the iPhone you want to make a location change on to your computer. You need a reliable USB cable to get this done.
Step 3: After iWhere Location Changer detects your connection, it will direct you to a new window showing your real-time position on a map. Here is the corresponding image for this.
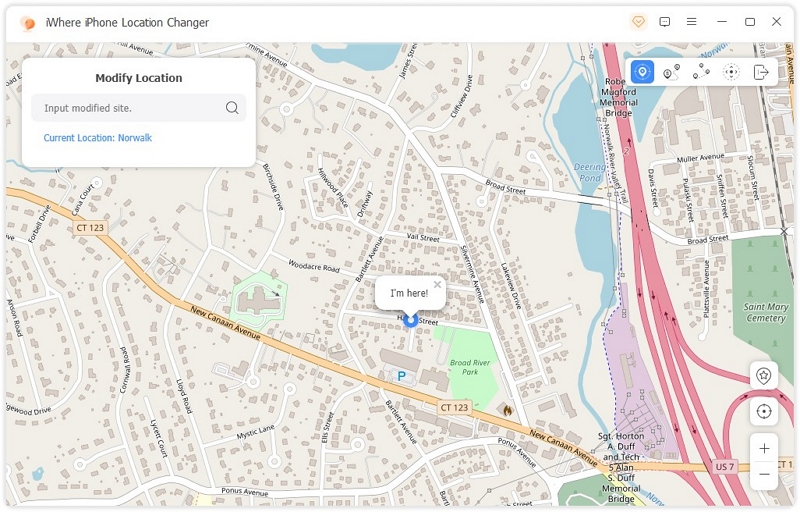
Go to the left-hand side of your screen and click on the search field. Input the destination you want your iPhone to display henceforth and click on Confirm Modify.
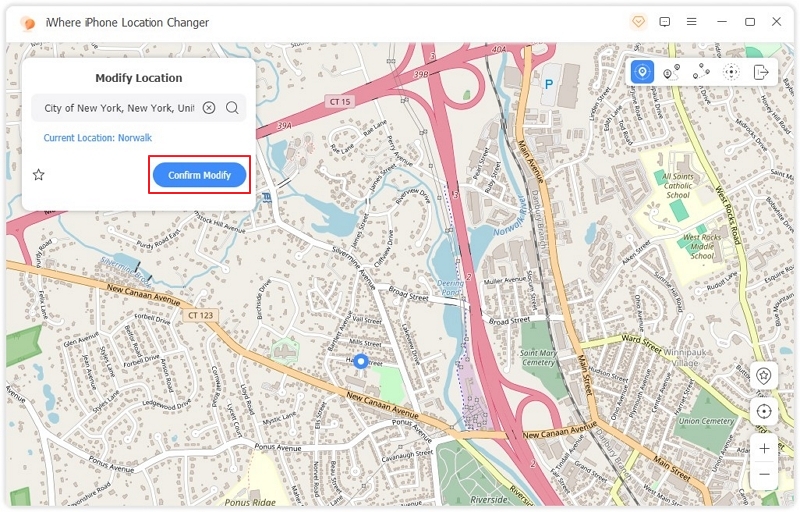
Now, iWhere will modify your iPhone GPS to the set location instantly.
Part 2. How to Change Country and Region on iPhone
This part is about how to change country and region on the iPhone Settings, which modifies the Apple ID and Apple Store location.
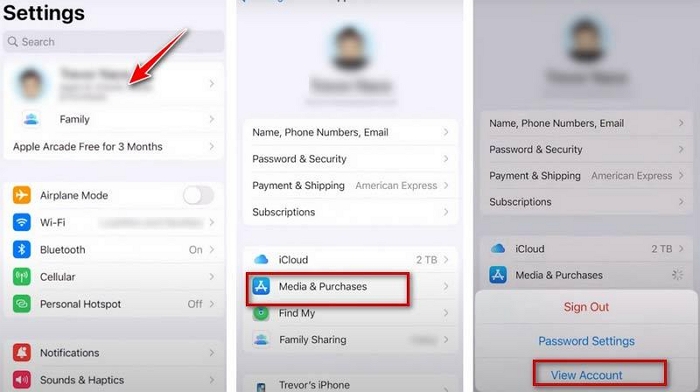
- Open Settings and tap on your profile icon.
- Next, select Media & Purchases when the interface below appears.
- Now, click on View Account and sign in to your Apple profile by providing screen passcode.
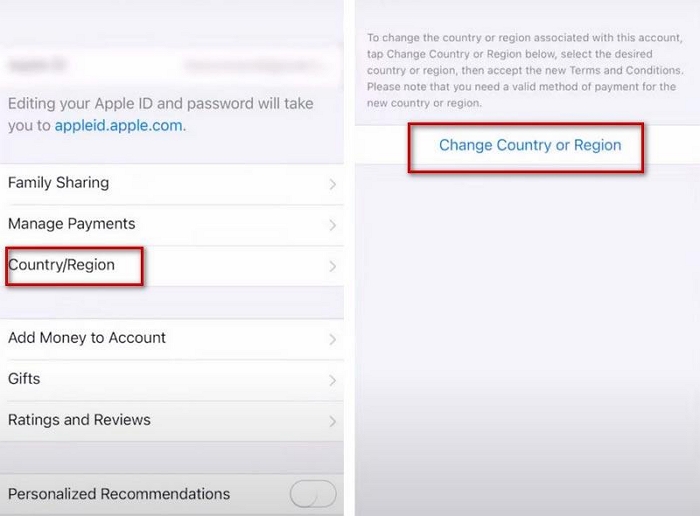
- Choose Country/Region on the Account Settings screen and click Change Country or Region on the subsequent page.
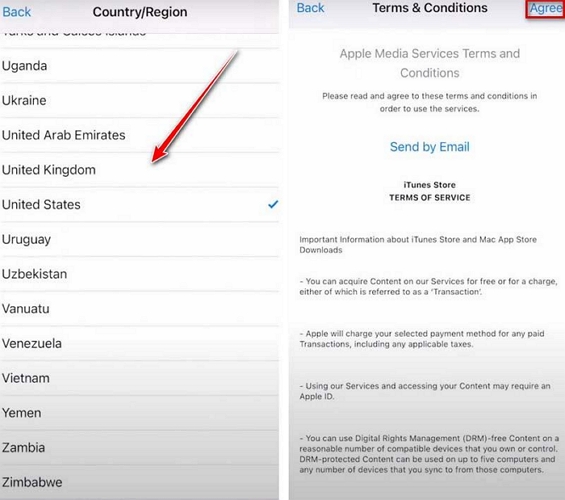
- Click on the country you want your iPhone to read onward and click Agree to validate your settings. After that, follow the onscreen instructions to complete the location changing process.
Part 3. How to Change IP Location on iPhone
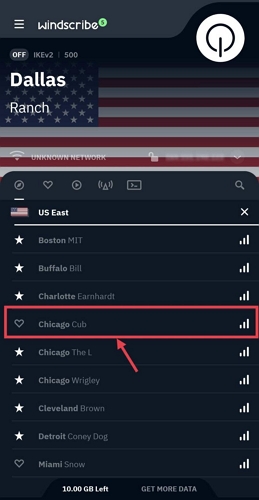
Changing your IP address is incredibly beneficial if you’re looking to surf the internet anonymously on your iPhone. This approach involves using a Virtual Private Network tool (also known as VPN) like Windscribe. With such a tool, you can easily modify the IP address for any iPhone model and access geo-restricted content without hassles.
To change your iPhone location using Windscribe, follow these steps:
- Install Windscribe on your iPhone from the Apple Store.
- Launch the app and register a profile by entering the required information.
- Next, select the country whose IP address you want to use henceforth and wait patiently for Windscribe to implement the changes.
Part 4. Specific Way to Change Location on iPhone Find My App
With a secondary iOS device, you can also make changes to your Find My location on iPhone without installing any app. Here is the detailed guide:
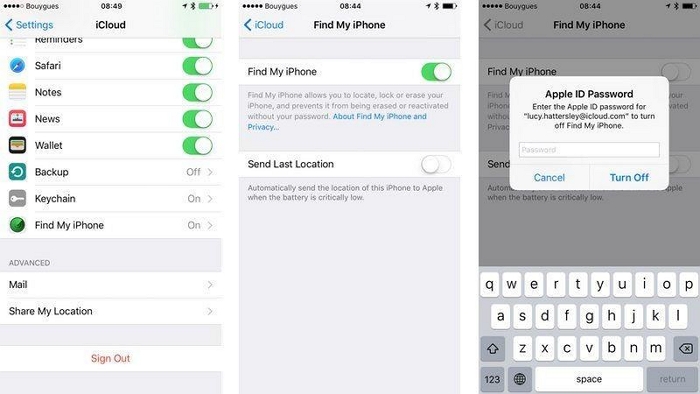
- Grab your main iPhone. Go to Settings and tap your Apple ID name.
- Choose Find My > Find My iPhone and toggle off the feature.
- Next, sign into the secondary device with your Apple ID details in Settings.
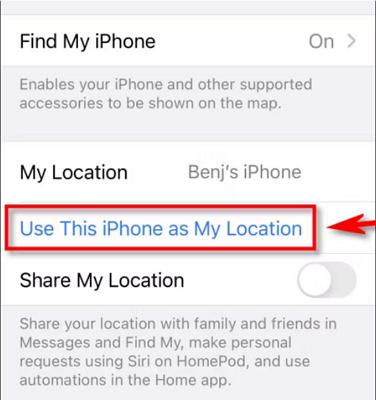
- Tap your Apple ID tab again and choose Find My, followed by tapping Use This iPhone as My Location.
- Once done, you can dump the secondary device anywhere and anyone tracking your location will be misled.
Note: You have to login to another Apple ID on the main iPhone whose location you want to change, or you will use the device without accessing the Apple ecosystem.
Part 5. How to Change Primary Location on iPhone
Suppose you want to modify your primary location on the Contact app, Apple Maps, or Apple ID, you can apply any of the techniques recommended below:
Contact App
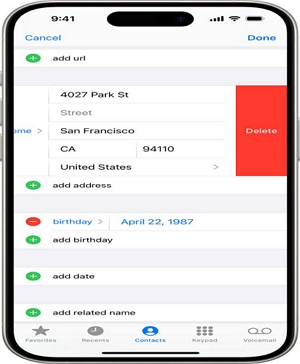
- Launch the Contact app on your iPhone.
- Tap on your profile picture and click on the Edit icon at the top right corner of your screen.
- Head to where you have an existing address and make the necessary adjustments so you have an updated address.
- Save your entry by clicking on the appropriate icon.
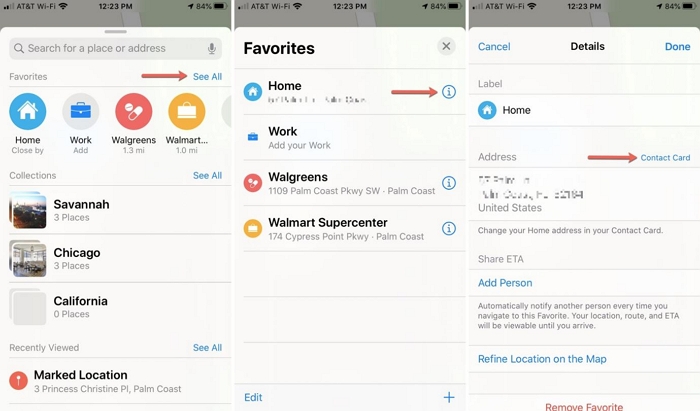
Apple Maps
- Launch Apple Maps on your device.
- From the bottom of your screen, swipe up the Search bar.
- Next, select Home or any other option under the Favorite panel.
- Follow the guide displayed to fill in or update your location.
Conclusion
Ultimately, when you want to change your iPhone location, this post has gotten you covered. With any of the 5 methods recommended here, you can easily make changes to your location on your iPhone. Of all the methods, iWhere iPhone Location Changer is the only one that helps you change your GPS read by location-based apps without notifying anyone. Additionally, the software provides you with unlimited destinations to migrate to.
